background preloader

Useful Articles

Facebook Twitter

In Praise of Seams. Some knitters actively avoid patterns that will require sewing. But is seamless always the best way to go? By Sandi Rosner Seamless sweaters are everywhere, or at least that’s how it seems to me. More and more, the patterns I find myself perusing—whether for work or pleasure—share a common element: they’re constructed without seams. Top-down, bottom-up, raglans, round yokes, and set-in shoulders—all of these styles can be made without seams. But the simple fact that you can do something, doesn’t always mean it should be done. Don’t get me wrong. 1. There’s more to seaming than simply holding sides and sleeves together. Some years back, I knit a top using a hand-dyed nylon ribbon yarn.

The lesson learned? 2. I’ve encountered many patterns where the planned avoidance of seams results in some pretty convoluted knitting gymnastics. A fitted waist, fitted shoulders, and set-in sleeves give a garment the sharp, modern silhouette we all love to wear. 3. The Details. Shaping in Pattern. By Sandi Rosner Many of our favorite designs feature an allover pattern—lace, cables, or some other interesting texture. When the time comes to shape the waist, armholes, or neckline, you are expected to maintain the established pattern in spite of a changing stitch count. In this issue, we’ll take a detailed look at how to maintain a lace or cable pattern while increasing or decreasing. Lace Patterns The defining feature of knitted lace is a pattern of decreases and accompanying yarn overs that create holes in the fabric. Let’s use my design from the Spring 2012 issue, Sanderling, as an example. 1.

Armhole and neck shaping usually calls for binding off some stitches, followed by a series of decreases. The chart on the bottom (Illustration 1) shows how the armhole shaping would intersect with this pattern. Once the shaping is complete, the clean edge for seaming is maintained. What about sleeves, where you need to increase instead of decrease in pattern?

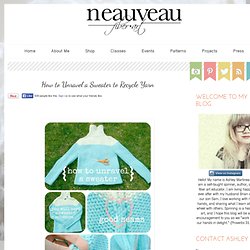
2. Cable Patterns 3. 4. Handspun Yarn Shop and Fiber Art Blog by Neauveau: How to Unravel a Sweater to Recycle Yarn. This is the sweater we will be unraveling. Turn your sweater inside-out, grab a pair of sharp scissors and let's get started! There are good seams and bad seams. This is an example of a good seam. It looks like two tiny braids side-by-side. Newbie unravelers will want to cut the thread one bit at a time, which is fine. I've cut the seam from the bottom of the sweater to the end of the sleeve. At the top of the sleeve are little loops! FLASH FORWARD: See the pile of yarn ramen in this photo? When you unravel a sweater that is made of many colors, you will usually find a knot where the two colors meet. Here is the collar and shoulder seams of the sweater, still waiting to be unraveled. This is what a bad seam looks like. On a whim I pull the little thread.
But what do we do about the bad seam on each shoulder? Here is the skein-measuring thing (I call it a "ghetto-knoddy" - a ghetto version of a niddy noddy you can buy online. Tips for specific yarns. Thread for Thought – Subversive Knitting. In preparation for the upcoming Textile Association of America symposium I’m presenting at later this week — “Textiles & Politics” symposium — I’ve been doing a lot of research on our country’s history of using yarn crafts — specifically knitting — as a political act rather than merely a domestic or social one. Primarily a feminine duty or pastime, knitting has a deliciously rich history of political subversion. For example, as Britain levied higher and higher taxes on its colonies in the 1760s, Americans made their displeasure known by weaning themselves off imported British goods; they officially banned British imports in 1769. In addition to British tea which, of course, resulted in the infamous Boston Tea Party revolt (1773), Americans had previously relied upon many imported English textiles to clothe themselves.

Colonial knitter Over the next few centuries, knitting enjoyed resurgences at almost every major American war (“Knit for Victory!”) WWII poster “body count” mittens. Have a Yarn - March 2008 - Stitch of the Month -Heel and Toe Formula. March 2008 Sock Tips - Heel and Toe Formulas Have you ever wanted to know how to turn a heel and finish a toe on any number of cast on stitches? If you find yourself knitting socks without a pattern in front of you, the following heel and toe methods work for any size socks. The formulas are included in this overview of how to knit a sock. If you just want the heel and toe formulas, scroll down to the yellow boxes. If you are using a 4ply sock yarn (such as Regia, Fortissima, Opal, etc...), use 2.0mm - 2.5mm double pointed needles (set of 5). Cast on loosely the desired number of stitches and join into a round. Cuff: Knit 2X2 ribbing (k2, p2) or 1X1 ribbing for approx. 2".

Leg: Knit stockinette stitch (knit every round) for desired length. Heel flap: Knit half of your stitches onto 1 needle (the heel flap stitches) - so if you have 72 sts total, 36 stitches will be on one needle for the heel flap, and the other 36 will be left on the other needles to be worked on later (the instep stitches). You CAN Block Acrylic, You Should Block Acrylic. I am a reader of Anne Hansens blog, Knitspot. She does the most awesome lace shawl patterns in the universe.

She has just released her new Maplewing shawl pattern. It's absolutely the most stunningly gorgeous pattern she has come up with yet! Unfortunately, I had problems downloading the pattern after I purchased it. I've run out of downloads (you get 3) trying to download it and still don't have my pattern. After having a right good panic attack for about 45 minutes, and emailing her shouts of help, I need to settle down.

Anne has excellent customer service so I'm sure the problem will be resolved. Take large cleansing breath here. Okay. Being a member of Ravelry, I get to read all kinds of wonderful information on the subject of knitting, crochet, spinning, etc. Wrong-in epic proportions! Acrylic CAN be blocked. Acrylic CAN be blocked! In fact, it should be blocked. I'm gonna tell you how to do it right. First of all, as I said above, acrylic projects need to be blocked. Not blocked. A Knitting & Crochet Blog: Mother Bear Tutorial: Seaming While Knitting. I make the original flat-knitted Mother Bear pattern using a simultaneous seaming-while-knitting method.

If you're like me, and would rather knit than seam; you enjoy the look & simplicity of garter stitch and prefer working with two needles, then this seaming-while-knitting method may be for you. The process is more complicated to explain than it is to actually knit, so I've included a photo-heavy tutorial. Each step's explanation is followed by its respective photo. So, words first, then photo next. You can move your cursor over each photo for an explanation. I've used some standard knitting abbreviations: CO = cast onBO = bind offK = knitSt(s) = stitch(es)PU = pick up, meaning place st on the needle; not pick up and knit First, you'll need the original Mother Bear Knit Pattern.

Knit the Bear all in garter st. Begin by knitting half the bear as written. Stop halfway in head section, ending with wrong side row, ready to begin a front side row. Just turn your work... Turn your work. Knitty.com. -- a simple way to make your own patterns Anyone who read the title and thought "Oh, I can't do that," go slap yourself. Now, then. In the dark and mysterious past, knitters didn't have Debbie Bliss or Elsebeth Lavold telling them "cast on fifty stitches, work in pattern... " For most of knitting's history, the idea of a written pattern would have been strange and foreign. NOTHING TO IT?

To make matters even simpler, several master knitters over the years have taken pity on the rest of us and codified the proportions even more exactly. As you can see, 100% is the chest measurement, and then everything else is a portion of that. Just to convince you it's easy, I'll walk you through your first one. This is your prototype. Step one is a swatch. DO NOT KNIT BACK AND FORTH. Oh, quit whining. Once it's dry, pin the thing out on a foam-backed board (like my photo ^ up there) or a couch cushion (like I usually do), and get a ruler. Time for the math. What you need is your chest measurement. Knitting & Crocheting Glossary at Yarn Supply. Blocking Basics, Part 2. Ready to block! Note from Sandi: I am off to Mobile, Alabama, to spend time with Grandma Rose and Grandpa Manuel this week. But I didn't want to leave you without a little Knitting Daily in your email inbox! In July of 2007, I wrote a three-part series on blocking that seemed just perfect to share again as a way to help with last-minute holiday knitting madness--both yours and mine!

After all: Even Knitting Daily editors need a little time off. So while I am away, here's The Basics of Blocking, Part Two. (Are you the kind of person who learns by watching? (originally published July 27, 2007) Shape garment from the center outwards On Monday, we began our Adventure in Blocking with a review of the basic tools and preparations you need to make before you get started.

Step 5: If you are going to wet your knitting using the immersion method or the roll-in-wet-towels method, do it now. Don't stretch out the ribbing! Step 6: Start pinning. Pinning out the lace pattern Step 9: Let dry thoroughly. Ways Of Knitting-Part 1 (Introduction to stitch mount) « Abundance. Well, it has been about a month and a half since my last post.

The generous among you may assume that I am a very busy lady; that will last just as long as it takes you to read this next post (or rather series of posts), at which time you will doubtlessly conclude that I have no life at all. I do have a life, by the way. I do. really. Plus, I’ve been working lots on the new website; putting new yarns on our Stash Sale page. The other reason for my long absence is that, once I became determined to write a post on “Different Ways of Knitting”, I found myself saddled with a “hole to China” topic. 1. 2. 3. 4. There may be more after that. “No. (Never Ending Story quote, BTW) Let’s start with the stitch. It may be helpful to follow along with knitting in your hands. 1. 2. Your stitch has a Left Leg and a Right Leg. OK. Just kidding. 3. This is what it looks like when the Right leg of the stitch is in front of the needle. 4.

Now for the alternative. 5. Our little Cowboy sits on the needle.