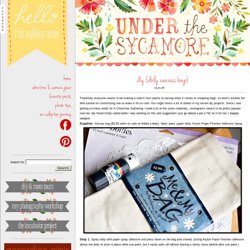

Contemporary Bedroom Furniture. Bedroom - Part 9. Doily canvas bag. Thankfully everyone seems to be making a switch from plastic to lasting when it comes to shopping bags, so here’s another fun little tutorial on customizing one to make it oh so cute.

You might notice a lot of doilies in my recent diy projects. Since I was getting so many ready for A Christmas Gathering I used a lot of the same materials…monograms seems to be pretty popular now too. My friend Cindy called while I was working on this and suggested I just go ahead a put a “W” on it for her, I happily obligied. Canvas bag ($2.00 when on sale at Hobby Lobby), fabric paint, paper doily, Krylon Paper Finishes Adhesive Spray : Spray doily with paper spray adhesive and press down on the bag (not shown) . : Gently paint over the holes – I recommend paint meant for fabric, not crafts. . : Peel back doily before paint dries. Bag after doily is removed I traced on my letter and filled it in with paint. For a cook: fill it with cooking supplies.
Giant Paper Rose Flower. If you loved the beautiful DIY wedding this morning and Nata’s gorgeous paper flower bouquets, you are in luck as Nata is sharing how she crafted them with us!

She was inspired by a template created by Morgan Levine on Martha Stewart (as was I in the flowers I created for this styled shoot). I just love that this basic idea has inspired different brides to create their own version of giant paper flowers – you might remember these equally awesome giant paper flowers from this wedding I shared last year. :) Thanks so much Nata for sharing how you created your giant pink paper rose + special thanks to Studio Castillero for the photos of the DIY + her wedding!
Materials (to make one giant rose) Step 1: Cut the petals Cut 5-6 teardrop petals and 15-6 heart-shaped petals from the petal colored crepe paper. IMPORTANT: Crepe paper is directional so it matters which way you’re cutting the paper. Repeat until all of your petals are cut Step 2: Cut the leaves + calyx Step 3: Make the rose stem. DIY Macrame Bracelet. Growing up by the beach in Southern California, the ability to knot a macrame bracelet was practically a right of passage.

Although those days are long behind us, we’ve never forgotten the ever-so-simple square knot technique. This time, however, we’re replacing hemp and wooden beads for more updated elements like colorful nylon cord and glossy metal charms. Happy knotting! You’ll need: Start by cutting the knotting cord into two 30 inch, two 20 inch and one 10 inch lengths. Center the 30 inch cord under the two middle strands. Pull tightly and slide the knot up to the top. Finish the 2nd half of the square knot by folding the left cord over the middle strands and under the right cord. Pull tightly and repeat the steps – left, right, left, right . . . To finish the knots, thread one of the cords onto a needle and sew up the center of 3-4 knots along the backside.
Repeat the same step on the other cord. After sewing up both knotting cords, trim away any excess. Blue Wine Bottle Oil Lamp INDOOR Modern by GreatBottlesofFire. DIY 52 Things I Love About You. Posted July 1, 2011 | 64 Comments Happy Friday, lovelies! We spotted a really fun, really easy DIY 52 Things I Love About You project for your boyfriend, girlfriend, spouse-to-be, husband, wife, or a friend.
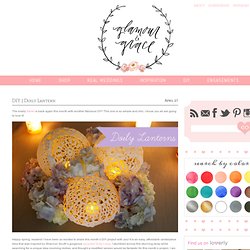
Read on to see this fun project + get inspired to make your own! This ’52 Things I Love About You’ craft (and images) are via Craftster (spotted here) and the supplies are easy to find: supplies o one deck of cards o binder rings o standard hole punch o scrabble tiles (just two – one for each of your initials) o printer + printer paper o scissors o glue how-to Simply type up the 52 things you love about your gift recipient, print them out onto paper, cut ‘em out, and glue ‘em on. Images via onetomatotwo Happy Crafting! Xo, -E. Some links above to Amazon as an affiliate; however, feel free to shop wherever you wish! Glamour and Grace. The lovely Sarah is back again this month with another fabulous DIY!

This one is so simple and chic, I know you all are going to love it! Happy spring, readers! I have been so excited to share this month’s DIY project with you! It is an easy, affordable centerpiece idea that was inspired by Shannon South’s gorgeous upcycled Doily Lamp.