
Creating a Turntable Animation. S 3D Skeleton and Mesh Skinning (Deformation) Conversion Software. For several decades Okino has been the pioneer, and pursued active R&D, in the area of professional skeleton and skinning conversion between the most popular 3D character animation software packages and file formats, those being 3ds Max, CINEMA-4D, LightWave, Maya, Softimage, Collada, DirectX, FBX and U3D.
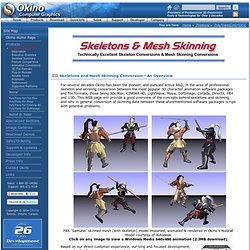
This WEB page will provide a good overview of the concepts behind skeletons and skinning, and why in general conversion of skinning data between these aforementioned software packages is ripe with potential problems. FBX 'Samurai' skinned mesh (with skeleton) model imported, animated & rendered in Okino's NuGraf. Model courtesy of Autodesk.Click on any image to view a Windows Media 640x480 animation (2.3MB download). Skeletons in a 3D character animation have a direct correlation to a human skeleton: they consist of articulated joints and bones, and they can be used as a controlling mechanism to deform attached mesh data via "skinning". Model Forced into "Bind Pose" The making of Feedback: The Riverbank scene. A pilot for a 3D computer animated film. The process of modelling the rest of the body was similar to that of modelling the face.

First we loaded reference sketches into the computer, then traced key lines in those sketches. We built the body out of several objects. We used polygon modelling for everything but the hat, which was a NURBS surface. As you can see from the pictures below, we initially modelled DDS with his arms at a slant downward. We changed this later to the classic T-stance because we found that it was easier to rig the model for motion-capture in this stance. The body in various stages of development. The body meshes also required a lot of revisions. Extra detail was added to the meshes at joints such as the knee, where deformation would occur during animation. Low Polygon Joints - What is the best way?
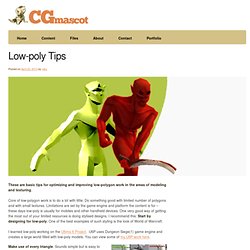
Limb_deformations.gif (725×503) Low-poly Tips. These are basic tips for optimizing and improving low-polygon work in the areas of modeling and texturing.
Core of low-polygon work is to do a lot with little; Do something good with limited number of polygons and with small textures. Limitations are set by the game engine and platform the content is for – these days low-poly is usually for mobiles and other handheld devices. One very good way of getting the most out of your limited resources is doing stylised designs. I recommend this: Start by designing for low-poly. One of the best examples of such styling is the look of World of Warcraft.
I learned low-poly working on the Ultima 6 Project. Make use of every triangle. For more texture detail somewhere on your model make that part bigger in your UV-map.
Anatomy. Materials. Enviroment. Pepakura Designer. Character Process. Now you ask, "How then shall I model?
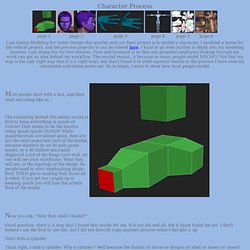
" Good question. Here is A way that I found that works for me. It is not the end all, but it hasnt failed me yet. I don't beleive I am the first to use this, but I did not directly copy anyones process when I thought it up. Start with a cylinder. Thats right, I said a cylinder. Creating muscles in 3ds max. SantaDistMaterial - Free Animation Scripts / Plugins Comments for 3dsmax.