
A Beautiful Mess. I love a good ring dish.
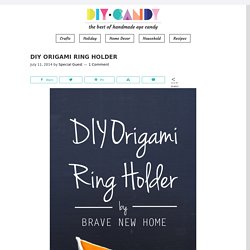
Especially if you love to do thin stacking rings like I do, it's a really good idea to have a ring dish at strategic locations in your house (next to the bed, in the bathroom, by the kitchen sink) so you always have a spot nearby when you take off your rings. To make the dish extra special, we're teaming up with our long time friends at Canon USA to help personalize these with your own photos and images using water-activated decal paper. Here's how: Supplies:-waterslide decal paper-scissors-turpentine-water-based polyurethane-foam craft brushes -white ring dish (I used these small appetizer plates)-Canon PIXMA MG7720 photo printer First you'll want to choose the photo(s) you want to put on your ring dish. Aren't they so cute?! Author and Photography: Laura Gummerman. A Beautiful Mess. Wow—so many of you have made these!
It’s incredible. We’ve also heard from many of you that you would like to see a video tutorial of this project, so we’ve added one (above). You can still see the original post along with all the photo and text tutorial below as well. Alice & Lois. You know I’ve got a thing for air dry clay.
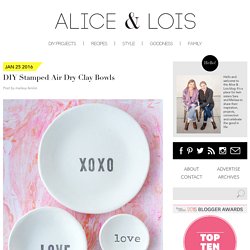
It’s so versatile, so easy to work with and dries so well. We decided to make some little DIY stamped air dry clay bowls for Valentine’s Day. I love the simplicity of the white clay with modern black letters. You could choose whichever words you like, but we were impartial to Love and XOXO. Alice & Lois. In the midst of planning and creating goals/project plans for 2015, it is best to take time and reflect all of the positive moments from the previous year. 2014 was a wonderful year for us here at the blog.

We went from posting three days a week to five days! We starting working as contributors for minted’s amazing blog, Julep. We also starting working with Project Nursery as a DIY contributor. Almost Makes Perfect. Maybe it’s just me – but i can’t enough little bowls. i use them for corralling jewelry, i use a couple as pinch bowls in the kitchen, i use them for sage smudging, i use them basically. so i wanted to make a set of “ceramic” bowls for rings and bracelets — and it’s super easy. 01. condition your clay and roll it out flat. cut a round shape by either doing it manually, or using something round as a cookie cutter (i used a candle lid, you can use anything!)
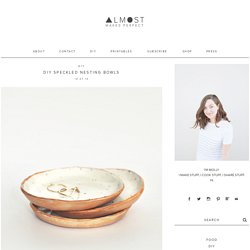
Cut it out using an xacto. 02. to mold the shape, place your circle into a bowl or saucer and gently sculpt the sides into a bowl shape. if you use a bowl, make sure it’s one that you never use with food! 03. bake according to the package directions, with the circle still molded in the saucer or bowl. sand for a smooth finish once they’re dry and cool. Artzy Creations. Best Friends For Frosting. Save your rings for a rainy day!
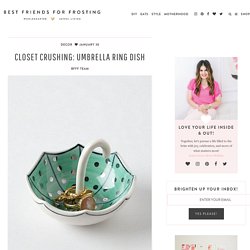
Today we are highlighting this cute and delicate Umbrella Ring Dish via Anthropologie that will make a perfect addition to your dresser. Brave New Home. Jennifer from Brave New Home tends to like more neutral décor – that is until warmer weather hits!

Then she’s all about brighter colors and florals, like these pretty monogram ring dishes from Anthropologie. Jennifer knew they’d make wonderful gifts for her kid’s teachers and recreated them using air dry clay. The personalization makes for a fun, yet inexpensive gift idea. Brave New Home. Hi!
I’m Jennifer of Brave New Home. I blog about home design, decorating and create lots of fun DIY projects in the process. By Wilma. Crafts Unleashed Being a lifelong crafter and procrastinator, I’m a huge fan of super easy handmade, last-minute gifts!
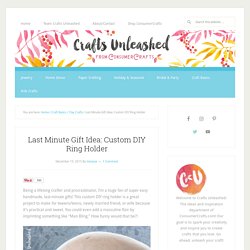
This custom DIY ring holder is a great project to make for tweens/teens, newly married friend, or wife because it’s practical and sweet. You could even add a masculine flair by imprinting something like “Man Bling.” How funny would that be?! Crafts Unleashed. I love the colors of autumn, don’t you?
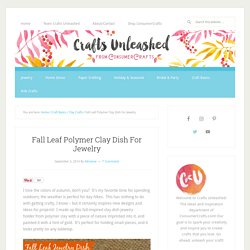
It’s my favorite time for spending outdoors; the weather is perfect for day hikes. This has nothing to do with getting crafty, I know – but it certainly inspires new designs and ideas for projects! I made up this fall-inspired clay dish jewelry holder from polymer clay with a piece of nature imprinted into it, and painted it with a hint of gold. It’s perfect for holding small pieces, and it looks pretty on any tabletop. Darice. When it comes to home crafts, I’m a sucker for handmade storage solutions. There’s just something so awesome about a project that is both decorative and functional. Several years ago, I discovered the solution to the chaos on my vanity: trinket and jewelry dishes. Even the smallest one can make such a huge difference. Design*Sponge. With an ever-increasing supply of jewelry, I often find my key pieces get lost amongst the pile, down the backs of sofas or mixed in with keys and loose change at the bottom of my bag.
Organization is not my strong suit and it usually takes losing something special to me to change my attitude. Recently, that was a ring from my first-ever serious relationship. His grandma bought all the “daughters” of the family a ring with their birthstones set into it. We weren’t married, but it was her way of blessing the relationship and making me part of the family. That ring still meant a lot to me, even many years (and relationships) later. Doodle Craft. Damask Polymer Clay Jewelry Dishes! Back in April, I made some beautiful Damask Pendants! And I love the technique so much I wanted to do it again!
So I made little delicate jewelry dishes. Perfect to put by the sink for wedding rings while washing dishes... East Coast Creative. Hi Guys! Today is a super fun day for East Coast Creative! I’m sharing 12 Make-It-Yourself Holiday Gift Ideas with Kelly Ripa and Michael Strahan on Live! With Kelly & Michael. Hopefully, you can watch the segment (9am EST), but even if you can’t, this is your lucky day… I’m sharing all 12 project tutorials so that you can give some fabulous handmade gifts that your friends and family will love! You can check out the other 11 projects HERE, but you have to learn how to make this clay jewelry dish first! BEAUTY SHOT- coming on 11/30. Eighteen 25. Every Crafty Endeavor. Well today marks the day that we take our friendship to the next level, because I’m totally about to let my cat lover flag fly high.
Not that it’s exactly been hidden all of these years, I mean, my cat Thomas was Mr. December last year for Kelly’s annual fundraising calendar (not to brag or anything). Fall for DIY. Have you ever dreamed of starting your own creative business? For the Makers. For the Makers. Fun Family Crafts. Gathering Beauty. Happy Hour Projects. Happy Hour Projects. Hello Glow. Hello Glow. Homemade Banana. I think my love of jewelry has been well documented here, so it should come as no surprise to you that sometimes my baubles get in the way of my work.
Homeology Modern Vintage. I’ve been feeling crafty as of late and looking for a reason to play with the ploymer clays I have stashed in the craft room. So when my jewelry tree collapsed underneath its load last week, it became the perfect opportunity. Honestly WTF. Incredibusy. “Hey, kids? Inspiration Made Simple. Inspiration Made Simple. Kelli Murray. So, I think this might be my favorite DIY to date. Laura Trevey. Lia Griffith. We are always on the look out for craft supplies and materials that we haven’t used before. It would be too easy to stay within our comfort zone and make what we know but that would be no fun right?! Lia Griffith. Lisa Storms. Little Inspiration. Little Red Window. Little Red Window. Little Red Window. Little Red Window. Lolly Jane. Lovely Indeed. Mad in Crafts. Make and Tell.
Momtastic. Mum in the Mad House. Oh Everything Handmade. Oleander & Palm. One Artsy Mama. One Artsy Mama. Paper N Stitch. Passion Shake. Pastels & Macarons. Pink Heels Pink Truck. Pretty Providence. Pretty Prudent. Quiet Lion Creations. Red Ted Art. Shelterness. Shelterness. Shelterness. Shelterness. Shelterness. Shelterness. Shrimp Salad Circus. Stars & Sunshine. The Sarah Johnson. The Things She Makes. The Things She Makes. The Things She Makes. Think Crafts. Think Crafts. This heart of mine. Uncommon Designs. Vikalpah. We Are Scout. Wholly Kao. Wild Amor. Willow Day. Yay for Handmade.