background preloader

Necklaces/Pendants

Facebook Twitter

A Kailo Chic Life. With Valentine's Day approaching and decorations out in the store in full force, my mind as been lead astray with visions of candy hearts, arrows, and all things pink. 
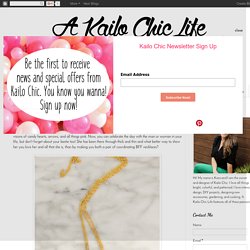
Now, you can celebrate the day with the man or woman in your life, but don't forget about your bestie too! She has been there through thick and thin and what better way to show her you love her and all that she is, than by making you both a pair of coordinating BFF necklaces?

The process is pretty quick and resulting pendants are adorable. Just a few craft supplies and you have a gift your friend is sure to love. The Supplies: Air dry clayHeart cookie cutter Acrylic craft paint in your choice of colorsNecklace chain an large jump ringsPliersPaint brushPainters tape Begin by rolling a piece of air dry clay appx. 1/4 to 3/8" thick. Once dry, tape off a portion of the hearts and paint the uncovered part of the heart with your paint. Adventures in Fashion. I must be going through some kind of clay phase lately, because try as I might, I just can't stop crafting with the stuff. 
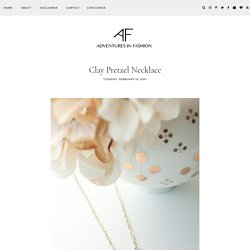
It's just so fun and easy, and I love that I can make pretty much anything from the stuff — within reason. So while I was making a conversation heart ring a couple weeks ago, I had the idea to whip up a pretzel necklace with the leftover clay... You know, waste-not-want-not, or whatever.

Read on for instructions! Using soft FIMO clay, roll a small amount into a long, noodle-like piece. Cross the ends over one another to form a pretzel shape, gently pressing down the ends to join them together. Once your now-hardened pretzel cools, spray paint it with gold paint. Take a pre-looped piece of wire and wrap it around the top of the pretzel on one end, leaving enough room to wrap the remaining wire around itself.

Using jump rings, connect the pendant to the chain and BOOM — you're all done! Artmind - Etcetera. In July, I saw the new exchange program on Totally Tutorials. 
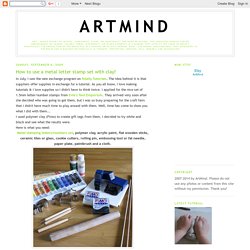
The idea behind it is that suppliers offer supplies in exchange for a tutorial. As you all know, I love making tutorials & I love supplies so I didn't have to think twice. I applied for the nice set of 1.5mm letter/number stamps from Evie's Tool Emporium. They arrived very soon after she decided who was going to get them, but I was so busy preparing for the craft fairs that I didn't have much time to play around with them. Well, time has come to show you what I did with them...I used polymer clay (Fimo) to create gift tags from them.

I decided to try white and black and see what the results were.Here is what you need: Metal stamping letters/numbers set, polymer clay, acrylic paint, flat wooden sticks, ceramic tiles or glass, cookie cutters, rolling pin, embossing tool or fat needle, paper plate, paintbrush and a cloth. Take a piece of polymer clay and soften it while kneading. I made two sets in black and white clay. Ready! Caught on a Whim. This Blog DIY: Monogram Charm Necklace Happpppy Frrrrrriday guys! I hope you have some awesome weekend plans in store. If crafting is on your agenda, be sure to check out this sweet monogram charm necklace DIY that I'm sharing over at Clairabellemakes. It's an easy, breezy project that makes a great gift for a friend (or for yourself)!! 
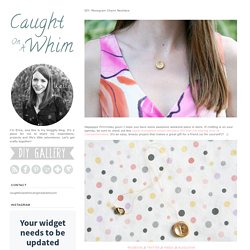
Caught on a Whim. As promised earlier this week, here is the tutorial for making these fun necklaces.

This project is super easy and costs next to nothing. By using only a little bit of polymer clay, you'll be able to create a ton of new necklaces to add to your jewelry box. Ready to make your own? 1. Just look at all the different types of shapes you can make! 2. 3. Making these can be a little addictive. P.S. Craft & Creativity. Jag fortsätter på hjärt-temat ett tag till och visar er ett halsband som jag gjort av Fimo-lera. Jag formade hjärtat för hand, gjorde ett litet hål med en synål och brände hjärtat i ugnen i 30 min på 110°C. När hjärtat svalnat trädde jag ståltråd genom hålet, tvinnade ståltråden till en ring och fäste bandet i ringen.

——–I’ll stick to my heart themed crafts for a bit longer and show you a necklace that I made of Fimo clay. I shaped the heart by hand and used a needle to make a small hole. I baked the heart in the oven for about 30 minutes at 110°C (230°F). When it had cooled off I threaded a piece of fine wire through the hole, twined it like a ring and threaded the string through the ring. För en beskrivning (med bilder) på hur man knyter en s k “glidande knut” klicka här.

Och för den som känner för att överraska sin käresta eller sina barn med ett hjärtformat ägg på morgonen så är det lättare än man tror, klicka här för beskrivning. Craftberry Bush. “Free the child’s potential, and you will transform him into the world” - Maria Montessori One of my favourite things about being a Mother is seeing the excitement and anticipation in my kiddies faces just prior to me unveiling their precious homemade gifts. 
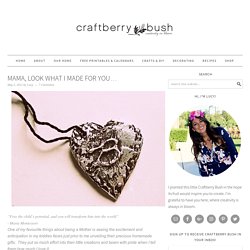
They put so much effort into their little creations and beam with pride when I tell them how much I love it. This is such project… On my previous post, I shared how to make sweet charms from pop (soda) cans and today, I wanted to share the child friendly method of creating these pretty little charms. Let’s get right to it….. You will need: Puff paint thick cardboard foil paper glue black or brown paint tack string or chain 1. 2. 3. 4. 5. 6. 7. 8. 9. 10. 11. 12. I have made large tiles using this method (this is one of the projects I speak of here) It looks like embossed metal, doesn’t it?

And that’s how easy it is to give Mom or Nan a special gift. As always, thank you for walking through this creative journey with me. A big ‘hearty’ hug to you, Lucy. Crafterella. Crafterella. I have a serious back log of pendants to sand! 
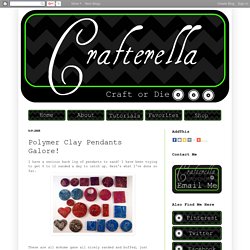
I have been trying to get 6 to 12 sanded a day to catch up. Here's what I've done so far. These are all mokume gane all nicely sanded and buffed, just waiting to be drilled. I am saving these for the fall craft shows I will be attending. These are made from slices of automatically wrapped canes (bullseye canes). Here are the backs, I just used the leftover clay to make marbled sheets for the backs to make the pendants double sided.

And this is my masterpiece, a Balinese filigree ornament. I love polymer clay. The 36th Avenue. Crafts Unleashed. This is a deceptively easy project you just need 3 coordinating colors of clay and a few tools and you’ve made a showstopping focal pendant! 
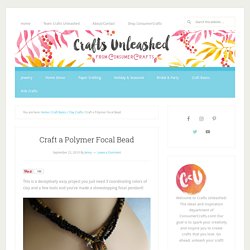
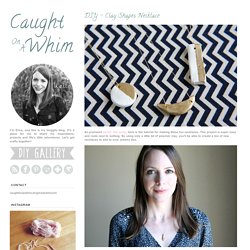
You need: Premo clay: black, gold, and white.Pasta Machine to condition the clay (optional)Polymer clay blade or sharp knife dedicated to polymer clayAcrylic block (like for rubber stamping)Swarovski chanton crystal (optional) Start off by slicing 1/2 inch chunks from your 1 lb blocks of clay. (If you are using individual blocks, use about 3/4 of a block. Condition the clay individually by kneading with your hands or running through the pasta machine 10-15 times.

(Read our review of a Pasta Machine for Polymer Clay here.) Take a handful of the mixture and squish it into a ball, making sure you compress the clay well and get all the air pockets out. Next, we’ll make a tear drop shape by rolling the clay with the acrylic mounting block. Gently pull the pointy end to draw it out more- we’re going to make it into a bail in a bit! About Jenny. Crafts Unleashed. Today I want to share a fun polymer clay tutorial with you, that is great for all ages! Premo Sculpey Clay Pendants. Your kids are going to love this one- and I guarantee it will take you back to your own childhood! Who didn’t love rolling “snakes” out of play-doh? The end result of your “playing” are these wonderfully rustic pendants that look like they are forged out of hammered pewter. Are you ready to get busy? Here is what you will need to make your own custom pendants: The first thing you will need to do is condition your clay.

I used white clay for my projects, but really any color will work, we will be painting them completely later. When you get the clay to a workable consistency, use a brayer, or rolling pin to roll the clay out into your desired thickness, and size. This will be your pendant base. Then, you have a million options! I am going to walk you through a stamped pendant to show you the process. Make sure your clay base is the right size for your stamp. Start with a base. Creative Index. This little DIY was inspired by Lindsay over at Delighted Momma.

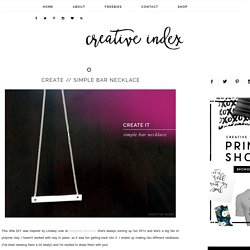
She's always coming up fun DIYs and she's a big fan of polymer clay. I haven't worked with clay in years, so it was fun getting back into it. I ended up making two different necklaces (I've been wearing them a lot lately!) And I'm excited to share them with you! What you need: First, condition your clay (roll between your hands until it's soft and pliable). Then shape the clay into a long cylinder/cube. Take your razor and start trimming. Once you're happy with the shape, place on a baking sheet and bake at 275 for about 20 minutes. Wear your new necklace proudly! And next week I'll share the other necklace I made..... Helpful Notes + Tips: // Work on a clean surface! Delia Creates. Clay projects are not my usual MO, but today I’m giving clay a go! 
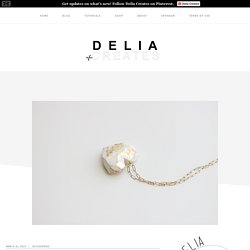
It’s really simple to make too. And…here’s my dirty secret… I used Crayola air dry clay… Yep! The kid stuff in the kid’s craft section.

It’s highly available, it’s relatively inexpensive, it’s hard to mess up, and it totally works. Let’s get to it. Materials: STEP ONE: Form your pendant. Grab a piece of clay a bit larger than you want your finished pendant to be. Roll the piece of clay into a ball. Slide the long sewing pin straight through the disc from top to bottom. Be careful to keep the pin as straight as possible. Once the pin is straight through, every so slightly wiggle the pin in a circular motion from EACH side.

STEP TWO: Cut your pendant. Remove the pin and let the disc dry for about 8-10 hours. It should be firm enough that when you go to cut it, it yields a nice clean slice and doesn’t squish at all under the pressure of your hand or the knife. Once it looks how you want it to, let it completely dry. That’s it! Design Dazzle. As always I am excited to share with you all one of my latest projects… I have been playing with clay lately and came up with some little things, among them there is this Clay Stamped Pendant. Make a ball with your hands… After make it flat with the help of a roller or just squish it with the bottom of a cup.

I made mine about a 1/4″. Use the lid of glue stick as a punch holder to make a perfect circle. Just remove the EXTRA clay and press softly the side of the clay to have it come out of the lid… Stamp It! Use any type of letter stamps. I found mine at the Scrapbooking aisle at Wal-Mart for just a dollar. Poke a hole for the chain. The size of the hole need to be big enough to put whatever you are hanging the pendant from through… NOTE: I got my chain at Walt-Mart also. It comes in one long piece but with enough locks to make four… If you end up getting this one fold the chain in half and cut it… And then fold each half in half and cut it again… You will end with four chains for around $3 total. Design Mom. Warmer weather is really on it’s way! That means short sleeves and bare wrists. So I asked Amy of This Heart of Mine to create something gorgeous to adorn our arms while we soak up the sunshine.

The little clay charms she came up with are stunning! I promise, when you see the tutorial, you are going to want to make some. — Gabrielle We haven’t had much of a winter this year but I am ever so excited for spring to arrive. Bright green grass, tulips in the garden and days filled with sunshine and warmer breezes. To bring spring faster, if only in my accessories, I picked out beads in bright tones. First, I strung the bracelets, using elastic bead cording, and made them to my size. To keep track of the beads (and out of the hands of my little ones), I used a relish tray to hold them while I worked. Now for the charms. If you’ve never worked with it before, polymer clay is an oven bake clay that comes in a variety of colors. The next step is to give the charms some texture. Doodle Craft. Damask Polymer Clay Pendants! It's easy to make these colorful pendants! When all was said and done...I liked the damask ones the BEST! You just need oven bake clay, like this white sculpey.

Some rubber stamps...and paint! Soften and roll out some clay about 1/4" thick. Stamp an impression on the clay Use a cookie cutter to cut the clay Add a necklace hole with a straw Place on a tray and bake according to package directions. Now it is time to paint! Now, add some other colors... Dab another color on it and get down in all the cracks.

Just over part of the pendant. Then use a damp cloth and wipe off the top surface of the paint. Add on some more paint, in another color! Wipe again. Keep it like this... Or keep wiping and the paint on the highest surface will wipe off and show the white clay again! Repeat again---for a stunning sort of tie dye effect! These are gorgeous and would make great ornaments too! Add a chain, cord or whatever to make a stunning necklace! Doodle Craft. Doodle Craft. Earnest Home co. Eat Drink Chic. Eighteen 25. Eighteen 25. Eighteen 25. Eyes of Style. Happy Hour Projects. Happy Hour Projects. Haute to Sew. Hello Wonderful. Hey Wanderer. I'm Sharing The Wealth. JoAnn. JoAnn. Laura Wadsworth.

Little Red Window. Living with 3 Moon Babies. Love & Cupcakes. Love & Cupcakes. Love & Cupcakes. Minted Strawberry. My Cakies. My Girlish Whims. My Two Butterflies. Oh Oh. Penelope & Pip. Quiet Lion Creations. Shelterness. Stars for Streetlights. The Idea Room. The Pretty Life Girls. The Pretty Life Girls. The Things She Makes. The Things She Makes. The Things She Makes. The Things She Makes. Then She Made. Then She Made. Then She Made. Then She Made. Then She Made. Time for Tea Beads.