
Clothing Craft. Patterns That Fit You - Free Shorts Class. Learn to make shorts patterns according to YOUR measurements; and they're guaranteed to fit!
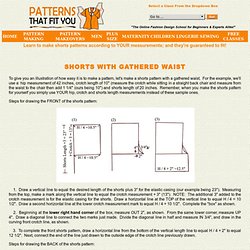
To give you an illustration of how easy it is to make a pattern, let's make a shorts pattern with a gathered waist. For the example, we'll use a hip measurement of 42 inches, crotch length of 10" (measure the crotch while sitting in a straight back chair and measure from the waist to the chair then add 1 1/4" (ours being 10") and shorts length of 20 inches.
Remember, when you make the shorts pattern for yourself you simply use YOUR hip, crotch and shorts length measurements instead of these sample ones. Steps for drawing the FRONT of the shorts pattern: 1. 2. 3. Steps for drawing the BACK of the shorts pattern: 1. 2. 3. The last step is to draw in the new "inside" leg line -- drawing from the new crotch extension point to the bottom of the leg.
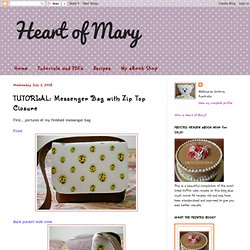
Remember you have not allowed for seams yet, so after making the shorts pattern, mark the 5/8" seam allowance all around and a 2" hem. TUTORIAL: Messenger Bag with Zip Top Closure. First...pictures of my finished messenger bag Front Back pocket/side view Top view showing zip closure, front pockets and magnetic snap Close up of zip closure Inside view with zippered pocket.
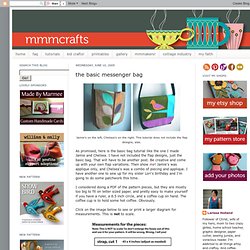
The basic messenger bag. Jamie's on the left, Chelsea's on the right.
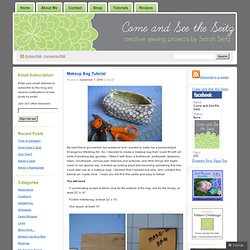
This tutorial does not include the flap designs, alas. As promised, here is the basic bag tutorial like the one I made Jamie and Chelsea. I have not included the flap designs, just the basic bag. That will have to be another post. Be creative and come up with your own flap variations. I considered doing a PDF of the pattern pieces, but they are mostly too big to fit on letter sized paper, and pretty easy to make yourself if you have a ruler, a 6.5 inch circle, and a coffee cup on hand. Click on the image below to see or print a larger diagram for measurements. YARDAGE: Assuming the width is 45 inches, you'll need about a yard each of the outside and the liner, plus your interfacing if you are using it.
THE FINISHED BAG DIMENSIONS, EXCLUDING THE STRAP: about 12 inches x 12 inches x 3 inches wide at the bottom. 1/4 INCH SEAM ALLOWANCE IS INCLUDED IN THE MEASUREMENTS. Makeup Bag Tutorial « My best friend got married last weekend and I wanted to make her a personalized Emergency Wedding Kit.
So, I decided to create a makeup bag that I could fill with all sorts of wedding day goodies. I filled it with floss, a toothbrush, toothpaste, tweezers, lotion, mouthwash, various pain relievers and antacids, and other things she might need on her special day. Envelope Style Makeup Bag Tutorial: Boho Blossom. Quick and easy make-up bag for K with tutorial.
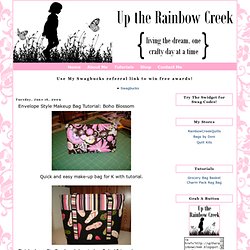
Finished one flip flop beach bag today. Only 19 to go! K emailed me today and wanted a quick pattern for a make-up bag she can make in one evening. I found quite a few tutorials and freebies online, but they all had zippers. I thought I would try to come up with one that doesn't have a zipper, since I doubt she has one on hand. My first one was cute, but way too small. This one came out very cute and didn't take too long. How to make a simple (reversible) tote bag. Here is a simple way to make a tote bag.
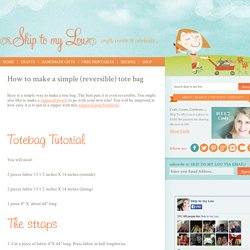
The best part it is even reversible. You might also like to make a zippered pouch to go with your new tote! Glossary. Max California: Tutorial. Hello visitors!
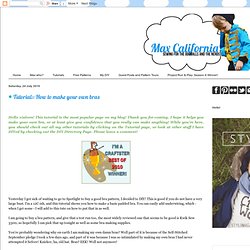
This tutorial is the most popular page on my blog! Thank you for coming, I hope it helps you make your own bra, or at least give you confidence that you really can make anything! While you're here, you should check out all my other tutorials by clicking on the Tutorial page, or look at other stuff I have DIYed by checking out the DIY Directory Page. Artsycraftybabe.typepad.com/tutorials/pleated_tote_pattern.pdf. Time for a new tutorial... I found some spare time to finally write down the tutorial I promised last week.
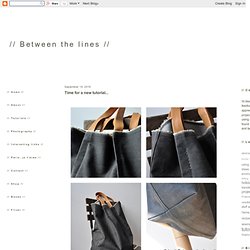
The bag has been used extensively lately, and I must say it's one of my favorites (didn't I say that of every single one of my bags?). It's sturdy, carries quite a bit and yet it still looks elegant, if I may say so myself. And it's so simple to make. Ready?! Here is what you need: - enough denim, canvas, or any other heavy-weight fabric you have at hand to cut two 54cm x 52cm pieces from - the given dimensions include seam allowances for side seams and bottom seam (note: since I wanted to make use of the denim's nice selvedge (Yes, Cindy, you got that right - that was of course on purpose!!)
Instructions 1. 3. Note: for a good description of the different types of French seams and felled seams, check out Annekata's tutorial here. 4. As usually, if you have questions about this project just let me know! Good luck!