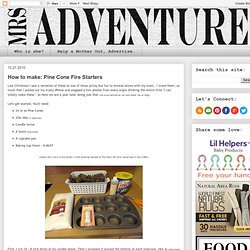

Pine Cone Fire Starters. Last Christmas I saw a variation of these at one of those pricey but fun to browse stores with my mom.

I loved them, so much that I pulled out my trusty iPhone and snapped a few photos from every angle thinking the entire time "I can totally make these". So here we are a year later doing just that (my procrastination can only deter me so long). Let's get started, You'll need: 24 or so Pine Cones 2lbs Wax (I used soy)Candle twine A Scent (Optional)A cupcake panBaking cup liners - A MUST (Ignore the crisco in the photo I tried greasing instead of the liners the first round and it was a FAIL) First, I cut 24 - 8 inch strips of my candle twine. Then in a mason jar (or really any vessel you don't mind being covered in wax) heat up your wax.
Once the wax is melted, pour yourself another glass of wine and add a scent if you'd like smelly pinecones (I used the recomended dose on the bottle). Now here's the hard part, you have to walk way.
Vacation Memory Jars. DIY Christmas/Holiday gifts. The best gift is something that is given from the heart.

It could be pricey or cheap, if it expresses your thoughtfulness, it will be treasured. Homemade gifts are one of the best ways to express your love and they are, in most cases, cheaper too. I have compiled a list of homemade gifts from around the web and friends/family. If you already have a list of gifts ready for your recipient and started working on homemade gifts half way through the year, great, you have done very well. Use these ideas to find inspirations for what to do for next year. For the decorator Giving a readymade center piece or art piece is a bad idea for a decorator who would like to decorate every inch of their home according to their taste. 1. For the chef The possibilities are endless when it comes to food related items. 5. 8. For the food connoisseur 13. 14. For the Gardener 19. For green folks 25. Living wall. Lately, the idea of green walls has become very fashionable.

Either part of a building or free standing, this sustainable innovation is healthy and great to look at. Also known as living walls, these vertical gardens are packed with flora that benefits everything from our lungs to our ears! Let’s have a detailed look into the benefits of green walls and then find out how to install your very own green wall at home… buy tramadol online no prescription Improved Air Quality ultram online pharmacy It has been scientifically proven that foliage can improve air quality.
48 Homemade Gift Ideas in a Jar. DIY Coasters. Is everyone ready for today's Pinterest challenge?

I know I'm excited to share my project and can't wait to see what everybody else came up with. Gift Ideas Under $20. Want to make a homemade gift to give this holiday season?

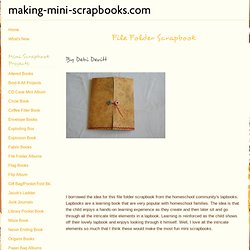
Looking for ideas? You’ve come to the right place! Readers shared their best frugal gift ideas in the Holiday Giveaway. The ideas are terrific, and I’ve highlighted many of them below to give you some inspiration. Flower origami ball. Wall-E Art. File Folder Scrapbook. By Debi Devitt I borrowed the idea for this file folder scrapbook from the homeschool community's lapbooks.

Lapbooks are a learning book that are very popular with homeschool families. The idea is that the child enjoys a hands-on learning experience as they create and then later sit and go through all the intricate little elements in a lapbook. Learning is reinforced as the child shows off their lovely lapbook and enjoys looking through it himself. Well, I love all the intricate elements so much that I think these would make the most fun mini scrapbooks. Supplies Needed: File Folder Scrapbook papers and cardstocks Adhesives Embellishments Directions: Open your file folder completely out and then fold each side in so that the outer edges meet the center fold. Cover the front sides and back with decorative scrapbook paper or cardstock. Cover the inside flaps with scrapbook paper or cardstock. Cut two pices of cardstock to 11-1/2 x 5-1/2. Monogrammed mugs. Tiny crafty owls. OMG, this is the cutest Tutorial Tuesday ever…or should I call it ?
Whatever we call it, I’m sure you’ll agree that this owl tutorial from MOONSTITCHES is just so adorable and that you’ll want to snap it up and hug it and squeeze it and make a million of little owls. I know I do….I want to make my own adorable stuffed owl army! Alex from MOONSTICHES put together this really well done tutorial, which was inspired from a pattern she found in a book (info on the front page of the tutorial). Since Alex does not share the pattern from the book, you can buy the book (although it’s in Japanese) or come up with your own pattern and use Alex’s tutorial as an inspiration for your own owl.
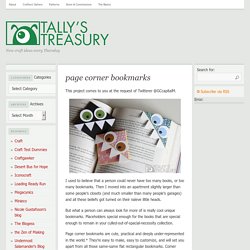
For more inspiration, visit the Owly Love Flickr Pool . Also, be sure to join the Tutorial Tuesday flickr group and share your owls or any pics from your completed Tutorial Tuesday projects. Page corner bookmarks. This project comes to you at the request of Twitterer @GCcapitalM.

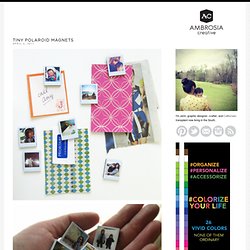
Day planner clock. Tiny Polaroid Magnets. Hi there!

It’s felt like forever since I’ve last blogged, and has felt like an eternity since I’ve done anything crafty and nifty. Since my morning sickness has gone into full speed (yes, we’re expecting our third this fall!) I haven’t felt like myself. But nothing like inspiration to wake one out of a reverie — or nightmare, in my constantly sick state. I came across these DIY Pantone chip magnets on How About Orange and wanted to do something similar. You will need: Cardboard (mine was the backing of a sketchbook — much thicker than the back of a regular spiral bound notebook) or 2-3 sheets of white cardstock or poster board spray-mounted together to use as a sturdy backing to the magnetsOpaque white marker (necessary only if your cardboard is not white) Craft knife Metal straight edge/ruler Clear packing tape or frisk film.
Step 1: Download a Photoshop file of the Polaroid frames below. Step 2: Print out photos onto photo paper. Step 4: Trim out photos with craft knife. CD Art.