
Mini Stove - StumbleUpon. Decor It Yourself - Easy solutions for your nesting... Traditional Turf Houses. The Icelandic turf house was the product of a difficult climate, offering superior insulation compared to buildings solely made of wood or stone, and the relative difficulty in obtaining other construction materials in sufficient quantities.
Due to the lack of transport and Iceland’s remoteness, importing foreign timber was not very common and mostly reserved for ship and church building. However, Iceland did have a large amount of turf that was suitable for construction. photo source The turf houses are made of flat stones, and upon this was built a wooden frame which holds the load of turf. The turf would then be fitted around the frame in blocks often with a second layer, or in the more fashionable herringbone style. Another interesting aspect of the Icelandic turf house was the introduction of attached toilets, which were communal, and the act of going to the attached toilet was often done in large groups. The doors are made of wood and they are the only external wood on the house.
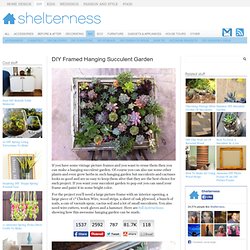
Framed Hanging Succulent Garden. If you have some vintage picture frames and you want to reuse them then you can make a hanging succulent garden.

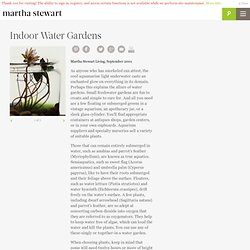
Of course you can also use some other plants and even grow herbs in such hanging garden but succulents and cactuses looks so good and are so easy to keep them alive that they are the best choice for such project. Grow An Avocado Tree! Moss graffiti. Indoor Water Gardens. As anyone who has snorkeled can attest, the cool aquamarine light underwater casts an enchanted glow on everything in its domain.

Perhaps this explains the allure of water gardens. Small freshwater gardens are fun to create and simple to care for. And all you need are a few floating or submerged greens in a vintage aquarium, an apothecary jar, or a sleek glass cylinder. You'll find appropriate containers at antiques shops, garden centers, or in your own cupboards. Aquarium suppliers and specialty nurseries sell a variety of suitable plants. Those that can remain entirely submerged in water, such as anubias and parrot's feather (Myriophyllum), are known as true aquatics.
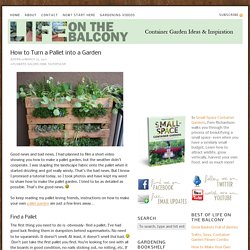
When choosing plants, keep in mind that some will need twelve hours or more of bright light daily. Rinse gravel thoroughly to remove dust, which can cloud the water, and salt, which can damage roots and leaves. After a few weeks, begin fertilizing the plants with tablets made specifically for water gardens. Pallet Garden. Good news and bad news.

I had planned to film a short video showing you how to make a pallet garden, but the weather didn’t cooperate. I was stapling the landscape fabric onto the pallet when it started drizzling and got really windy. That’s the bad news. But I know I promised a tutorial today, so I took photos and have kept my word to share how to make the pallet garden. I tried to be as detailed as possible. So keep reading my pallet loving friends, instructions on how to make your own pallet garden are just a few lines away… Find a Pallet The first thing you need to do is–obviously–find a pallet.
Don’t just take the first pallet you find. Collect Your Supplies For this project, you’ll need the pallet you found, 2 large bags of potting soil, 16 six packs of annual flowers (one six pack per opening on the face of the pallet, and two six packs per opening on the top of the completed pallet garden), a small roll of landscape fabric, a staple gun, staples, and sand paper.
Now for the sides. Succulent table. Max with the new Succulent Table.

Can you believe that our latest DIY project was once just a couple of junky pallets and some scrappy table legs? Crazy…if I didn’t have photos, I wouldn’t believe it myself. Not too long ago, we whipped out a coffee table sized succulent table out of an old shipping crate. Now we scaled it up. The pallets. First bit of advice, deconstructing pallets are a big pain unless you have the right tools…and our hammer and wall scrapper wasn’t quite doing the trick. Tree Ring Path. Terrarium.
The other week, my good friend Stephanie and I planned out a craft weekend.

Our mission: Terrariums. Not the kind you keep lizards in, but the kind you can seal up and watch the moss grow. It was fun, cheap, and easy, and while we were creating them I realized how awesome they would be as centerpieces at a wedding. They are totally unique, creative, and beautiful. We each made four of them, which just goes to show they are not even that labor intensive. Terrariums are meant to be long lasting, so you can even make some months before the wedding and still have them thriving in time for the big day. So lets get down to the nitty-gritty of how you can actually make them: Step 1: Materials • Glass containers in whatever size you heart most. . • Good dirt and rocks. . • Figurines or decorative rocks to place inside. . • Horticultural Charcoal. . • Moss (another one of those things you can find outside, but can also order if you don’t live somewhere it doesn’t grow naturally). - Paula Hayes - Eco Sphere.