
New Ring Designs. November 24th, 2010 A while ago I bought lots of antique silver spoon sets when we visited Colin’s sister Morag and her family over the summer as they live near Spoon Central – a little village called Horncastle that is full to the brim with small antique shops.
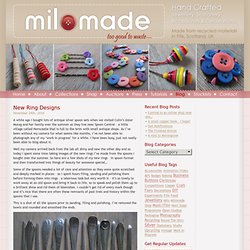
As I’ve been without my camera for what seems like months, I’ve not been able to photograph any of my ‘work in progress’ for a while. I have been busy, just not really been able to blog about it. Well my camera arrived back from the lab all shiny and new the other day and so today I spent some time taking images of the new rings I’ve made from the spoons I bought over the summer. So here are a few shots of my new rings – in spoon format and then transformed into things of beauty for someone special… This is a shot of all the spoons prior to sanding, filing and polishing. Before and after shots of set 1 This set of spoons has a lovely pattern on the upper side and on the under side so I made two different rings. What do you think? Handmade projects repurposed from everyday objects. Gather those bobby pins you have lying around and turn them into your new favorite accessory!
With a little paint and a touch of your own creative flair, you can jazz up any outfit with these bobby pin earrings. Pair 'em with a simple black top for a a bold statement or add a little spunk to your favorite outfit. Best of all, you'll always end up with a one-of-a-kind pair when you DIY. Materials: Bobby Pins — Piece of Cardstock or Cardboard — White Spray Paint or Nail Polish — Acrylic Paint or Nail Polish (colors of your choice) — Clear Nail Polish — 2 Thin Pieces of Wire — Earring Hooks — Paintbrush — Pencil Steps: • Clip bobby pins onto a piece of cardstock separating each slightly from one another.• Apply a layer of white spray paint or nail polish as a primer.
DIY. Crochet Trim Seam. Cut side seams and sleeves off if you use a tshirt (here I used a tank).
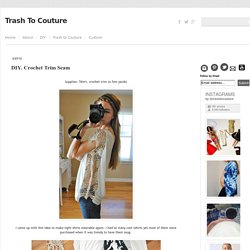
Sew front to back right sides together. Lay out and pin where you want the armhole to go. Top stitch new side seam leaving armhole open. I did this with fringe trim as well here. DIY Fashion-Forward Bracelets. When money is tight, but fabulous fashion is a necessity, try out your crafting skills to make something new and fantastic.

These bracelets are sure to impress and look quite expensive, but all they require is some gold chain and friendship bracelet yarn, both of which you can find at a craft store like Michael’s Art Supply. Make one signature piece or stack a bunch for a layered look! DIY Sweat-sacoche diy-laptop-sweat – the Trendy Girl. The Adventures of an Urban Socialite™ Top two images from Honestly… WTF (total cost about $5)/ Bottom image from Oak– retail $372.00 Love this clever project from Erica and Lauren of Honestly… WTF… so much so I might even attempt it– I love these bracelets!

The best part is, there are tons of options in terms of hex nuts (they have bronze, steel, etc.) and twine color, size, etc. and the project is super straight-forward. Have fun! Via MCSpice.