
Canada, Toronto RepRap User Group. Mendel Buyers Guide. Edit is restricted to the sysop group (set from the "protect" tab)move is restricted to the sysop group (set from the "protect" tab) Entries on this page are in no way an endorsement of quality of goods or service.

Below is simply a list of suppliers. Do your research by Googling <company_name RepRap forum> before you buy. This will usually find other reprappers' experience with a given company on our forums. See here for details of how to get included on this page. RepRap is open-source hardware, so there is not a single place to buy it but rather many options. Vendors To remain fair, all vendors that sell here are up for review. If you get bad service, say so on the forums and help other reprappers. Community There are several subforums in the RepRap Marketplace and Job Shop, where people who have sets of RepRap parts for sale can advertise the fact and others can post requests to buy.
Also take a look at fellow RepRap developers selling printed parts on the wiki. Project specific parts.
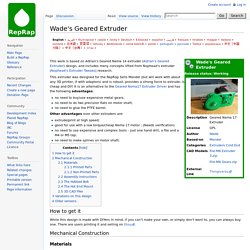
Development. Wade's Geared Extruder. Wade's Geared Extruder Release status: Working This work is based on Adrian's Geared Nema 14 extruder (Adrian's Geared Extruder) design, and includes many concepts lifted from Nophead's extruder (Nophead's Extruder Tweaks) research.

This extruder was designed for the RepRap Sells Mendel (but will work with about any 3D printer, if with adaptors) and is robust, provides a strong force to extrude, is cheap and DIY. It is an alternative to the Geared Nema17 Extruder Driver and has the following advantages: no need to buy/use expensive metal gears; no need to do two precision flats on motor shaft; no need to glue the PTFE barrel; Other advantages over other extruders are: extrude/print at high speed; good for use with a low torque/cheap Nema 17 motor ; (Needs verification) no need to use expensive and complex tools - just one hand drill, a file and a M4 or M5 tap; no need to make splines on motor shaft; How to get it Mechanical Construction Materials Printed Parts Non-Printed Parts 3D CAD Files.
Prusa Mendel Assembly. Prusa Mendel Documentation Before assembling a Prusa Mendel, make sure you have all the parts necessary.

For the bill of materials, see Prusa Mendel. For the visually oriented, have a look at this photo gallery of an ongoing Prusa Mendel build. You may also want to watch the complete video series for assembling a Prusa 2 How_to_build_Prusa_2. Notes: Heating the flat side of a bushing with a hair dryer or heat gun before snapping onto the smooth bar can keep it from snapping. Frame Triangles This step takes about 15 minutes per triangle, for a total of 30 minutes. There is a triangle on each side of the Prusa RepRap. Parts Required (per triangle) 2 RP footed frame vertices 1 RP frame vertex (non-footed) 1 RP bar clamp 3 370mm M8 threaded rods 14 M8 nuts 14 M8 washers (Optional but recommended) A piece of threaded rod or wood or any other material with precisely 290mm length.
Front Threaded Rods This step takes about 30 minutes. Parts Required 2 assembled frame vertex triangles 2 RP bar clamps. Prusa Mendel.