
Lovely Wire Knot Ring Tutorial. You can make this lovely ring (or a version of this design) yourself, using just some basic tools, wire and a lip balm! Yes, in this tutorial I am going to demonstrate that just basic beginner tools and a wire from Michael’s can go a long way! Wouldn’t this ring make a great present?? For the purpose of this tutorial I am going to be using the very basic, cheap tools that are available almost everywhere. Instead of a ring mandrel you can just use a tube of a lip balm, like I did. I chose to make my ring from a simple gold-plated wire (20 gauge) but you could also use 18-gauge wire, twisted wire (wouldn’t that be nice?) PLEASE excuse the state of my nails in these pictures.. First thing to do is to cut a piece of wire. Next, wrap your wire around the tube of your lip balm. Cut of the extra bits, if any. Now bend the wire coming from your left to aim away from the ring and then bend again to aim it slightly upwards, as shown on pictures below.
Almost done! And it’s done. 101 Pretty Printables {free} Inspiration : bird tattoos + DIY temporary tattoos. I've been having a love affair with bird motifs since many years now, so my heart skipped a beat when I saw a flock of birds' tattoo for the first time.
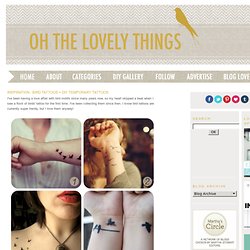
I've been collecting them since then. I know bird tattoos are currently super trendy, but I love them anyway! As far as I'm concerned, I'm not ready for a tattoo (I have a VERY low tolerance to pain), so as an alternative, I opted for temporary transfer tattoos! Yes, just like those we found as inserts in bubble gums when we were kids. You need : 1. 2. 3. 1. 2. 3. It can last up to 7 days, but mine started cracking after 4 days, so I dissolved it with baby oil.
Chalkboard coasters - tutorial. Well, I'm going to show you how to make your own!
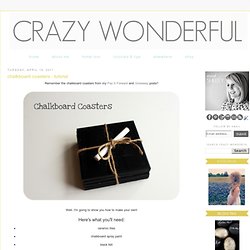
Here's what you'll need: ceramic tiles chalkboard spray paintblack feltscissorshot glue gun and gluechalk STEP ONE: Lay your tiles out and spray with chalkboard spray paint. I did 3 light coats, making sure they were dry between coats. STEP TWO: Cut out felt squares the same size as your tiles. STEP THREE: Using your hot glue gun, add some hot glue to the center of the tile and attach the piece of felt. STEP FOUR: Use chalk to draw or write anything you can think of onto your new coasters and enjoy! Easy peasy, super affordable, and perfect for housewarming or hostess gifts!!!
Cost Breakdown: 4x4 tiles - $0.38 each. 101 Simple Handmade Gift Tutorials. These simple handmade gift tutorials will make any crafty person’s heart sing with joy!

You don’t need special skills or a bunch of time because these can all be done super fast! Simple and cute…that works for me! Oh, and think of all the money you will save making these gifts. {At least that’s the story I tell my husband…shhhh!} Helpful Info / Spray vinegar on windshield before a winter storm & car windows will not frost over...& other winter car tips. Cleaning Products. Keith and I have had our couch and arm chair for over eight years.
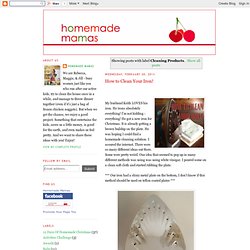
To be honest, we bought these because we liked the way they looked. We didn't realize how durable microfiber is. Most spills wipe off very easily. Rocky, our little dog once got ahold of a bottle of red food coloring and got it all over the couch. Amazingly, that wiped off too! Handmade Coasters. How To Turn An Old Photo Into A Cheap And Easy Piece Of Art. Thank you so much for all your lovely comments on my home office makeover!
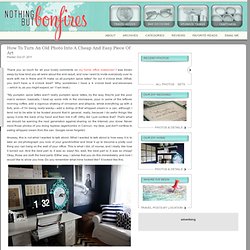
I was blown away by how kind you all were about the end result, and now I want to invite everybody over to work with me in there and I'll make us all pumpkin spice lattes* for our 4 o'clock treat. (What, you don't have a 4 o'clock treat? Why, sometimes I have a 4 o'clock treat and elevenses—which is, as you might expect, an 11am treat.) *My pumpkin spice lattes aren't really pumpkin spice lattes, by the way, they're just the poor man's version: basically, I heat up some milk in the microwave, pour in some of the leftover morning coffee, add a vigorous shaking of cinnamon and allspice, whisk everything up with a fork, and—if I'm being really wacky—add a dollop of that whipped cream in a can, although I tend not to be able to be trusted around that in general, really, because I do awful things like spray it onto the back of my hand and then lick it off.
(Why did I just confess that? 1. 2. 3. 4. 5. 6. 7. 8. 9. 10. DIY Tile Coasters. Make some for yourself.
Make some for the grandparents. These fun coasters sit on my coffee table and make me smile whenever I glance at them. These personalized cuties, give the average ol’ coaster a run for his money! Supplies: 4″x4″ tile coasters white tissue paper printer scotch tape scissors Mod Podge (Matte or Gloss) paint brush Krylon acrylic clear coat black felt with adhesive backing Let’s get to work! 1. 2. 3.