
Typographical art prints. I have some new items to share on this bright and sunny Spring morning!

These feature two of my favorite quotes as a start to a new series of typographical art prints I’ll be rolling out. The first one is a timely quote from Doug Larson, “Spring is when you feel like whistling even with a shoe full of slush.” In alternating tints of peachy pink, yellowy orange and brownish gray, I’m continuing to play with tints like I’ve done with my latest thank you cards except in these I’m highlighting specific words instead of letters. I love this quote! The second one is another favorite of mine, “Wherever you go, no matter what the weather, always bring your own sunshine” from Anthony J.
These prints can be purchased here. . © 2012 Happy Dappy Bits LLC. Wooden Spoon - SAUVAGES. Si,à votre grand malheur, vous n'avez pas pu participer à notre atelier Enjolive ta cuillère de bois, voici un petit tutoriel pour le faire vous-même, à la maison.

C'est tout simple. Il vous faut : - de la peinture acrylique - des pinceaux fins - des cuillères de bois (plus elles sont vieilles, mieux la peinture tiendra - en plus d'être un projet plus écolo car on réemploi ce qu'on a!) - des bouts de tissus, des boutons, etc. . - du vernis ou une laque pour protéger le projet (encore une fois, on peut faire un effort pour choisir un vernis à l'eau et sans COV (composés organiques volatils) afin de préserver notre environnement et un air plus sain dans la maison) - du papier collant Grosso modo, vous n'avez qu'à peindre le motif ou personnage désiré sur votre cuillère.
Le papier collant vous servira à faire des lignes bien droites (si vous avez envie de rayé, bien sûre) Finissez par une bonne couche de vernis, une fois la peinture sèche au touché. Amusez-vous! DIY Broadway Tile Coasters. I kind of have this secret obsession with Broadway.

I have tons of soundtracks on my Iphone and I'm starting to amass a nice collection of Playbills from all the shows I've seen. One of my secret dreams has always been to be a Broadway actress. Make Your Own Personlized Eye Chart. DIY Wall Art: Triangles. There aren't too many things in life more satisfying than hanging your own art in your living room.

If you think you can't make your own art, you are WRONG! Making art is easy and fun and there is absolutely no wrong way to do it. I'll give you some tips to make sure all your art projects turn out great. First, here are my top 3 tips to ensure your DIY art projects come out amazing: Pay attention to color. Here are the supplies you'll need for this project. sheet of acrylic canvas paper, or a stretched canvaspaint brushpencilrulerpainter's tapeacrylic paint in primary colors and white Start by drawing the design in pencil onto your canvas. Next, plan out where you're colors are going. DIY Pillows Made from Daddy's Shirts. Want a little insight into what my husband signed up for when he said "I do"?
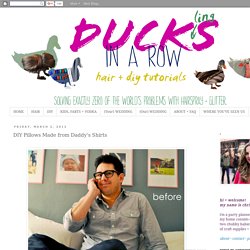
I've had a box squirreled away in the bottom of the closet for the past three years. Every time my husband has announced that he's going to sort through his clothes and get rid of old items, I'd hover over him like a ravenous vulture circling a horse carcass. I would wait on baited breath for an old button-down shirt to hit the "give away" pile, swoop in, nab the shirt with my sharpened craft talons, and hastily slink off to the box in the bottom of my closet. I hope your mental image of me doing this involved drooling and a hunchback. So what, pray tell, could possibly evoke such strange behavior? Recovered Stool. Tuesday, January 3, 2012.

Friendship Ear Buds. I first saw this idea on pinterest, and loved the look!

Anie, of SassyBudsz, has opened an etsy shop selling friendship ear buds. Check out her shop here. DIY: Spray Painting Lace. I've seen spray-painted lace on objects all over the craft blogs lately, and I love it.

My mom bought this wooden tray and jars to organize and easily transport her button collection. Today we experimented with lace, and it was totally cool! Wooden tray all primed and dry: Mom painting the tray a lovely teal color: Taping on the lace, and covering the areas that she didn't want spray-painted: How to: No Sew Scrap Fabric Basket with Handles. I am in LOVE with making scrap fabric baskets.

They are just turning out so well! I thought I’d show you another one that I put together. The basket is a different type and shape but it still worked so well, and I added handles. My little girl attached herself to this basket and I had to bribe her just to get it away from her to take a picture. This technique could make the cutest Easter basket to match an Easter dress. Painted Glass Vase. A is for AiRpLaNe... 12 Ways to Make a Spring Wreath. Song Lyric Wall Art / D.I.Y. Project. Modern Wall Art with Paint Swatches! Looking for a way to fill that blank wall but don't have permission to paint?

All you need is a trip to a major hardware store and an afternoon in front of a good movie to take care of that little dilemma. Supplies Needed: Large frame with paper insert, a ton of pretty paint chips, double-sided tape squares, and vinyl letters appropriate to the size of your frame or phrase (4" - 6").
I went with a color scheme that involved a variety of tones from some of my favorite colors. It's basically a muted rainbow with plenty of lighter shades to keep things from getting too busy. 1. 3. Colorful Mosaic Wall on the cheap!!! Like a lot of people, I live in an apartment. The type of apartment complex that doesn't allow painting of any kind. Miss Make: Tutorial: Happy Raincloud Mobile. A few weeks ago I got a really exciting email. I had been selected to participate in the Scribble Shop challenge.
It's kind of like 'Iron Chef' for crafty bloggers, except I did it in my living room, and there were sadly no dramatic sound effects. They sent me a box filled with assorted craft supplies with one instruction: make something. When my box arrived I eagerly ripped it open to discover: - stick-on felt shapes I really liked the glass marbles because they looked like little dewdrops. My Favourite Colour surface designs « handsome things. 15 Mar I absolutely adore these pillows and fabrics that Frances White launched at this year’s Design Indaba. It’s probably a good idea to warn the babysitter cause you wouldn’t want little Johnny ending up in the naughty corner for these. “My Favourite Colour is a surface design company with a focus on the interior industry.
It was started in 2011 and launched at the 2012 Design Indaba by fine artist, Frances White, whose love of bright, jewel-like colours and strong pattern have translated into a vibrant collection of textiles and soft furnishings. The first range focuses on South African flora, a particular love of Frances’, with each design drawing its inspiration from the flowers of a particular region. A wide range of cushions is available, and fabric by the metre is currently in production. My Favourite Colour’s fabric collection and soft furnishings range is designed, printed and sewn in South Africa. Her pillows range between R350 and R495 and you can order them from her website.
DIY Wall Art: Bubbles. If you liked my DIY on triangle art, then you're going to love this one. I saw something similar in a blog post about cool offices, and I thought 'Hey, I could make that! ' This project is super fast, will cost you almost nothing and looks amazing. The holy trinity of DIY art projects if you ask me. Put a Spring in Your Step with 12 Mod Podge Projects. DIY Beach Glass Jars & Bottles. DIY: Stencil Pillow.
January 16th, 2012 Have you tried fabric markers yet? I finally got around to it, and they work great. Paired with a stencil you can use them to stencil your favorite quote on a tea towel, apron, t-shirt, table runner, pillow cover, place mat, cloth napkin, old pair of blue jeans—anything you can think of!