
How To Tie Dye Your LEGS. I am about to show you how to tie dye your legs... or leggs really.

Yeah, they're just stockings, but the result is still the same. I now have 3 different crazy pairs of tights that each were made from old clothes and food coloring. 8 Gorgeous Hair Accessories with Tutorials! There's something about hair accessories that just make me smile!
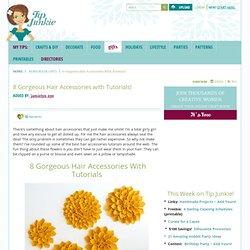
I'm a total girly girl and love any excuse to get all dolled up. For me the hair accessories always seal the deal! The only problem is sometimes they can get rather expensive. So why not make them? I've rounded up some of the best hair accessories tutorials around the web. Learn how to make these gorgeous felt flowers from Miles of Sunshine. Faux Metal Rope Bangle. How to make a Faux Metal Rope Bangle I am always on the hunt to find ways to make new DIY accessories.
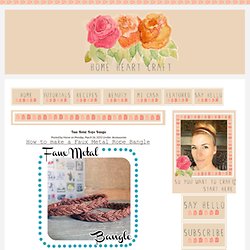
Tired of the same ol same ol friendship bracelets of fashion seasons past, I wanted to spice things up a bit. While I am still perfecting this technique, I am happy with the results so far and thought I would share the tutorial with you, even if I am still tweaking it. Hope you enjoy this quick tutorial on how to create a faux metal bangle bracelet with some twine and glue! What you will need: Some twine or poly rope that you can find at the hardware store. *Start by measuring off three pieces of the rope for a simple braid. *Hold the three strands of rope together and add a glob of hot glue on the top and bottom of the strands. *Once the glue dries, start your braid. What's Your Emergency? There are lots of “Emergency” supplies needed when you travel – emergency money, emergency credit card, emergency chocolate, emergency make-up, and emergency first aid supplies. I made up a small emergency zippered pouch for Sarah to take on her travels.
It is perfectly sized to fit in her handbag/day pack to hold some travel essentials. Minnie Mouse Bow With Doily. I hesitated typing in Minnie Mouse up there…but my husband calls my little girl minnie when she wears it.
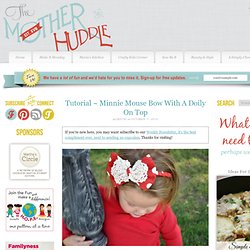
It’s fitting right? Remember the pants I made that match? They’re my favorite. Absolute. How-To Make Headbands {21 Free Patterns. I just adore headbands!
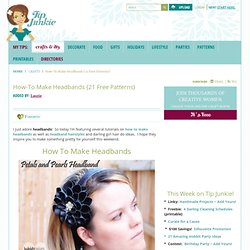
So today I'm featuring several tutorials on how to make headbands as well as headband hairstyles and darling girl hair do ideas. I hope they inspire you to make something pretty for yourself this weekend. How To Make Headbands 1. Petals and Pearls Headband - Leather and pearls give this headband the perfect blend of soft and strong.
Another headband... Making a new headband is so fast and easy that it makes me feel very productive.
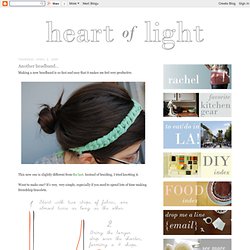
This new one is slightly different from the last. Braided Headband Tutorial. It's chilly outside here today and I'm loving it!
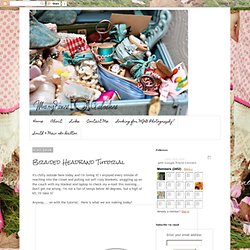
I enjoyed every minute of reaching into the closet and pulling out soft cozy blankets, snuggling up on the couch with my blanket and laptop to check my e-mail this morning... Don't get me wrong, I'm not a fan of temps below 40 degrees, but a high of 65, I'll take it! Anyway.... on with the tutorial. Here is what we are making today! What you need- Thick hair tie Six 1" strips of fabric Bulldog clip or safety pin Sewing machine (or needle and thread) Fabric tac I ripped my fabric strips so they were a bit frayed on the edges, personal choice.
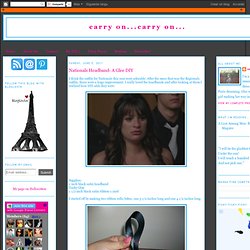
Tack each end of the braid just enough that it doesn't come undone . Then tack both braids together on each end, be careful not to twist the braids. 50+ Cute & Crafty Headbands To Make: {Free Patterns. Fabric Scrap Necklaces and Headbands. Nationals Headband- A Glee DIY. I think the outfits for Nationals this year were adorable.
After the mess that was the Regionals outfits, these were a huge improvement. DIY Lanvin-inspired Pearl and ribbon necklace. Supplies- Satin Ribbon-I used two different sizes but you don't have to.
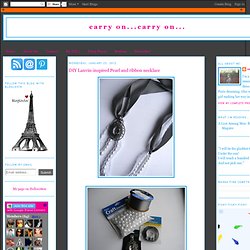
Large rhinestone pendant Assorted sizes of pearl beads Beading thread Thin lace trim First I started by beading the pearls onto the thread. Owl Purse. I made a few owl purses recently.
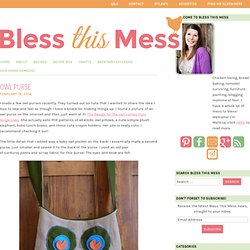
They turned out so cute that I wanted to share the idea. I love to sew and feel as though I have a knack for making things up. I found a picture of an owl purse on the internet and then just went at it! The design for the owl comes from Gingercake. She actually sells PDF patterns of all kinds: owl pillows, a cute simple plush elephant, hobo lunch boxes, and those cute crayon holders.
Craft Day with my Grandma: Mini Purses. 1. Fuse lining to batting pieces according to directions on wrapper. Use parchment paper to sandwich the pieces in order to keep batting from fusing to the iron and the ironing board. Using a straight edge, trim the batting the same size as the lining. 2. Fold the fused pieces in half horizontally to find the half way point and clip a tiny notch to mark. 3.
Guitar Strings to Bangles « Danielle Griffin. I’ve always thought there was -something- that could be done with used guitar strings. At first I thought wire jewelry, but they don’t stay bent that easily. I figured it out though…fabric-covered bangle bracelets! You can use wire for these as well, but I like the guitar strings because they keep their shape easier. The tutorial: You need one thicker guitar string (E, A, D….G will work but it’s kind of cutting it close), some electrical tape, wire cutters, scissors and some fabric (a light silk or cotton or something like that works best): First, trim the ends off the strings: Second, wrap into a circular shape…make sure it’s even, and trim the ends when you’re done.
Zippered iPhone Wallet - tutorial. Do you ever go out and all you want to take is your phone and maybe your keys and a credit card? But you don't have any pockets? This little wallet is the solution. It snugly fits your iPhone and a couple of cards, and I added a handy little clip for my keys. DIY: Infinity Scarf. Last month, Daniel's cousin told me about some infinity scarves that she made as gifts for people. Adding a Little Lace to Life. DIY: old tie into 2 new bows. Scout Inspired Bow Tie: Craft Project. Today our contributor, Amanda, is sharing the most incredible scout inspired bow tie!
Stitch Your Own Suspenders! Love the look of suspenders on your guy? How To Make a Bow Tie. In our local shop we sell tons of vintage bow ties. Painted Leather Bracelet D.I.Y. I'm so excited to share this D.I.Y. with you today! If you love the look of geometric bracelets this season, this one is for you. How to turn your ribbon scraps into trendy bracelets. What a wonderful warm weather week we had here in T.O.! It's time to re-organize your wardrobe and take out your favorite Spring outfits...and to add some new pieces if you can. Try This DIY Fabric Fishtail, BoHo-Chic Headband. A Super Easy DIY Beaded Leather Bracelet. Pretty Handmade Dual Chain & Ribbon Necklace Tutorial.
Teacup Totes and Ladybirds. The weather this weekend was somewhat delightful, a wonderful change to the dark clouds and patchy rain we had in the middle of last week. I had been planning a photo shoot for my Mystic Moose website all week, but even though the sun was shining, the lighting just wasn’t quite right for it – it was too bright and harsh, and by the evening it had gone a little cloudy again. Miss Make: Easy Drawstring Bag Tutorial.
This is one of myfavorite 'lunch break projects' from my job at the Urban Craft Center. Light Weight, Easy & Fun To Make Assorted Bracelets. Hand-stamped bag. Tutorial: Vintage ‘Alice in wonder’ hairband. 12 Necklaces to DIY. Guest Post: Resin Bottle Cap Pins Tutorial and Printable with Heidi of Digknity. Handmade Zipper Pouch Tutorial. Leather + Thread Wrapped Bracelet DIY - a year of handmade gift. Flower earrings. The cheekiest monkey of all. DIY Tuesday: Borrowed from the boys. THE WEEKENDER. DIY Wrap Bracelet.