
Shelterness - Part 2. How To Make a String Tree Wall Mural Home Hacks. All Featured Projects. Sign In to get Your Personalized Recommendations. Most favorited all-time. S Blog » Blog Archive » Notebook Cover in Fabric - with lace & love. There is a fountain of youth: it is your mind, your talents, the creativity you bring to your life and the lives of people you love.
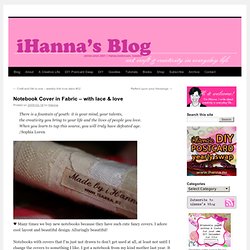
When you learn to tap this source, you will truly have defeated age. /Sophia Loren ♥ Many times we buy new notebooks because they have such cute fancy covers. I adore cool layout and beautiful design. Alluringly beautiful! Notebooks with covers that I’m just not drawn to don’t get used at all, at least not until I change the covers to something I like. It’s now my everyday writing diary. I made the cover on the sewing machine but then hand embroidered on top of that. I love white on white a lot! More details of the closure and backside; This book didn’t have a closure, so I added one to the slipcover and it works well.
. ♥ Hearts again. And when it’s closed with the waistband it looks like this; Nice! The backside has a occra colored fabric with words. Quilling - Turning Paper Strips into Intricate Artworks. Quilling has been around for hundreds of years, but it’s still as impressive and popular now as it was during the Renaissance.
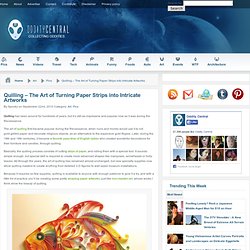
The art of quilling first became popular during the Renaissance, when nuns and monks would use it to roll gold-gilded paper and decorate religious objects, as an alternative to the expensive gold filigree. Later, during the 18th and 19th centuries, it became a favorite pass-time of English ladies who created wonderful decorations for their furniture and candles, through quilling. Basically, the quilling process consists of cutting strips of paper, and rolling them with a special tool.
It sounds simple enough, but special skill is required to create more advanced shapes like marquises, arrowheads or holly leaves. All through the years, the art of quilling has remained almost unchanged, but new specialty supplies now allow quilling masters to create anything from detailed 3-D figures to wall-sized museum installations. Jon's Bushcraft- Home. Jordynn Mackenzie - Limited-edition handmade accessories.
An easy to sew square-bottomed tote bag by Jordynn Mackenzie Skill level: beginner sewing machine iron & ironing board scissors straight pins ½ yard for outer ½ yard for lining ¾ yard by 10 inches for straps ribbon, 18" long 1/2 yard to 1 yard fusible interfacing Making a bag is really a lot easier than you think! Learn how to make the Jordy Bag - a fully lined, roomy tote. Little bird crafts. Guest DIY: Silje from Little Bird Crafts. Hi!

I'm Silje from Little Bird Crafts. Elsie and I have been friends for a long time and I am so excited to contribute to the Blog Party today! Recently I've been really into making soaps. I am planning to make some for the RVA online store soon. :) I just made a fun mini book. Cut two 4x4" paper squares and four 4x5" paper strips, I used brown card stock, you can also use patterned paper. Use glue dots on the back of the paper flaps, and glue each paper strip flap to each of the four sides of one of the squares. Glue the second 4x4 paper square in the center to cover up the paper strips.
Now you can decorate with pictures, or just cute little notes and text like I did, the options are really endless. Super easy, and super cute! HowTo: Free and Huge custom poster for your wall. Here, I want to quickly illustrate how to create, huge(up to 20 meters), awesome looking, rasterized wall posters using previously mentioned Rasterbator.
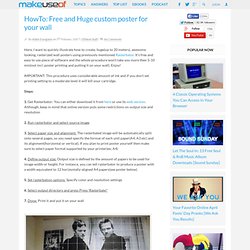
It’s free and easy to use piece of software and the whole procedure won’t take you more then 5-10 min(not incl. poster printing and putting it on your wall). Enjoy! IMPORTANT: This procedure uses considerable amount of ink and if you don’t set printing setting to a moderate level it will kill your cartridge. Steps: 1. 2. 3. 4. How-to Guide Rubber Stamped Domino Art Jewelry Pendants Stamp Dominos. The Hipster Home » Blog Archive » How to Make a Tiny Terrarium in a Light Bulb. Ahoy there Hipster Homers!

I’m Julie and I’m the very first guest blogger on this fine site. Today’s project involves breaking stuff, plants, found objects, and miniatures. Fun, right? Let’s get started! We’re going to go through the steps to create your very own little terrarium. Dos and Don’ts: Do use sand or small pebbles; these are good because water drains through them easily. How To: You’ll need a few tools to make a tiny terrarium but nothing complicated to get started. Needle-nose pliersScissorsLong tweezers or chopsticksFlathead screwdriverGlasses or goggles Let’s start with the light bulb. We will be removing the inside parts of the lightbulb. First, remove the metal tip from the bottom of the bulb. Then, when enough of the sides are raised to get a good grip on them, hold one of the sides with your pliers and yank out the metal tip. Next remove the black glass. Now you will be able to see the interior parts of the light bulb. Pull out any remaining wires with the pliers.