

50 Tiny And Adorable DIY Stocking Stuffers. Recycle cans into nice trays. Mason Jar Snow Globe Tutorial. Home Decorating Ideas: Create a Button Bouquet from Stash Supplies. Tuesday Tute ~ My Button Clock! I shared a button clock a few weeks back – and it inspired me to make my own!
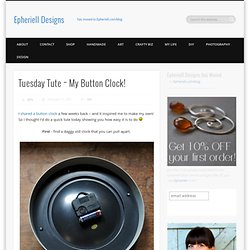
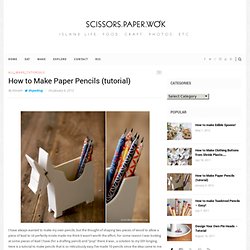
So I thought I’d do a quick tute today showing you how easy it is to do First - find a daggy old clock that you can pull apart. Here are the bits that make up the mechanism – make sure you remember which parts go where! How to Make Paper Pencils (tutorial) I have always wanted to make my own pencils, but the thought of shaping two pieces of wood to allow a piece of lead to sit perfectly inside made me think it wasn’t worth the effort.
Holiday DIY: Fun Gifts For Anyone. This is probably the most fun project I've done...I just kept laughing while it was all coming together.
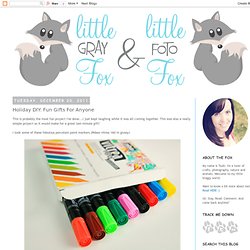
This was also a really simple project so it would make for a great last-minute gift! I took some of these fabulous porcelain paint markers (Pebeo vitrea 160 in glossy) And drew funny faces and mustaches on some dollar store mugs.Let the paint dry for 24 hours then bake in the oven according to the marker's directions. Candy Cane Marbled Monogram Ornaments. I recently saw a marbleized nail technique on Pinterest and was so inspired to try it.
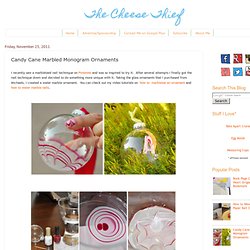
After several attempts I finally got the nail technique down and decided to do something more unique with it. Finger Knitting How-to. You know how I just wrote about how I like getting a handmade gift more than just about anything.

Well, this is anything. Sitting on the couch on a lazy Sunday, knitting with my kids . . . that beats gift-getting for sure. Loose Leaf Tea? Make Your Own Tea Bags! Like many of you, I LOVE loose leaf tea.

However, I'm always looking for cute and creative solutions to use my tea. These D.I.Y. tea bags are super cute. I think they would make amazing gifts! Here's how you can make your own... Supplies needed: Coffee filters, Scissors, Sewing machine, Loose tea leaves, Stapler, Embroidery thread, Paper for tags (construction paper, old book pages, etc.), Optional: Spices (pumpkin pie spice, cinnamon, ground ginger, etc.) Step 1 - Cut two coffee filters into a rectangle. Step 2 - Stitch the filters together on three sides, leaving one of the smaller sides open. Step 3 - Fill the teabag with the loose tea leaves. Step 4 - Stitch the top of the tea bag closed. Step 5 - Fold down the corners, placing a 3-4in. piece of embroidery thread under one of the flaps. Step 6 - Fold the tip of the tea bag down, and use a stapler to hold it shut.
Step 7 - Cut paper tags and glue, stitch, or staple them to the ends of your embroidery thread. Enameled Vintage Keys DIY. When I was a kid my mom used red fingernail polish and painted the first initial of our last name to identify things we had, especially on stuff we took camping or our Tupperware and Corningware dishes.

There was always a big red initial on the back, lest someone got confused that the Corningware dish with potato salad at the potluck or the cooler filled with beer at the picnic was OURS not theirs! She also used fingernail polish to identify keys. It made it easier to know what the keys were for. All keys seem to look the same nowadays. DIY Wrap Headphones. I got the idea to make these from the DIY wrap bracelets I made a little while ago.
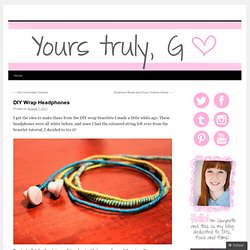
These headphones were all white before, and since I had the coloured string left over from the bracelet tutorial, I decided to try it! To start off, take the string and tie a knot with it around one of the wires. You can use one colour, or as many colours as you want. Once you have the knot set, start wrapping. Make sure you have a lot of string because you don’t want to run out halfway down the wire and have to tie another knot and start over again. If you want, you can add beads along the way to jazz it up a bit. Charlotte Hupfield Ceramics. Thank you for visiting my post about DIY Tin Lanterns… You may also be interested in my individually handmade ceramic homewares, accessories and gifts in my shop – take a look!
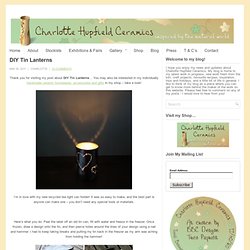
I’m in love with my new recycled tea light can holder! It was so easy to make, and the best part is anyone can make one – you don’t need any special tools or materials. Here’s what you do: Peel the label off an old tin can, fill with water and freeze in the freezer. Once frozen, draw a design onto the tin, and then pierce holes around the lines of your design using a nail and hammer. I had to keep taking breaks and putting my tin back in the freezer as my arm was aching from holding the hammer!