
DIY Hand Lettered Gift Wrap. Today’s DIY post comes to us from Aimee Strickland of madeinthefold, where she offers beautiful hand lettered wedding invitations and stationery.

You can also check out her blog for more daily inspiration! Supplies - kraft gift box (found at your local craft store)roll of kraft papertwill tape (found in the fabric section of your craft store)assorted tags or mini gift bagspencileraserwhite gel pen (i used a white gelly roll pen) or black fine point pentext printed in font of choice (optional) Step 1: Assemble your box. Depending on the box, this should require a simple amount of folding and tucking. Step 2: Once you have your phrase scripted on top of the box, you can trace your pencil outline with the white gel pen, making the phrase as thick as desired. Step 3: Fill box with a gift, candy, or goodies to give to your recipient! {Photos by madeinthefold for The Sweetest Occasion.} Silk-Dyed Eggs {aka TIE-Dyed!} I posted this tutorial a few years ago and it has become somewhat of a tradition to bring it back every year!
One of our family Easter traditions is dying eggs with pieces of silk. I saw a cute lady show Martha how to do it a few years ago and I ran upstairs right then to steal a tie! It’s way cooler than those cups of neon liquid that end up all over your clothes, your furniture and your hands plus it gives you an excuse to rid a man’s closet of ugly ties. Here’s the run-down: You need 100% silk for this to work. {Valentines day} pixel-y popup card. I‘ve been scratching my head trying to come up with a card for my hubby {AKA the non-romantic type}.
I finally decided to make this pixely popup heart card! They are really minimal (which I love) and take about 20 minutes to make (that includes the card, insert and envelope). You can even make some pixely confetti to put inside the card (if you are a big kid like me!). Full instructions and printable templates below! Art 1. Optical Design. DIY Enlarged Photo Art « I’ve always struggled with how to fill large walls, and I swear that how all the walls in our house are…large and empty!

I have a gallery wall going in the entry, but unfortunately there can only be so many gallery walls in one house. Enlarged photographs are a great way to go, but I wanted something with a little more interest. So here is what I came up with! I started with a photograph that I loved. This was taken when Jesse and I drove up the Sunshine Coast of British Columbia, and spent an afternoon kayaking up the inlet. Once they were all laid out, I got my large piece of foam core. Once all the photographs were pinned to the foam core, I held it up vertical and pushed them all the way.
Once they were all clipped down, I held it upright again and pushed the pins from the back so that the clipped ends were flush with the backside, and the photographs were sticking up about 1/4 inch off of the foam core. Then I carefully pried off the back section, so the edges were only paper thin. DIY Braided Bead Bracelet - Honestly WTF. It’s been awhile since our last bracelet DIY.

I don’t know about you, but our wrists have been begging for another colorful addition for months now. So after playing with some materials that were already on hand, we’ve created a tutorial for a braided bead bracelet, which is a not so distant cousin of the hex nut and wrap bracelet. Because honestly, you can never have too many . . .
You’ll need: Cut the waxed linen cord into a 26″ and 19″ piece. Tie a knot about half an inch down from the loops. Start braiding the strands. Push the bead against the base of the braid, and cross the left strand over the middle. Keep a finger at the base of the braid, holding the beads in their place and keeping the braid tight. Finish the bracelet with another inch of braided cord, measuring it against the wrist. Thread on a two hole button – two strands through one hole and one strand through another. Trim the end. Your bracelet is finished! Project: Scrap-Happy Needlebook. By Jessica Wilson I’m a big fan of needlebooks.
Always delighted to receive a handmade one in the post, I fill it with needles, pins, and safety pins, use it for a week, then tuck it somewhere “safe.” Of course I rarely remember where these safe stashes are, but do I plan better and place it in the metal drawer designated for sewing accoutrements? No. You’d think I would have learned by now. Not only am I a big fan of receiving needlebooks, I am quite fond of making them as well. Materials Fabric and lace scraps Fabric scissors 4″ x 8″ manila folder or cardstockGlue stick Needle and thread Sewing machine 4″ x 8″ piece of felt Pins Needles Button Embroidery thread.
Beautiful photo books and book printing. Make your own book. Craft DIY Projects, Patterns, How-tos, Fashion, Recipes @ Craftzine.com - Felting, Sewing, Knitting, Crocheting, Home & More. How to Screen Print T-Shirts. Lay out the t-shirt on an entirely flat surface.
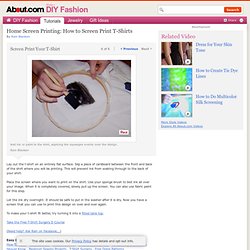
Slip a piece of cardboard between the front and back of the shirt where you will be printing. This will prevent ink from soaking through to the back of your shirt. Place the screen where you want to print on the shirt. Use your sponge brush to blot ink all over your image. When it is completely covered, slowly pull up the screen. Let the ink dry overnight. Learn Folding Techniques for Tie Dye.