

LittleQuack's Crafts: Accordion Addiction. It's been a while since I posted anything but that doesn't mean I haven't been doing anything.
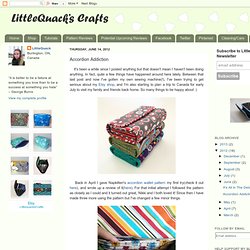
In fact, quite a few things have happened around here lately. Between that last post and now I've gotten my own sewing machine(!) , I've been trying to get serious about my Etsy shop, and I'm also starting to plan a trip to Canada for early July to visit my family and friends back home. So many things to be happy about :) Back in April I gave Napkitten's accordion wallet pattern my first try(check it out here), and wrote up a review of it(here). Behind the card slots there is a thin pocket that is the perfect depth for paper currency. Another thing I changed was the idea of the loop on the side to allow a wristlet strap to be attached. I do a few more things my own way but they are just in the construction and are mainly to make things a little easier or a little quicker for me while sewing. Thanks for looking, and all three of these wallets are available in my Etsy shop.
Does PINTEREST KNOW EVERYTHING? If you haven't read about why we do these posts, check out the explanation in our first "Does Pinterest Know Everything?
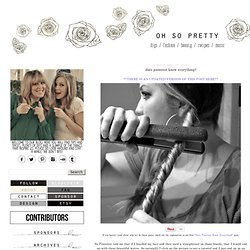
" post. So Pinterest told me that if I braided my hair and then used a straightener on those braids, that I would end up with these beautiful waves. So naturally I click on the picture to see a tutorial and I just end up on an image. No tutorial. But I'm thinking... Here is my hair before, completely straight. Split all of your hair into two parts and then braid each part and secure with a hair tie of your choosing. Take one of the braids and twist it tightly away from your face. Place the straightener around the twisted braid and instead of just pulling the straightener down...
Twist the straightener in the same direction the hair is twisted. This is what the braids looked like after being "straightened. " When your hair has completely cooled, pull out your hair ties and run your fingers through the braids to release them. The DIY: "DIP" DYED HAIR. 78K+ *DISCLAIMER- I AM NOT A PROFESSIONAL COSMETOLOGIST/HAIRDRESSER/COLORIST.
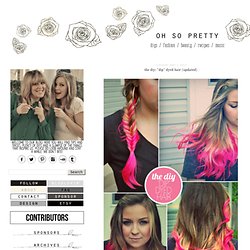
THIS WAS JUST AN EXPERIMENT GONE RIGHT.* So if you saw our Candy Hair Color post, you know that Casey and I are pretty obsessed with fun-colored-hair right now. It's not a reasonable obsession but hey, are any obsessions really that reasonable? I decided to take matters into my own hands and give my hair some change. By the way, I really don't recommend trying this at home! How To Style a Hair Bow. Love bows?
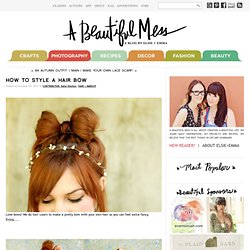
We do too! Learn to make a pretty bow with your own hair so you can feel extra fancy. Enjoy..... 1. Start with a loose pony tail. 2-3. Here's a second option. Thanks so much Katie! Utility Cord Bangle. ANNOUNCEMENT: A select number of these bracelets are available for sale here.
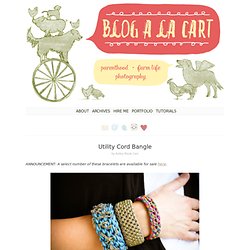
I know, I know. ENOUGH ALREADY WITH THE UTILITY CORD AND BRACELETS! I couldn’t resist! I had extra utility cord lying around from last week’s project, and was highly inspired by these Orly Genger bangles. Thus, today’s latest DIY accessory. Materials: Utility cord Crochet hook (sized according to utility cord thickness) Metal chain (optional) Directions: 1. 2. 3. 4. 5. 6. 7. Photos: Courtesy of Ashley Weeks Cart.
Partial French Braid with Cascading Hair ~ Tutorialalso known as the "Waterfall Braid". I’m not the originator of this hair style but I’ve gotten so many requests for it, I thought I’d give it a go for you.
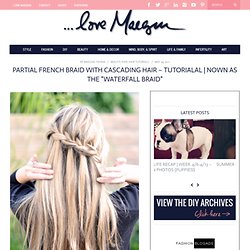
I don’t know what it’s called either so I haven’t researched it and/or found any other tutorials for it …thus, this is my version of it, and I’ve dubbed it the Partial French Braid w/ Cascading Hair. The photos I’ve seen online show the braid a little more straight across the back of the head and mine sort of braids at an angle, similar to my side/low french braid up-do. I’m sure this is 100% easier to do on someone else’s hair than your own but it goes pretty quickly once you get the hang of it …I mean, it’s my shortest hair video tutorial to date.
That’s gotta mean something, right Enjoy. Note: Apologies in advance for the yelling of “NOOOO” towards the end, where I momentarily fear I’m going to lose my entire braid and have to start over. Have Fun!