
&jones design company - StumbleUpon. Welcome to flower week – five days of simple and delightful flower projects.

I could probably do three weeks of flowers because there are so many different ways to create them, but I’ve limited it to five of my current favorites. Before we get started, let me make a few disclaimers: 1. I find inspiration for projects all over the place {online, in shops, in magazines}, then figure out how to re-create them on my own. Each of these projects are my adaptation of something I’ve seen elsewhere. 2. 3. Okay, so let’s begin. Here’s what you’ll need: :: paper {either cover or text weight} :: florist wire :: scissors, pencil, glue gun STEP ONE: cut irregular circle This circle is approximately 8 inches, but you can do any size you wish. STEP TWO: cut spiral Start at the outside edge and cut in a spiral fashion to the center. I like a sort of bumpy shape so that the petals end up a bit irregular If you aren’t so sure about your cutting skills, feel free to draw your spiral before cutting.
Song Lyric Wall Art / D.I.Y. Project - A Beautiful Mess - StumbleUpon. A couple weeks ago, I found a paint-by-number at an unbeatable price.
I can't pass these things up even though I already owned this particular design. I thought that I could maybe use it to make a fun D.I.Y., but my new rule is that all thrifts that I purchase with the intent of restyling need to get done right away. I have way too many half finished projects in my life. With that little bit of motivation I came up with a fun D.I.Y. to display some of my favorite song lyrcis in our newlywed home. Enjoy.... ORANGE RIND VOTIVES - StumbleUpon. Oh my! handmade goodness - StumbleUpon. By Michelle Vackar, Modern Handmade Child One of our favorite outside activities at our home is drawing with chalk on the driveway.

You can play hopscotch, four-square, and of course draw and create silly stories. My daughters and I were talking one day as we played hopscotch about how to make chalk and I thought to myself, let’s try it! It ended up being quite a lot of fun. What you will need: • Toilet paper or paper towel tubes • Scissors • Duct tape • Wax paper • Small bucket or disposable container to make the recipe • ¾ cup of warm water • 1 ½ cups Plaster of Paris • 2-3 tablespoons of tempera paint • Paper bag or a “mess mat” ** we made six tubes of chalk – we simply doubled the above recipe Step 1: If you are using paper towel tubes, cut each tube in half, so it is roughly the length of a toilet paper roll tube. Step 2: Cover one end of each tube with duct table to hold the contents within.
Step 3: Cut as many pieces of wax paper as you have tubes. Fall Pumpkin Decorations Made from Recycled Books. Have a bunch of old books laying around?
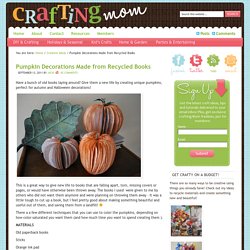
Give them a new life by creating unique pumpkins, perfect for autumn and Halloween decorations! This is a great way to give new life to books that are falling apart, torn, missing covers or pages, or would have otherwise been thrown away. The books I used were given to me by others who did not want them anymore and were planning on throwing them away – it was a little tough to cut up a book, but I feel pretty good about making something beautiful and useful out of them, and saving them from a landfill! There a a few different techniques that you can use to color the pumpkins, depending on how color-saturated you want them (and how much time you want to spend creating them ).
Old paperback books Sticks Orange ink pad Orange acrylic paint Large mixing bowl Exacto knife Hot glue & glue gun. Watermark Tee by Sweet Verbana - StumbleUpon. Hello U-Create readers!
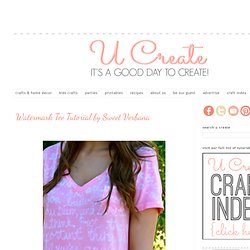
I am so excited to be guest posting here today. It just so happens to be my first guest post and I'm still a little shocked that it's here at Ucreate, one of my favorite blogs! A little bit about me.. I'm from a little town called Keller, Texas. I'm a junior at Texas A&M University (whoop!). I'm working on my education degree and expect to be an elementary school teacher in just two short years. When I'm not busy studying for classes, I love to sew. I just started blogging in May and have already met all kinds of wonderful women, I hope you'll stop by and say hi too!
Watermark Tee Tutorial What I love about this project is that it's completely customizable. Materials: Elmer's Blue Gel Glue (it must be the blue gel, white won't work) Fabric Dye (RIT is my tried and true brand) A white cotton Tee, Tank, Dress etc. Fun Family Crafts. Recycle Those Bits of Crayons into Fun New Shapes!