
DIY Picture Tiles - You Will Never Buy a Photo Frame Again. Lately I’ve been having this huge urge to decorate the house.

This is big news. I do not decorate. Arguably, one of the reasons why is because I. absolutely. hate. to. buy. mass. produced. decor. (Also, I can’t ever remember if pink and purple go together or not.) Anyway, this extends to photo frames. Nope. Long story short, I discovered this method of transferring my photos cheaply, quickly, and beautifully to something uncommon and unique. Tiles. The only thing that’s not particularly crunchy about this is that it uses Modge Podge or similar (and I’m not sure what’s in Modge Podge). It’s just grainy and doesn’t dry clearly. Boo. BUT, if you can overlook that one minor issue, I think you’ll love this. And it will be glorious. Here’s how you do it. First, you need to go to Home Depot, Lowes, or something like it. (FYI, I found that Lowes prices on tiles were cheaper than Home Depot. I like the stone tiles, because they have texture.
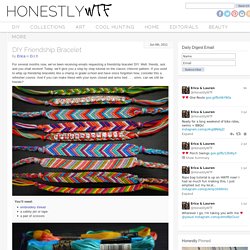
So you pick out your tiles in the sizes you want. Go go go! How to Make a Hollow Book. Simple Ideas That Are Borderline Crafty (38 Pics) DIY Friendship Bracelet. For several months now, we’ve been receiving emails requesting a friendship bracelet DIY.

Well, friends, ask and you shall receive! Today, we’ll give you a step by step tutorial on the classic chevron pattern. If you used to whip up friendship bracelets like a champ in grade school and have since forgotten how, consider this a refresher course. And if you can make these with your eyes closed and arms tied . . . umm, can we still be friends? You’ll need:embroidery threada safety pin or tapea pair of scissors Start by cutting several strands of embroidery thread at about 24 inches each.
Start on the left side with the outermost color (shown here in red) and make a forward knot by creating a 4-shape over the 2nd color, loop it under and back through the opening. Pull up and to the right to tighten. Now pick up the outermost color on the right side (show here in red) and make a backward knot, creating a reverse 4-shape over the 2nd color, loop it under and back through the opening.
Kids. Art. How to Make Clothing Buttons from Shrink Plastic… This tutorial is an old one of mine that’s too good not to share again.

Since posting the first time, I’ve had lots of questions about these buttons which will hopefully be answered in this revised post. Equipment Some handy notes: 1. The buttons. Single hole, hole punch (like this one here). 2. 3. Okay.. lets get started! Tracing tips: You can use either coloured pencils or permanent pens. Words must be writted backwards in order to be readable. Shrinking the buttons: To shrink the buttons, you can use an oven or a heat gun (the kind used for embellishing). After the buttons have twisted and twirled, and are LYING FLAT, it’s time to take them out. Note: If the skrinking is taking too long, you may need to turn your oven up. Here’s a short little stop-motion to make sure you’ve got the gist of how easy this is! Shrink Paper {here} Circle Punch {here} Hole punch {here} Pens {here} Update: I’ve made a video to show how to shrink the buttons using a craft embellishment heat gun.
Kimanh. No thanks on helping you with life!