
How to Make Clothing Buttons from Shrink Plastic&8230;. This tutorial is an old one of mine that’s too good not to share again.

Since posting the first time, I’ve had lots of questions about these buttons which will hopefully be answered in this revised post. Equipment Some handy notes: 1. The buttons. Single hole, hole punch (like this one here). 2. 3. Okay.. lets get started! Tracing tips: You can use either coloured pencils or permanent pens. Words must be writted backwards in order to be readable. Shrinking the buttons: To shrink the buttons, you can use an oven or a heat gun (the kind used for embellishing). After the buttons have twisted and twirled, and are LYING FLAT, it’s time to take them out. Note: If the skrinking is taking too long, you may need to turn your oven up. Here’s a short little stop-motion to make sure you’ve got the gist of how easy this is! Shrink Paper {here} Circle Punch {here} Hole punch {here} Pens {here} Update: I’ve made a video to show how to shrink the buttons using a craft embellishment heat gun. Kimanh. Recycling T-Shirts.
So way way back, in June, I wrote this Studio Organization post, about starting the process of organizing my studio by cleaning out the closet full of junk.

Well, it's September and...let's just say the closet is a work in progress. Some of the things that are taking up space in the closet are shirts that I never wear anymore. I realized I could repurpose them into something else! Here are some tutorials for recycling shirts: Check out these t-shirt scarves! Create cute little bows for accessories or packaging with this tutorial. Gorgeous ruffled pillow tutorial here. Looks like I have a lot of projects ahead of me to keep me from cleaning out my closet! Puff Stitch Scarf. My mom absolutely loved the beautiful puff stitches of the crocheted slouchy beanies I made for myself and my brother and sister.
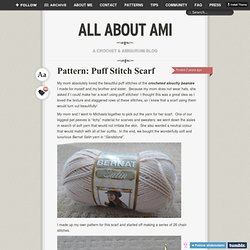
Because my mom does not wear hats, she asked if I could make her a scarf using puff stitches! I thought this was a great idea as I loved the texture and staggered rows of these stitches, so I knew that a scarf using them would turn out beautifully! My mom and I went to Michaels together to pick out the yarn for her scarf. One of our biggest pet peeves is “itchy” material for scarves and sweaters: we went down the aisles in search of soft yarn that would not irritate the skin. She also wanted a neutral colour that would match with all of her outfits. I made up my own pattern for this scarf and started off making a series of 26 chain stitches. Next I worked 12 puff stitches in the first row with ch-1’s in between. Then I worked twelve puff stitches in the chain-1 spaces.
I continued with this simple pattern for a couple more rows… And then many more rows… Materials: