
Webssearches. Put your stuff up in the air! Hanging DIY ideas & tutorials. Posted by ScrapHacker.com on onsdag, juni 27, 2012 · 9 Comments To heck with both feet on the ground!
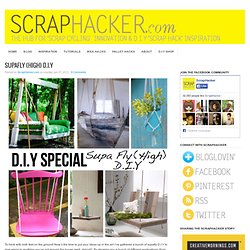
Now’s the time to put your ideas up in the air! I’ve gathered a bunch of supafly D.I.Y to give wings to anything you’ve got around the house (well, almost!). By showing you a bunch of different applications (from chunky sofas to delicate D.I.Y hanging planters) I hope you’ll all find a little something to get your DIY juices flowin’ in the mix – Enjoy! Pics via here The hanging desk is not only cool looking but an awesome space saver! Pics via GreenWeddingShoes, CapitolRomance & Etsy. Φτιάξε τα δικά σου έθνικ σκουλαρίκια. 18/8/2012 10:28:45 πμ Τα κοσμήματα της Αλεξάνδρας Μαρίνου είναι ένα μυκονιάτικο must είτε για το πρωί στην παραλία του Super Paradise, είτε για το βράδυ στο «σκαλάκι» στο Ματογιάννι.

Ακολουθούμε τα tips για να φτιάξουμε τα δικά μας. Πως θα φτιάξεις έθνικ κρεμαστά φτεράκια- σκουλαρίκια: How to Make an Origami Pig: 16 steps (with pictures) Edit Article Edited by Flickety, Krystle, Chris Hadley, Denis Camargo and 25 others There are plenty of wild or exotic animals you can fold from a sheet of paper, such as a jumping frog, flapping bird and hopping rabbit, but what if you want to make an origami farm?
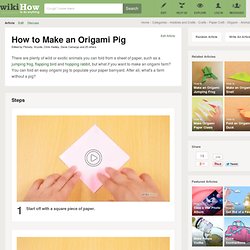
You can fold an easy origami pig to populate your paper barnyard. After all, what's a farm without a pig? Ad Steps an Origami Pig Step 1.360p.mp4 00:00 00:02 00:02 spaceplay / pauseescstopffullscreenshift + ←→slower / faster (latest Chrome and Safari)←→seek . seek to previous 12…6 seek to 10%, 20%, …60% 1Start off with a square piece of paper. Tips. Big Doodle. Big sharpie doodle!
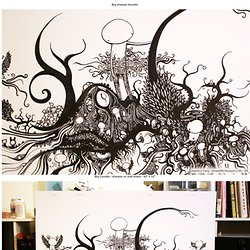
Big Doodle - sharpie on mat board - 40" x 32" Artwork © Lawrence Yang 2009 my blog | my site | purchase inquiries. Interior Design Ideas, Photos of Home Design & Decorating Pictures. Interior Design Ideas – Designer Furniture and Home Accessories - Dering Hall. A Crafty Way To Transform Your Home. Trendy crafts for your home. DIY Macrame Bracelet. Growing up by the beach in Southern California, the ability to knot a macrame bracelet was practically a right of passage.

Although those days are long behind us, we’ve never forgotten the ever-so-simple square knot technique. This time, however, we’re replacing hemp and wooden beads for more updated elements like colorful nylon cord and glossy metal charms. Happy knotting! You’ll need: Start by cutting the knotting cord into two 30 inch, two 20 inch and one 10 inch lengths. Center the 30 inch cord under the two middle strands. Pull tightly and slide the knot up to the top. Finish the 2nd half of the square knot by folding the left cord over the middle strands and under the right cord. Pull tightly and repeat the steps – left, right, left, right . . . To finish the knots, thread one of the cords onto a needle and sew up the center of 3-4 knots along the backside. Repeat the same step on the other cord. After sewing up both knotting cords, trim away any excess.
DIY Braided Bead Bracelet. It’s been awhile since our last bracelet DIY.

I don’t know about you, but our wrists have been begging for another colorful addition for months now. So after playing with some materials that were already on hand, we’ve created a tutorial for a braided bead bracelet, which is a not so distant cousin of the hex nut and wrap bracelet. Because honestly, you can never have too many . . . You’ll need: Cut the waxed linen cord into a 26″ and 19″ piece. Tie a knot about half an inch down from the loops. Start braiding the strands. Push the bead against the base of the braid, and cross the left strand over the middle. Keep a finger at the base of the braid, holding the beads in their place and keeping the braid tight. Finish the bracelet with another inch of braided cord, measuring it against the wrist. How to Make A Decorative Chrysanthemum Mirror. Chrysanthemums are some of my favorite flowers.
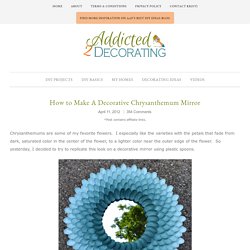
I especially like the varieties with the petals that fade from dark, saturated color in the center of the flower, to a lighter color near the outer edge of the flower. So yesterday, I decided to try to replicate this look on a decorative mirror using plastic spoons. So obviously it doesn’t look exactly like a chrysanthemum, but I think it’s pretty good! What do you think? I had fun with this project! First, I bought six packages of 48 plastic spoons, and I cut the handles off of all of them. Next, I was in the mood to craft…not to use power tools. But here’s what I did. Then I flipped it over, with the spoon handles on the bottom, and I covered the gap with thick paper (almost like cardstock) using hot glue to attach it. Home Decor- Home Decorating Ideas- elledecor.com.