
DIY: Cape. Red Riding Hood Cape Pattern. Cowl Capelet Free Pattern. The Audrey Cape Tutorial. This tutorial is for personal use only.

Thank you. These capes are one of the girls' favorite things that we have yet made. I am not kidding when I say that this cape comes out everyday....and I won't let it be worn to school yet (it's still in the mid 80's here---and apparently I am a mean mom) so someone is waiting for the day that it will finally be cool enough that she can wear it to school. But I am glad that it is a keeper, because it was easy and cute. Here is the thing about this cape.....and I know I say this often on our blog but you are all going to faint at how easy this pattern is. All it is.....is a BASIC CIRCLE SKIRT! One of my favorite things is to take a super simple pattern and make it into something else. Here is what you need: One word of advice: This was a thrifting challenge, so I ended up making the linings of these capes from regular cotton fabric.
Also, I made two capes. Big Girl Cape Tutorial *You should work on the folded edges....and not the selveges. Make dress from mens shirt. *DIY* Kragenketten - Bubikragen - Peter Pan Collar - 3 Varianten. Schnittmuster und mehr. Galaxy Print. Hey meine Lieben!

Es ist wieder Zeit für eine DIY Idee von eurem Minipu Galaxy Prints finde ich einfach nur supercool und war schon drauf und dran mir so eine Leggins, oder ein T-shirt zu bestellen! Aber: gibt's leider nur von teuren Markenshops und darauf hatte ich absolut keine Lust. Dann habe ich mir ein paar Tutorials auf Youtube angesehen, aber keiner hat mir so richtig zugesagt.
Hab ich mir gedacht; ich mach einfach meinen eigenen und hier kommt er: Du brauchst: 1 Flasche Bleichmittel (dm ca. 2€), eine kleine Sprühflasche (nimm einfach zum beispiel ein leere Hygienesprayflasche oder so, es sollte bloß einen feinen Zerstäuber haben und bevor du es mit Bleiche füllst müssen alle Rückstände des alten Inhaltes entfernt sein), Textilfarben in Blau, Weiß, Schwarz und Violett, kleine Schwämmchen, ein Pinsel, ein paar Handschuhe, und natürlich ein schwarzes Shirt etc. Los geht's: Mache das ganze am besten draussen, also auf dem Balkon oder im Garten, weil die Bleiche echt unangenehm riecht. DIY Peter Pan Collar. We almost lost our marbles when we first spotted these scalloped white Louis Vuitton collars on the runway.
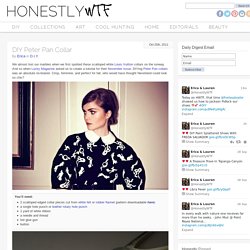
And so when Lucky Magazine asked us to create a tutorial for their November issue, DIYing Peter Pan collars was an absolute no-brainer. Crisp, feminine, and perfect for fall, who would have thought Neverland could look so chic? You’ll need:2 scalloped edged collar pieces cut from white felt or rubber flannel (pattern downloadable here)a single hole punch or leather rotary hole punch1 yard of white ribbona needle and threadhot glue gunbutton Using the pattern template, cut out the two collar pieces. Create small holes between each scallop, using the hole punch. DIY Collar Tips. You probably have guessed by now that we have a major soft spot for almost all things western . . . bolos, cowboy boots and the like.
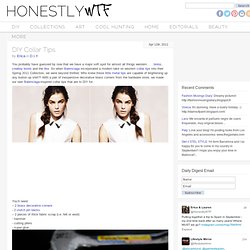
So when Balenciaga incorporated a modern take on western collar tips into their Spring 2011 Collection, we were beyond thrilled. Who knew these little metal tips are capable of brightening up any button up shirt?! DIY Sequin Collar - Inspiration & Links to 10 Awesome DIY Tutorials. Posted by ScrapHacker.com on torsdag, mars 8, 2012 · 5 Comments Today is International Womens Day…today is also the day of the H&M and Marni designer collaboration global launch.

I say celebrate girl power and Marni by letting the collection inspire some D.I.Y action. There are lots of goodies among the Marni pieces, a personal favorite is the Sequin Peter Pan collar… It so happens that collars have been a popular D.I.Y project among crafty online DIY fashionistas for quite a while now so embrace diversity and tap into the inspiration from the line-up of no less than 10 D.I.Y collar tutorials from around the web, all ready to help you launch your very own D.I.Y collar project – Enjoy!
Gold Leather Collar from aPair&aSpare – TUTORIAL HERE. DIY No Knit Scarf. We love Rike Feurstein.
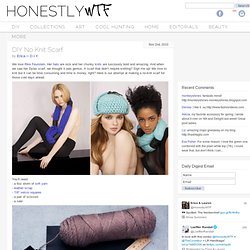
Her hats are sick and her chunky knits are lusciously bold and amazing. And when we saw her Dylan scarf, we thought it was genius. A scarf that didn’t require knitting? DIY Lace Shorts. A few weeks ago, our friend Katie showed up wearing the cutest lace trimmed shorts.
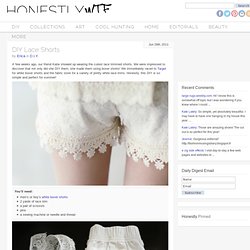
We were impressed to discover that not only did she DIY them, she made them using boxer shorts! We immediately raced to Target for white boxer shorts and the fabric store for a variety of pretty white lace trims. DIY Studded Sneakers. Studding sneakers has been on our DIY to-do list for awhile now.
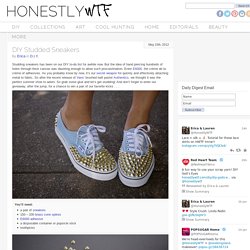
But the idea of hand piercing hundreds of holes through thick canvas was daunting enough to allow such procrastination. Enter E6000, the crème de la crème of adhesives. As you probably know by now, it’s our secret weapon for quickly and effectively attaching metal to fabric. So after the recent release of Vans‘ brushed twill pastel Authentics, we thought it was the perfect summer shoe to adorn. DIY Color Block Moccasins. Our love of Minnatonka moccasins and obsession with Balenciaga‘s Fall 2010 shoes made this DIY we created for Foam Magazine a no brainer.
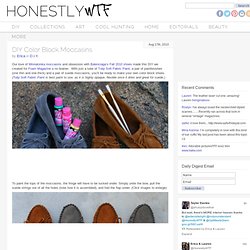
With just a tube of Tulip Soft Fabric Paint, a pair of paintbrushes (one thin and one thick) and a pair of suede moccasins, you’ll be ready to make your own color block shoes. (Tulip Soft Fabric Paint is best paint to use, as it is highly opaque, flexible once it dries and great for suede.) To paint the tops of the moccasins, the fringe will have to be tucked under. Simply untie the bow, pull the suede strings out of all the holes (note how it is assembled), and fold the flap under.
(Click images to enlarge) Start by making a test patch near one of the holes, as this part will be covered and it’s a great way to get comfortable with your brush and paint. Let dry for at least 2 hours and reassemble the fringe to reveal your new pair of SICK color block mocs! (images by Honestly…WTF) DIY Ombré Denim. Dip dyed ombré denim has been popping up here and there and not only do we love the look, it’s super easy to do yourself!
We’ve combined Tory Burch‘s dip dyed jeans and Miss Unkon‘s ombré 501s as inspiration for a pink infused DIY that could be done in a jiffy. Start by rinsing your shorts with water. A bottle of RIT liquid dye amounts to 1 cup; you’ll dye your shorts with the lightest shade first and darkest shade last. Pour 1/3 of the cup of dye into 2 gallons of hot water and mix. When dyeing dark denim, you will want to use less water for a darker dye. Ring out the excess dye and add another 1/3 cup of dye to your bucket. DIY Bleach Tie Dye. Last summer, we were obsessed with shibori indigo tie dying.

No, really . . . we just about dyed anything white in sight. So when Free People asked us to include a DIY in their guest blogger series, we knew a new tie dye project was absolutely in order. And as the weather is beginning to warm up, what better time than now to start experimenting with reverse tie dye using bleach! Black tees and tops: watch out!
To make a grid-like pattern, fold the shirt like an accordion and bind it between two pieces of wood or other flat shaped objects. Before you start bleaching, make sure you are wearing gloves and working outdoors or in a well ventilated area. The rusty brown color will slowly fade into a beautiful lighter shade as it begins to set. DIY Shibori. Today marks HonestlyWTF’s four year anniversary. Four years! To celebrate, we’re revisiting the very first tutorial we ever featured on the site: shibori tie dye.