
Meubles palettes. Pour meubler votre intérieur à moindre prix, penser à recycler les palettes en bois.

Avec un matelas futon, quelques coussins et des roulettes, on les transforme facilement en joli banquette. En les superposant, on en fait des meubles de jardins plutôt sympa ! On peut aussi désolidariser les lattes patinées par le temps et les réutiliser pour faire de jolis têtes de lits par exemple. Textilfarbe zum sprühen für Polstermöbel. Textilfarbe zum sprühen für Polstermöbel Polstersprühfarbe in der Dose zum umfärben für Polster aller Art.250ml (8 Fl Oz )Eine Dose reicht für ca. 1-2 qm Upholstery Fabric Paint Spray lässt Ihre alten Möbel in neuen Farben erstrahlen.Sie können es zum einfärben von Sofas, Stühlen, Kissen, Autositzen, Autoinnenräume, Teppichen, Gardinen, Decken, Sessel, Badematten, Hantücher uvw.

Upholstery Spray ist eine nicht giftige, nicht gefährliche, nicht entflammbare Stoff-Sprühfarbe, speziell entwickelt für den Gebrauch auf saugfähigen Materialien. Upholstery Paint verwandelt Ihre alten Lieblingsmöbel, Teppiche, Vorhänge, sämtliche Polstermöbel oder die Innenausstattung Ihres Autos einfach und schnell. Upholstery Paint führt nach dem Trocknen zu einem dauerhaften Ergebnis. Ihre Möbel sind nicht mehr die Neuesten? Upholstery Spray ist die Lösung. Welcher Stoff ist geeignet? Das Upholstery-Spray müssen in den Stoff einziehen können um den Stoff umzufärben. Frau Liebe : Diamonds are eben nicht zwangsläufig a girls best friend. Genau was ich mir zu Weihnachten gewünscht habe: 1000 fette Würmer in Kuhscheiße.Malte weiß, wie man mich glücklich macht.

Diese Würmer sind echte Hochleistungskompostierer und wohnen jetzt in unserer Küche. Nicht freilaufend, sondern in einer eigens für sie zusammengebastelten Wurmkiste.Die Würmer waren ein frühes Weihnachtsgeschenk, weil wir nicht in Biomüll ersticken wollten.Erst wollte ich einen fertigen Wurmkomposter kaufen, aber €140 damit meine Würmer komfortabel kacken können erschien mir dann doch etwas zu heftig.
Nach einiger Recherche und einem Baumarktbesuch hatte ich alles zusammen um die Kiste selber zu bauen.Im Internet gibt es viele verschiedene Anleitungen (einfach mal "worm bin" suchen). Ich bin keine Expertin aber nach ein paar Wochen erfreuen sich meine Würmer noch bester Gesundheit und kompostieren nun so still vor sich hin. Eine Wurmkiste zu bauen dauert nicht länger als eine halbe Stunde: How to make 3D paper ball ornaments.
I love 3D paper things. Love. Stellated dodecahedrons! Hello there.
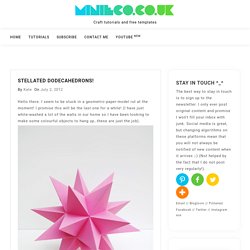
I seem to be stuck in a geometric-paper-model rut at the moment! I promise this will be the last one for a while! Invisible Bookshelves. You've all seen these invisible bookshelves, right?
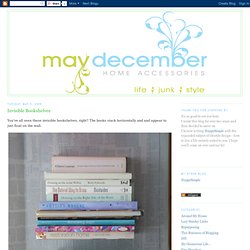
The books stack horizontally and and appear to just float on the wall. They look really cool, but they can cost a bundle. Fortunately, they're easy and cheap to make from simple L-brackets. 25 Awesome DIY Ideas For Bookshelves. DIY Bookshelves. DIY Rotating Goal List. How to make easy paint chip wall art. If your apartment needs some decorating, you can't draw, and you're broke, consider chopping up paint chips. These are Glidden swatches from Home Depot made into a simple triangle pattern.
I put it inside a mat and frame I already had, and it looks fairly respectable. Put anything inside a mat and frame and it will look respectable. Heck, you could frame a crumpled-up Kleenex and somebody will assume it's a very special piece of modern art. Bloom tea light cover. DIY Egg Carton Recycling Bin. You Will Need x4 large egg cartons Hot Glue Gun A3 Card stock (colour is your choice) Scissors 1.

Warm up the glue gun, when it is ready to use, piece your first two cartons together, there should be 4 points where they are touching firmly, Put a dob of Glue on each point, push them together and hold until glue has set. DecoCrush blog déco, idées déco. Dans la boite. En plein grand week-end de mai, et oui, j’ai l’immense chance de faire le pont et d’avoir ainsi 4 bons jours de repos à moi !

J’organise donc mon temps entre glandouille, repos, cuisine, balades… J’ai aussi réhabilité mon joli balcon, devenu zone de guerre pendant l’hiver et les grises journées dont nous avons été témoins ces dernières semaines… Puis je me suis dit que ça faisait longtemps que je ne vous avais pas fait de petites sélections DIY… ;) La chose est donc réparée, cela fait un moment que j’accumule des boites de conserves de toute tailles en me disant que je pourrais faire quelque chose de chouette avec… Voici donc ma petite sélection d’idées ^^. Source. Pretty legs. Depuis quelque temps cette tendance me fait de l’oeil et je ne pouvais pas laisser le blog passé à côté… Certaines fois je me dis que je ne vais pas parler de telle ou telle chose parce que vous avez un ordinateur et flânez sur le web aussi !

Mais souvent je me dis que vos n’êtes peut-être pas tous aussi no-life que moi - je plaisante hein je fais des trucs à côté - à passer mon temps sur les blog créa/déco et que du coup je peut, peut-être donner des envies/idées à certains/certaines :) et ça ça me plait plutôt bien ! Ce qui attire mon attention aujourd’hui ? Les pieds de mobiliers peints en différentes couleurs, histoire de donner un côté funky et unique à son canap’ ou au vieux bahut chiné en brocante. → prettypegs ← La marque Suédoise – bah ouais encore… – Prettypegs a sorti une ligne de « pieds » originaux, amusants et personnalisables qui peuvent s’adapter Attention roulement de tambour….. à vos meubles IKEA. → chic cham ← → Chic cham ← → Morning by foley ←
Diy geoball. Rakastan geometrisia muotoja.
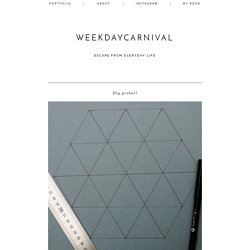
Näiden pienien pallojen sisälle voi synttäreillä tai joulupöydässä kätkeä vaikka karkkia tai sinne voi säilöä omat pienet aarteet. Piirrä vain kuusikulmio ja ruuduta se kolmioilla, taittele, leikkaa, liimaa ja kiinnitä siivekkeet toisiinsa. Tämä icosahedronin muoto on todella monikäyttöinen. Voit tehdä isoja tai pieniä koreja. Kartonki on ehkä helpoin materiaali tähän. Makekind: a guest column by laura parke of a girl who makes. This week I’m sharing a simple, yet somewhat time intensive project.
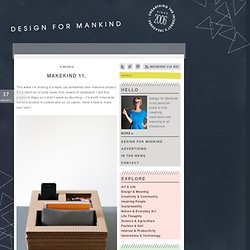
It’s a catch-all of sorts made from sheets of cardboard. I did this project in steps so it didn’t seem so daunting – it’s worth it because the end product is custom and so, so useful. Hartz IV Möbel. Diy / Ping pong balls?! Ombre maybe? crazy fun.