
RaspberryPi: Reading I2C Inputs using C. Accessing Raspberry Pi GPIO pins with Python libraries is popular among hackers & makers.
How about programming languages like C? C gives you flexibility to port code in embedded firmware/driver layer if necessary. That is why I was looking for a C library that exposes Raspberry Pi GPIO pins for application layer. I was specially interested in exploring the I2C pins and found the excellent wiringPi library. In this post, I will show step by step on how I use wiringPi library to read from the I2C interface of a 3-axis Accelerometer+Gyroscope module. Hardware setup: Adafruit's Raspberry Pi Lesson 4. GPIO Setup. The diagram below show the pins on the GPIO connector for a Raspberry Pi Version 1 (which is what existed when this tutorial was released) Version 2 has pin 27 replacing pin 21 but it otherwise the same As well as supplying power (GND, 3.3V and 5V) all the GPIO pins can be used as either digital inputs or outputs.
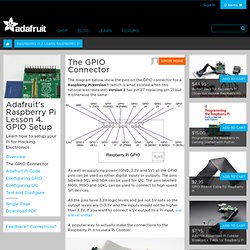
The pins labelled SCL and SDA can be used for I2C. The pins labelled MOSI, MISO and SCKL can be used to connect to high speed SPI devices. All the pins have 3.3V logic levels and are not 5V-safe so the output levels are 0-3.3V and the inputs should not be higher than 3.3V. If you want to connect a 5V output to a Pi input, use a level shifter. Raspberry Pi - Model B, 512MB. Le-raspberry-pi-3 in out. Install RPi.GPIO Python Library. The RPi.GPIO Python library allows you to easily configure and read-write the input/output pins on the Pi’s GPIO header within a Python script.
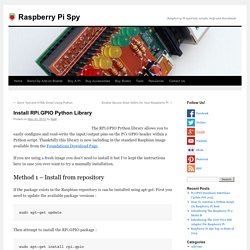
Thankfully this library is now including in the standard Raspbian image available from the Foundations Download Page. If you are using a fresh image you don’t need to install it but I’ve kept the instructions here in case you ever want to try a manually installation. Method 1 – Install from repository. S Raspberry Pi Lesson 11. DS18B20 Temperature Sensing @Raspberry_Pi #raspberrypi. January 29, 2013 AT 8:28 am Adafruit’s Raspberry Pi Lesson 11.

DS18B20 Temperature Sensing @ The Adafruit Learning System. Learning System. GPIO Library. Update: 14th May, 2013 wiringPi version 2 has been released and now has its own website ( to look after it.

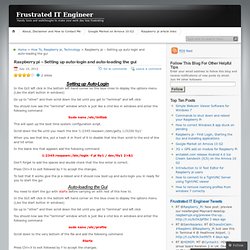
Most of the documentation on the projects site has been copied over to it the new site, but there may still be 1 or 2 pages that are still missing. I’d encourage you to use the new site if possible where there will be a forum and wiki (when I get time to implement them!) WiringPi is an Arduino wiring-like library written in C and released under the GNU LGPLv3 license which is usable from C and C++ and many other languages with suitable wrappers (See below) You may be familiar with the Arduino… Briefly; Arduino is really two things; one is a hardware platform, the other software, and part of the software is a package called Wiring. Raspberry pi – Setting up auto-login and auto-loading the gui. Home > How To, Raspberry pi, Technology > Raspberry pi – Setting up auto-login and auto-loading the gui Setting up Auto-Login In the GUI left click in the bottom left hand corner on the blue cross to display the options menu (Like the start button in windows) Go up to “other” and then scroll down the list until you get to “terminal” and left click You should now see the “terminal” window which is just like a cmd box in windows and enter the following command Sudo nano /etc/inittab This will open up the boot time system configuration script.
Bcm2835: C library for Broadcom BCM 2835 as used in Raspberry Pi. This is a C library for Raspberry Pi (RPi).
It provides access to GPIO and other IO functions on the Broadcom BCM 2835 chip, as used in the RaspberryPi, allowing access to the GPIO pins on the 26 pin IDE plug on the RPi board so you can control and interface with various external devices. It provides functions for reading digital inputs and setting digital outputs, using SPI and I2C, and for accessing the system timers. Pin event detection is supported by polling (interrupts are not supported). It is C++ compatible, and installs as a header file and non-shared library on any Linux-based distro (but clearly is no use except on Raspberry Pi or another board with BCM 2835).
The version of the package that this documentation refers to can be downloaded from You can find the latest version at. Owners of a Raspberry PI, what do you use it for? : AskReddit. Windows Installation. Windows installation is very simple and works on Windows 2000 / XP, Vista and Seven.
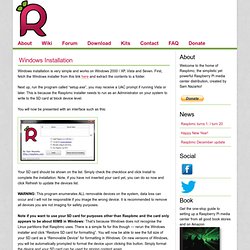
First, fetch the Windows installer from this link here and extract the contents to a folder. Next up, run the program called “setup.exe”, you may receive a UAC prompt if running Vista or later. This is because the Raspbmc installer needs to run as an Administrator on your system to write to the SD card at block device level.
You will now be presented with an interface such as this: Your SD card should be shown on the list. Five Basic Raspberry Pi Projects. At $35, the Raspberry Pi is almost an impulse purchase.

Once its in your hands, its basic nature calls out for it to be used in some great projects. While its always tempting to jump in and build something completely mindblowing, it pays to start with a few easy projects and learn the system before jumping in to the deep end and experiencing frustration. Easy Project Criteria We classified easy, basic Raspberry Pi projects as ones that required a limited amount of programming expertise and required only hardware that might be owned already. We definitely recommend a monitor, keyboard and mouse when working with the Raspberry Pi as it makes things much easier, especially when just starting out. 1. Serial Library. WiringPi includes a simplified serial port handling library.

It can use the on-board serial port, or any USB serial device with no special distinctions between them. You just specify the device name in the initial open function. To use, you need to make sure your program includes the following file: #include <wiringSerial.h> Then the following functions are available: int serialOpen (char *device, int baud) ;
Tutorial: Interrupt-Driven Event-Counter on the Raspberry Pi. --D. Thiebaut (talk) 19:57, 23 July 2013 (EDT) Raspberry Pi. WiringPi provides some helper functions to allow you to manage your program (or thread) priority and to help launch a new thread from inside your program. Threads run concurrently with your main program and can be used for a variety of purposes. To learn more about threads, search for “Posix Threads” Program or Thread Priority int piHiPri (int priority) ; This attempts to shift your program (or thread in a multi-threaded program) to a higher priority and enables a real-time scheduling. Support for GPIO-driven interrupts. Maddin1234 wrote:Ok, perhaps MY process is sleeping, but then POLL has to run to thedoor and wake me up when someone is there.I didn't have a look into poll.c, but from the name I guess it is polling. poll(), and the similar select(), are the standard system calls for checking and/or waiting for one or more files to become ready for I/O.
With a timeout value of zero, poll() simply checks whether each of the files is in the requested state and returns immediately. So you can use it to make your own polling loops. But with a non-zero timeout value, and if none of the requested conditions are already met, poll() puts the current process in an (interruptible) sleep state until some asynchronous event elsewhere on the system changes the state of one of files, or causes the timeout to expire. How to Customize XBMC 12 Frodo with All the Bells and Whistles. Kodi (formerly known as XBMC) is a great entertainment center software. But, here’s the deal: Like many other open source projects, it is driven by a very technical community, and it is not necessarily user-friendly enough for the average person to use and customize.
Fortunately, with a bit of time and the right skin, you can set things up properly and make Kodi (XBMC) very user-friendly and rock solid. I have spent countless hours crawling forums and websites, trying to get the live TV setup, premium online content, automatic light control, and all the other settings right. Note: These step-by-step instructions have been tested with Kodi v15, but they should also be compatible with v16 (codename Jarvis). Open source software and hardware tutorials, Raspberry Pi hints and tips, learn electronics and LPIC practice exams. Free online course on building a simple Raspberry Pi OS from the University of Cambridge. This summer, the University of Cambridge Computer Lab has been home to a small group working on projects with the Raspberry Pi.
Alex Chadwick is one of those people, and he’s produced this: a free course on building a very simple operating system for the Raspberry Pi in assembly language. The course opens with some explanations about what assembly language is – and, importantly, what an operating system really is; you’ll learn some new concepts and possibly some new terms, and then you’ll dive headlong into practical work. You will work through sessions which teach you how to enable and manipulate one of the board’s LEDs, then learn some graphics theory and start generating lines, text and random numbers. Eventually you’ll be manipulating text to display computed values, and learning how to build your own command line interface.
Raspberry Pi Temperature Sensor. RPi Low-level peripherals. Back to the Hub. Hardware & Peripherals: Hardware and Hardware History. Low-level Peripherals and Expansion Boards. Screens, Cases and Other Peripherals. Introduction. Raspberry Pi - run program at start-up. The Only Raspberry Pi XBMC Tutorial You Will Ever Need.