

Maries making: Crochet Butterfly Pattern. Fun with Foam Printing - Easy Tutorial. I loved this idea because not only can you recycle these horrid polystyrene containers, but the process is really simple.
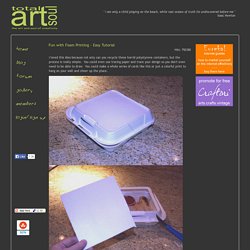
You could even use tracing paper and trace your design so you don't even need to be able to draw. You could make a whole series of cards like this or just a colorful print to hang on your wall and cheer up the place. Materials needed: Foam or polystyrene container pencil paint or ink small roller 1. 2. 3. 4. 5. Happy printing! Original image courtesy of themetapicture. Do it yourself, 3D hand - Binnit.
New England Through Yummy Moms Eyes: Tutorial: Photo Wood Blocks - StumbleUpon. Recycled Pillow Box Favors. You know that I save toilet paper rolls.
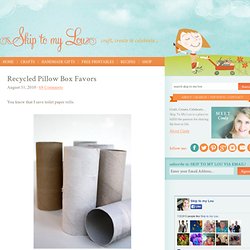
They can be made into so many things — mummies, rockets, Uncle Sam hats, flower party favors………………. even cute pillow boxes perfect for a little favor! Fold in one side of the end. Then fold in the other side. Repeat on other end. Open back up and give the toilet paper roll a bit of paint. Give it a nice shine with a light coat of clear spray paint. Fill with candy and treats, fold back ends. How about some for Halloween? Design*Sponge - StumbleUpon. I don’t know what it’s like in your neighborhood, but when I step outside here in Oakland, I sense it right away: Fall is in the air!

I’m lucky enough to have a few turning trees on my street, so I don’t miss out entirely on the brilliant autumn colors I remember from growing up in NH. Speaking of brilliant autumn colors, I’m thrilled to share this stunning maple leaf rose bouquet DIY from a fellow Kate — clay, fiber and paper artist Kate Hust. Kate first learned how to make these a few years ago from a retired art teacher in her community, and now they’ve become an annual tradition when fall rolls around. Her instructor taught her to wrap the leaves really tight, so they looked like rose buds, but Kate has modified the technique a bit to suit her own tastes: She likes to find the really big leaves and make them with large open “petals.”
She’s clearly perfected the craft, and I’m so happy that she’s decided to pass the tradition on to us. Decorative Paper Lanterns - Martha Stewart Crafts - StumbleUpon. Embroidery Designs at Urban Threads - Projects - StumbleUpon. Cardboard Weaving Loom. Baking Soda Clay. Here's another homemade modeling compound that good for both kids and adult artisans.
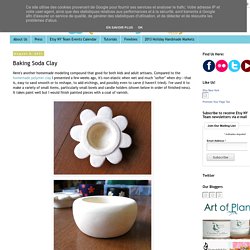
Compared to the homemade polymer clay I presented a few weeks ago, it's non-elastic when wet and much "softer" when dry---that is, easy to sand smooth or to reshape, to add etchings, and possibly even to carve (I haven't tried). I've used it to make a variety of small items, particularly small bowls and candle holders (shown below in order of finished-ness). It takes paint well but I would finish painted pieces with a coat of varnish. Sanded nice and smooth! Materials 1 cup corn starch2 cups baking soda1.25 cups cold waterNon-stick potWooden spoonMed-large bowl (not pictured)Damp cloth, lid or plate (not pictured) Steps Combine ingredients in pot and stir until smooth.
Cook over low-medium flame, stirring constantly, until the mixture resembles mashed potatoes. First steps in sewing: Paper Plate Weaving. One of my daughter's favourite toys for over a year now, is a lacing set where she 'sews' or laces different outfits onto a wooden doll's body.
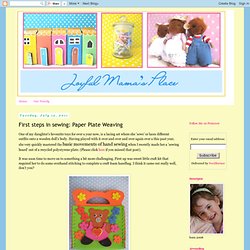
Having played with it over and over and over again over a this past year, she very quickly mastered the basic movements of hand sewing when I recently made her a 'sewing board' out of a recycled polystyrene plate. (Please click here if you missed that post). 26 Beautiful Free Retro Fonts.
How-To: Duct Tape Roses - StumbleUpon. Free cartoons-games amigurumi patterns - Page 3 - StumbleUpon. Mad in crafts: DIY Fire & Ice Lanterns - StumbleUpon. The old becomes new: A new variation on the outdoor lantern.
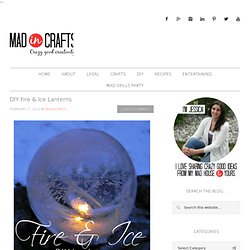
We have had an unusually warm winter in Michigan this year, and while the temps have been nice, I have had to hold off on this project idea until we got a cold snap. We finally got some snow and cold earlier this week, so I was able to try out this fun winter project. I had pinned a product called Globe Ice Lantern Kits a few months back recognizing that I could DIY them at home.
Originally priced at nearly $30 for a kit that makes 6 lanterns, I think they are very reasonable for a small batch. If you are making several (say, for a special event or to light a walkway), you can make 3 of these DIY versions for only $2 worth of supplies from the dollar store. To make DIY Fire & Ice Lanterns, you will need: Oh my! handmade goodness - StumbleUpon. By Michelle Vackar, Modern Handmade Child One of our favorite outside activities at our home is drawing with chalk on the driveway.

You can play hopscotch, four-square, and of course draw and create silly stories. My daughters and I were talking one day as we played hopscotch about how to make chalk and I thought to myself, let’s try it! It ended up being quite a lot of fun. What you will need: • Toilet paper or paper towel tubes • Scissors • Duct tape • Wax paper • Small bucket or disposable container to make the recipe • ¾ cup of warm water • 1 ½ cups Plaster of Paris • 2-3 tablespoons of tempera paint • Paper bag or a “mess mat” ** we made six tubes of chalk – we simply doubled the above recipe Step 1: If you are using paper towel tubes, cut each tube in half, so it is roughly the length of a toilet paper roll tube. Step 2: Cover one end of each tube with duct table to hold the contents within.