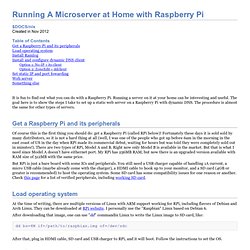

Running A Microserver at Home with Raspberry Pi. It is time to install a web server.

Instead of deploying the old king Apache (which is poweful but large and resource consuming) on my little RPi, I decide to go for another popular web server Nginx, which is lightweight but also very powerful. Install it from the repository: sudo apt-get install nginx sudo /etc/init.d/nginx start If you open " in a browser you probably can already see a default web page from Nginx.
The configuration files of Nginx are in "/etc/nginx/" directory by default. Cd /etc/nginx/sites-available sudo cp default mypi And open "/etc/nginx/sites-available/mypi" with an editor, and change a few important lines in "server{}" block root /home/rpi/html; index index.html index.htm; # Make site accessible from server_name mypi.no-ip.org; this tells Nginx the document root and server hostname. Sudo /etc/init.d/nginx restart and everything under directory "/home/rpi/html" can be visited via link " Now the web server is up and running! Configuration. Configurar Nginx como Webserver. Wordpress for Raspberry Pi using Nginx and MySQL. I’ve been wondering how the Raspberry Pi would handle WordPress.

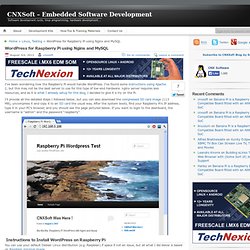
I’ve found some instructions using Apache 2, but this may not be the best server to use for this type of low-end hardware. nginx server requires less resources, and as it is what I already setup for this blog, I decided to give it a try on the Pi. I’ll provide all the detailed steps I followed below, but you can also download the compressed SD card image (113 MB), uncompress it and copy it to an SD card the usual way. After the system boots, find your Raspberry Pi’s IP address, type it in your PC’s browser, and you should see the page pictured below. If you want to login to the dashboard, the username is “admin” and the password “raspberry”. Instructions to Install WordPress on Raspberry Pi You can use your default Debian Linux distribution (e.g. Install ngnix, php and mysql in the server: sudo apt-get update sudo apt-get install nginx php5-fpm php5-cli php5-curl php5-gd php5-mcrypt php5-mysql php5-cgi mysql-server. Raspberry Pi Site: Raspberry Pi as a WebServer. Creating a LAMP server (web server - Linux Apache Mysql PHP) on the Raspberry Pi - Linux tutorial from PenguinTutor.
This provides details of how to configure a Raspberry Pi as a webserver.

This is similar to the guide to using Xubuntu as a LAMP webserver, but adds some of the things that need to be handled differently for the Raspberry Pi. It is termed a LAMP server which is one of the most common configuration for webservers which standard for: Linux – operating system Apache – webserver (http) software Mysql – database server PHP or Perl – programming languages This setup is probably overkill for most uses of the Raspberry Pi, but it is the setup that most users will be familiar with and is a good way to learn about setting up a webserver.
I’ll be looking at setting up a lightweight setup in future. All this configuration is done at the command line. Why use the Pi? Avoiding the geeking answer of “because I can” I think there are some good reasons for doing this. Learn Linux The main aim of this site is to teach Linux skills. Debian Linux Security passwd and follow the prompts for changing the password.