
I LIKE BIG BUTTONS DIY. When I opened my first store in NYC, way back when, I decorated the store with huge plywood cutouts of buttons, needles and spools of thread.

I then took cord and wrapped the spools, threaded the wooden needles and made a criss-cross in each button.....and then spray painted the entire "wood collage" gold! It looked amazing. If I had Krylon's Glitter Blast back then, I would have used that instead. These huge frisbee buttons would look terrific in any room in your house. Especially if you're creative! Frisbee Button DIY Here's the DIY video! You'll need: Frisbees Drill with large drill bit Krylon Glitter Blast Krylon Fusion in a color that matches your Glitter Blast. How to Fake a Landscape Painting (A Tutorial) I love art that looks old, a little rare, antique…….like maybe it was acquired from an estate sale or maybe even an auction at Sotheby’s.
But I don’t like to spend large amounts of money on art…..so I have to improvise. Here is a quick and easy painting tutorial….I promise anyone can do it as long as you can follow some directions. Here is the color palette I used. I also used some white gesso and a small crackle finish kit. Step 1: I was out of 8×10 canvas so I used a thin piece of hardboard. Step 2: Start blocking in some of your colors: some sky, some hay fields or marsh land (who can even tell the difference), and some green tree lines.
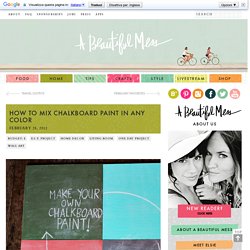
AND….this is the MOST important part: you have to give up painting with your dominant hand. Step 3: After your first coat of paint dries a little start filling in some of your larger sections by applying paint with a palette knife. Use the point of the palette knife to draw in some texture….as if you were drawing in some plants. How To Mix Chalkboard Paint in Any Color. We love using chalkboards as backdrops for displays and parties (like this one here!).

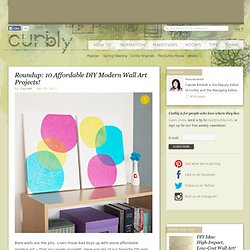
So we were super excited to learn that you can create your own custom colors-and it's really easy! We first learned how from Martha Stewart whose tutorial you can read here. She recommends that you use latex paint, but we tried it out with acrylic paints with much success. Here's how you too can create your own chalkboard paint... Supplies: 1/2 cup acrylic paint (choose any color you like, or mix colors together to make the perfect shade!) 1. 2. Once your chalkboard has fully dried be sure to slate the surface before using it for the first time. Have fun creating any color combination you like!! 10 Affordable DIY Modern Wall Art Projects! & Curbly. Bare walls are the pits.

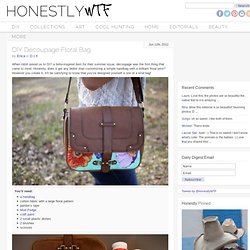
Liven those bad boys up with some affordable modern art -- that you made yourself! Here are ten of our favorite DIY wall art projects to make this week. 1. Bubbles of magnificent splendor! This project is high-impact and low, low cost. 2. 3. 4. Design Seeds&: For All Who Love Color. #ededed #e8dcca #b08a61 #66503c #6b636a #aba2a4 Find The Palettes You Love seasoned tones posted 04.27.14 comments 1 geode tones posted 04.25.14 comments 0 sponsored links culinary color. DIY Découpage Floral Bag - Honestly WTF. When H&M asked us to DIY a boho-inspired item for their summer issue, découpage was the first thing that came to mind.

Honestly, does it get any better than customizing a simple handbag with a brilliant floral print? However you create it, it’ll be satisfying to know that you’ve designed yourself a one of a kind bag! You’ll need:a handbagcotton fabric with a large floral patternpainter’s tapeMod Podgecraft paint2 small plastic dishes2 brushesscissors Start by taping off the edges and hardware of the handbag. Squeeze a dollop of colored craft paint into a small disposable container. Allow the first layer to dry completely.
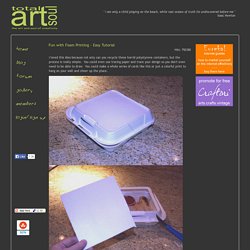
While the paint dries, carefully cut out a handful of flowers from the fabric. Arrange them onto the painted section of the bag. Remove the painter’s tape when the Mod Podge has dried clear and your floral handbag is complete! (all images by HonestlyWTF) Fun with Foam Printing - Easy Tutorial. I loved this idea because not only can you recycle these horrid polystyrene containers, but the process is really simple.

You could even use tracing paper and trace your design so you don't even need to be able to draw. You could make a whole series of cards like this or just a colorful print to hang on your wall and cheer up the place. Materials needed: Foam or polystyrene container pencil paint or ink small roller.