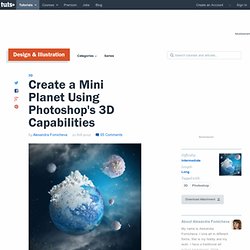

Create a Mini Planet Using Photoshop's 3D Capabilities. When most people think about Photoshop, they probably don't think about 3D.

What most people don't realize, however, is that Photoshop CS5 Extended includes some powerful tools to help you render your artwork in 3D. In this tutorial we will demonstrate how to create a mini planet using Photoshop's 3D capabilities. Let's get started! Tutorial Assets The following assets were used during the production of this tutorial.
Step 1 Create a new document, the size is 1400 x 1400px, 96 pixels/inch. Step 2 Insert sky image. Step 3 Add Layer Mask to the sky layer (click Mask icon in the bottom of layers palette). Icon in the bottom menu of the Layers Palette. Step 4 Group and duplicate sky layers, move them up. Step 5 Insert stars photo. Step 6 Rotate it on 90° and apply Warp Arch transformation just like for the sky layer in previous steps. Step 7 Duplicate stars layer, turn it on 180° and move it left and down. Step 8 Merge stars layers and apply Screen Blending Mode. Step 9 Step 10 Apply following filters. Bleach bypass. Photographic styles and digital darkroom effects certainly aren’t immune to the whims of fashion and changing tastes.

Whether it’s trendy cross-processing, HDR (High Dynamic Range) tweaks or shooting contre-jour (into the light), flick through the editorial and ad pages of any glossy magazine and you’ll see what’s currently in vogue. The muted colours, exaggerated contrast and super-detailed characteristics of what is known as the bleach bypass effect are very popular at the moment. Not only can we see the treatment in many of today’s magazines – think grumpy, gnarly chefs – it’s also been used in big-budget, block-busting films such as Saving Private Ryan.
The effect originates from a traditional darkroom process but, like many cool photo treatments, it’s now much easier and less messy to replicate using image-editing software such as Photoshop Elements or Photoshop CS. You simply use a combination of Adjustment Layers, layer Blending Modes and the Shadows/Highlights tool. Did you know? Photo retouching Tutorials. Photoshop Disasters Photoshop_Mistakes15 – SmilePanic. Animated 3D GIF. In this tutorial, we will explain how to take a flat logo and animate it using Photoshop's new 3D and Timeline features.

Let's get started! Tutorial Assets The following assets were used during the production of this tutorial. Envato Logo Step 1 Open the logo in Photoshop. Step 2 Select the Crop Tool and extend the top and bottom to give our scene more space. Use the Rectangular Marquee Tool to select just the 'envato' text (the leaf is excluded) and click on the "Add Layer Mask" icon in the Layers Panel. Step 3 To make things easier, I've renamed the only layer to "Text. " With the "Leaf" layer still active, go to Layer > Layer Mask > Apply.
Next, go to 3D > New 3D Extrusion From Selected Layer. Step 4 In the 3D panel, select the "Leaf" object (denoted by the extruded star icon) and go to the Properties Panel and set the Extrusion Depth to 35. We now need to move the "Leaf" object to the exact center of our scene. Step 5 Currently, our canvas is showing the Top View. Step 6 Step 7 Step 8.