
[make better ruffles] Ruffles rock.
![[make better ruffles]](http://cdn.pearltrees.com/s/pic/th/make-better-ruffles-see-kate-100201395)
(just like you.) This is a long post about lots of ways to gather ruffles for different effects. It’s not difficult but there are a lot of variables. Because sometimes you need your ruffles just so.The real word for this technique is gathering. But you knew that. I think three rows is my favorite one, but I don’t always have the patience to do three, especially when I can’t wait to see how my project turns out. ruffles and grainA while ago I told you how grain matters.
You can make ruffles from any grain you want and each has a different effect. That flowy look is the bias ruffle look. If you need an 8 inch ruffle which ruffle ratio would you use? These samples are all cut on the lengthwise grain using 2 rows of baste stitches. More sewing tips located here: a few of the fabrics used in this post (in case you love one): Tutorial: Shirring Fabric in 5 easy steps! How To Ruche. Gather A Ruffle Without Pulling A Thread. I enjoy using center-gathered strips to use as a ruffle embellishment (often called a "Euro-Ruffle").

The ruffled strip on the top pictured above is for my little friend Julianna, age 3, but I have used this same technique with narrow ruffles around necklines or sleeves on adult garments. The ways to use this embellishment are limited only by your imagination. In this tutorial, I will show you how to make a center ruffled strip, without having to pull any gathering threads!
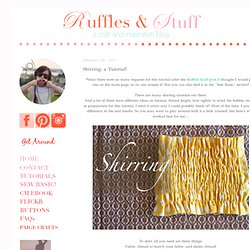
You can click each photo to enlarge it, then click the << BACK button of your browser to return to this page. First, start with a strip of woven or knit fabric. The top pictured above was embellished with 1-3/4" strips of woven fabric that have been finished like this-- Since the strips will be gathered, you may need to start with more than one strip so that it will be long enough. After stitching them together as shown above, trim off the the excess "triangle", leaving a 1/4" seam allowance. Labels: Sewing Tutorials. Shirring: a Tutorial! *Since there were so many requests for this tutorial after the Ruffled Scarf post, I thought I would post one on the main page, so no one misses it!

But you can also find it in the "Sew Basic" section* There are many shirring tutorials out there. And a lot of them have different ideas on tension, thread length, how tightly to wind the bobbin, etc. So, in preparation for this tutorial, I tried it every way I could possibly think of! Most of the time, I saw little difference in the end results. To shirr, all you need are three things: Fabric, thread to match your fabric, and elastic thread! 1: When first cutting your fabric, remember that your piece will be about half the size when finished, but with lots of stretch. 2: Then wind your bobbin by hand.
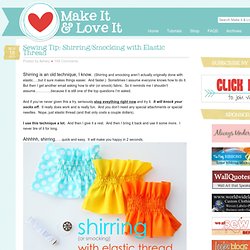
Continue to thread it through the bobbin's thread guides, just as you would with regular thread, using regular thread on top! 3: At the beginning of your first row, do a couple of backstitches, to secure the stitches. Shirring/Smocking with Elastic Thread. Shirring is an old technique, I know.

(Shirring and smocking aren’t actually originally done with elastic…..but it sure makes things easier. And faster.) Sometimes I assume everyone knows how to do it. But then I get another email asking how to shir (or smock) fabric. So it reminds me I shouldn’t assume…………..because it is still one of the top questions I’m asked. And if you’ve never given this a try, serisously stop eveything right now and try it. I use this technique a lot. Ahhhhh, shirring……quick and easy. The elastic thread is sewn into the back of the seams, and lets the fabric stretch but then pulls back in. You may remember seeing me use it here: And here: And here: I know, I use it a lot for skirt waist bands. I even include the technique in 2 of my patterns: The Maddy Dress here and the Lily Skirt here. It’s stretchy, really comfy, seriously easy, and a great texture to add to clothing. You need to ad this to your sewing repertoire, if you haven’t already. Ready for some shirring?