
Fun with Foam Printing - Easy Tutorial. I loved this idea because not only can you recycle these horrid polystyrene containers, but the process is really simple.
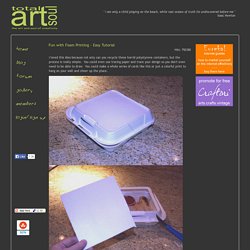
You could even use tracing paper and trace your design so you don't even need to be able to draw. You could make a whole series of cards like this or just a colorful print to hang on your wall and cheer up the place. Materials needed: Foam or polystyrene container pencil paint or ink small roller 1. 2. 3. 4. 5. Happy printing! Original image courtesy of themetapicture. How To: Make Typographic Gift Wrap. This year, I vowed to only make or buy handmade holiday gifts for my friends and family, and I've kept to it so far.
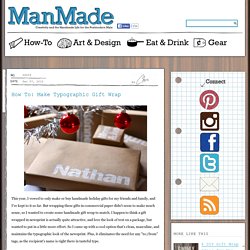
But wrapping these gifts in commercial paper didn't seem to make much sense, so I wanted to create some handmade gift wrap to match. I happen to think a gift wrapped in newsprint is actually quite attractive, and love the look of text on a package, but wanted to put in a little more effort. So I came up with a cool option that's clean, masculine, and maintains the typographic look of the newsprint. Plus, it eliminates the need for any "to:/from" tags, as the recipient's name is right there in tasteful type. Once I figured it out, it was actually quite easy and quick - less than ten minutes per gift. Here's how to do it: Materials and Tools 1. 2. 3. 4a. 4b. 5. 6.
Happy Holidays! 25 Handmade Gifts Under $5. If your gift list is long and your budget is small here are some great Handmade Gifts that you can make.
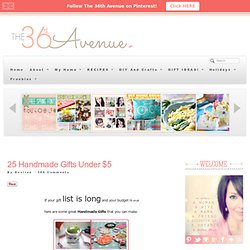
Keep in mind that handmade items are not just beautiful but special… Not martha - to make: papier-mache easter eggs - StumbleUpon. For Easter I made papier-mache polka dotted eggs.
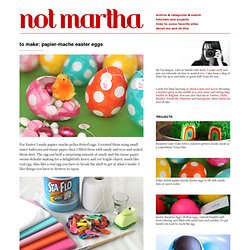
I created them using small water balloons and tissue paper then I filled them with candy and toys and sealed them shut. The egg can hold a surprising amount of candy and the tissue paper seems delicate making for a delightfully heavy and yet fragile object, much like real egg. Wedding Trends for Stylish + Creative Brides - StumbleUpon. If you loved the beautiful DIY wedding this morning and Nata’s gorgeous paper flower bouquets, you are in luck as Nata is sharing how she crafted them with us!

She was inspired by a template created by Morgan Levine on Martha Stewart (as was I in the flowers I created for this styled shoot). I just love that this basic idea has inspired different brides to create their own version of giant paper flowers – you might remember these equally awesome giant paper flowers from this wedding I shared last year. :) Thanks so much Nata for sharing how you created your giant pink paper rose + special thanks to Studio Castillero for the photos of the DIY + her wedding!
Materials (to make one giant rose) Step 1: Cut the petals Cut 5-6 teardrop petals and 15-6 heart-shaped petals from the petal colored crepe paper. Do-it-Yourself DIY String Wedding Lanterns Yarn Chandeliers - StumbleUpon. Jessica of Wednesday Inc shows us how to make those gorgeous twine chandeliers from the inspiration shoot she shared with us this morning.

Using balloons, glue and twine, you can also make these lanterns for your wedding – and then bring it home and use it as your very own mid century lampshade. What you will need are: balloons, glue, yarn, tray for glue, corn starch 1/2 cup of Corn starch, 1/4 cup of Warm water, clear fast drying spray paint, hanging lamp cord or fishing line (depending on your desired final product), and a lighting kit if you’re looking for a fully functional lantern.
Jessica recommends using a sharpie to mark on the inflated balloon how much room you need to leave for the lighting cord. She also recommends coating the balloon with vaseline prior to wrapping the yarn coated with glue so it doesn’t stick on the balloon once it’s dry. You can see all the details on Jessica’s blog. Craftgawker - StumbleUpon. DIY Solar Lamp: Make Your Own Eco-Friendly Sun Jars. The principle is simple and seductively clever: solar lights that store energy during the day and release light at night.

These can be purchased ready-made in a variety of colors (yellow, blue and red) but they can also be built at home. A simple, less-technical approach involves buying a conventional solar-powered yard lamp and then essentially harvesting it for key pieces to put in a jar. This is simply a way of taking an existing solar lamp design and appropriating its parts to make something more attractive for display around a house or home. A more electronically-savvy individual can take the more complex route and built a solar lamp from the ground up using small solar panels – though the aesthetic result may not be as impressive. Whatever route you choose to go, these are fun and sustainable gadgets that make it easy to go green, automate the process of turning on lights at night and can add some color to your porch, patio, garden or windowsill.