
Installing an Invisible Zipper. Zippers can be daunting even for experienced sewers.

The reason? Zippers are often installed the wrong way. Lots of seam ripping and swearing ensues, especially when it’s a simple mistake. There’s no need to be scared of zippers anymore! We’re here to help. With this tutorial we cover how to install an invisible zipper. Items Needed: invisible zipperthreadscissorspinsinvisible zipper footzipper footgarment Before we start, take a look at the back of your invisible zipper. 1. Zipper tape is usually smaller than 5/8″ 2. Place the pins parallel to the zipper 3. 4. Sewing slowly helps prevent the fabric from puckering 5. 6. Double check your zipper before sewing 7. Remember to back stitch at the end of the zipper 8. Embroidery How To Backstitch: Love Letters. The world's best sewing tutorials in no particular order.
Alina's Adventures sew everything A P indicates a printable tutorial or pdf pattern.

An F indicates a personal favorite. PET CARECatnip fish toy (Martha Stewart)Clothespin apron (Pick Up Some Creativity)Cool and cozy pet bed (Sew4Home)Country gent dog coat with pattern (Craftzine)Collapsible travel dish (Craft Stylish)Color spectrum pet bed (Design Sponge)Custom-fit doggy coat (Pretty Little Things)Dog leash (The Purl Bee)Embellished doggy sweater (Miss Lovie)Fabric dog coat pattern (Cut Out & Keep) PFabric pet bed (Inspiration & Realization)Fabric pup tent (CasaSugar)Family connection writing center (Craftzine)Fleece dog bed (Dog Under My Bed)Pet pouches (The B Line)Sweater dog toys (Craft Stylish)Squeaky doggie bone (Laura Griffin)Water resistant doggy coats (Martha Stewart) FOR THINGS WITH TWO WHEELSBicycle bucket (Noodlehead)Bicycle frame lunch bag (Evil Mad Scientist)Bike seat cover (thimble)Good old bike seat cover (Pickles) Key wristlet (Chickpea Sewing Studio) Tweet This!
Comments. Getting Flat Bias Necklines. I often get questions asking how I get my bias faced necklines to lay flat, so I’m here today with a tutorial to help you do just that.
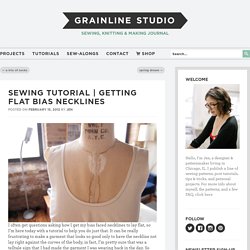
It can be really frustrating to make a garment that looks so good only to have the neckline not lay right against the curves of the body, in fact, I’m pretty sure that was a telltale sign that I had made the garment I was wearing back in the day. So first off, if you’re wondering what a bias faced neckline is, it’s where the neckline if finished with a strip of bias fabric that is turned to the inside and stitched in place. It’s how I finished the necklines of both the Tiny Pocket Tank and the Scout Woven Tee. It’s really very easy, just a few extra steps and some pressing that are well worth it in the end. As usual with tutorials this is an image heavy post, so click the link below to view the entire tutorial. ▲ A quick note. Step 01 | Preparing Your Garment Sew and finish the side and shoulder seams and any other seams that will intersect the neckline.