
DIY: Sharpie Tie Dye. This is a great project for kids, or adults.

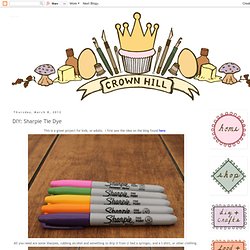
I first saw the idea on the blog found here. All you need are some Sharpies, rubbing alcohol and something to drip it from (I had a syringe), and a t-shirt, or other clothing. I put a piece of cardboard in my tank top to prevent bleeding. Step 1: Use the Sharpies to make marks on your t-shirt. Step 2: Drip some drops of rubbing alcohol. Watch your design expand Step 3: Dry your t-shirt completely before washing. After I washed it the colors faded, but I still like the look: TIP: After drying the shirt with a hair dryer, allow it to set for 24 hours before washing. Tip of the day: Sewing Trick. Express Your Best Images. Maybe this one too ~~ cute t-shirt!

This image was expressed in Express Images by Expimg on October 14th, 2012 at 10:57 am. Related Images: Authentic Louis Vuitton,Discount Price Now!!! Feel free to leave a reply using the form below! Leave a Reply You must be logged in to post a comment. 20 Ways to Repurpose Old Sweaters. It might not feel like it here in SF, but winter is most definitely on its way.

While we love cozying up in all of our old sweaters as the air gets cooler, there are definitely a few sweaters who are on their last legs. What’s a scrappy DIYer to do but repurpose like mad?! From tablet covers to coffee koozies to ornaments and a bow tie, here are 20 ways to repurpose a scarf! Make Your Own Glitter Flats. In case you haven’t noticed in the past almost 3 years (!!) WANM has been in existence, I am not a crafty person. Nope, I leave the crafts to Chels and I stick to the kitchen (where disasters can easily be shoved down the garbage disposal!). It’s not that I don’t want to get into crafts; I’ve just never been good at them. I like following recipes. I don’t like open-ended assignments where I have to choose colors and designs. But still. It started with these: The Kate Spade Nell Glitter Flats. The Gap Glitter Ballet Flats. And then, the other day, I was watching the Today Show and they had a whole segment on DIY glittering.
I was immediately super excited, but Chris was a bit skeptical when I told him. So, I did a little research and found quite a few bloggers who had the same idea for DIY glitter shoes. DIY Glitter Flats: • Mod Podge (about 2 ounces)• Glitter (any color, about 2 ounces)• Foam Brush • Clear Glaze Spray ( a few sprays)• Pair of plain flats (and color will do) Easily Dunn. So I got this shirt in the 6th grade. And I keep on keeping it because I like the stripes or something…and maybe the colors. But I can’t wear it because a) it’s too short and b) it’s too thick to layer with anything. And in the middle of last week’s closet-purging, in a blinding stroke of genius, I decided to make it a cardigan.
But the fastest, kind of laziest way possible. Rookie & RIT Dye Tutorial. It happens to me every year.

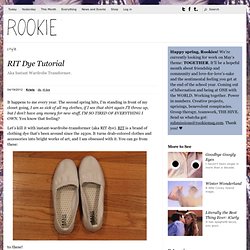
The second spring hits, I’m standing in front of my closet going, I am so sick of all my clothes, if I see that shirt again I’ll throw up, but I don’t have any money for new stuff, I’M SO TIRED OF EVERYTHING I OWN. You know that feeling? Let’s kill it with instant-wardrobe-transformer (aka RIT dye). RIT is a brand of clothing dye that’s been around since the 1930s. It turns drab-colored clothes and accessories into bright works of art, and I am obsessed with it. To these! And it’s not even hard. Now, there are other kinds of clothing dye out there, but I chose RIT because it’s got simple instructions on the back of the package, it costs about $3 per box, and you can find it almost everywhere in the U.S. Upcycled Sweater Boots. DIY wardrobe make over. DIY Shibori. Today marks HonestlyWTF’s four year anniversary.

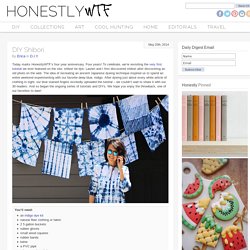
Four years! To celebrate, we’re revisiting the very first tutorial we ever featured on the site: shibori tie dye. Lauren and I first discovered shibori after discovering an old photo on the web. The idea of recreating an ancient Japanese dyeing technique inspired us to spend an entire weekend experimenting with our favorite deep blue, indigo. After dyeing just about every white article of clothing in sight, our blue stained fingers excitedly uploaded the tutorial – we couldn’t wait to share it with our 30 readers. You’ll need:an indigo dye kitnatural fiber clothing or fabric2 5 gallon bucketsrubber glovessmall wood squaresrubber bandstwinea PVC pipea long wooden sticka drop clothrubber glovesscissors When choosing fabric or clothing, it’s important that made of natural fibers. Itajime shibori is known as the shape-resist technique. Fold it again in the other direction – again, like an accordion. Wrap the twine around the fabric.