
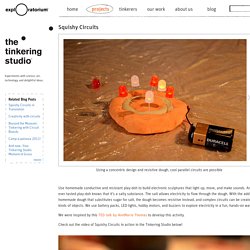
Electric Circuits - BrainPOP. Squishy Circuits - How To. Squishy Circuits. Using a concentric design and resistive dough, cool parallel circuits are possible All the ingredients that you need to make your own conductive and resistive Play-Doh Wrap the dough in plastic film and store in ziploc bags to keep it moist longer Integrating LED lights and power source into a sculptural design Exploring complex circuitry becomes natural We use food coloring for conductive dough, and leave the resistive kind white, so you always know which one you're using We like to use 9V batteries.
Squishy Circuits. The Squishy Circuits team developed this activity so that young children (including my own daughters) would have a playful way to explore circuits.
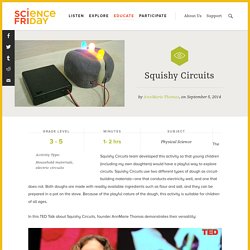
Squishy Circuits use two different types of dough as circuit-building materials—one that conducts electricity well, and one that does not. Both doughs are made with readily available ingredients such as flour and salt, and they can be prepared in a pot on the stove. Because of the playful nature of the dough, this activity is suitable for children of all ages. In this TED Talk about Squishy Circuits, founder AnnMarie Thomas demonstrates their versatility:
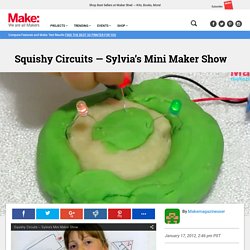
DIY Electro Dough Kit: Circuits - Technology Will Save Us. Squishy Circuits. Sylvia's Mini Maker Show. By Super Awesome Sylvia and her dad, James Are you curious about experimenting with electronics, but the fear of electric shock or soldering iron burns keep you away?
Why not try squishy circuits! With a special recipe of food-safe, kitchen-made, pliable dough developed at the University of St. Thomas, kids of all ages can easily use their hands to mold their very own simple circuits right before their eyes! Lets go! For this build, we’ll be mixing up two different types of dough, and then experimenting. Deionized or distilled water (Tap water is OK if you don’t have any)FlourSaltSugarVegetable oilCream of tartar (or lemon juice to substitute if you can’t find the stuff)Food coloringAnd last but not least, some measuring cups and a medium sized pot to mix it all up in. Squishy Circuits. Activity courtesy of AnnMarie Thomas, associate professor of engineering at St.
Thomas University, and the Playful Learning Lab. Visit the Squishy Circuits home page for a how-to guide, videos, and sample activities. Summary Students of all ages learn basic principles of electricity by fashioning circuits from play dough, batteries, wires, and LEDs. No soldering necessary! Grade level: Preschool to high school Time: 25 to 60 minutes.
Learning Objectives: After doing this activity, students should be able to: Define, recognize, and build a closed circuit.Define, recognize, and assemble series circuitsExplain why a closed circuit is required for any electrical device to operate.Describe the transformations of energy that occur in the circuit.Distinguish the difference between a parallel circuit and a series circuit. See Squishy Circuits in action at the Exploratorium in San Francisco: [vimeo] Standards International Technology and Engineering Educators Association G. [youtube] Materials. Squishy Circuits Project 2: Add Even More Lights. Abstract Have you tried our first Squishy Circuits project, and now you are looking for more to do?

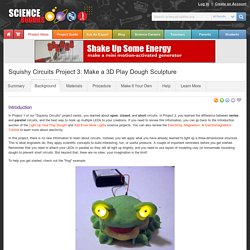
Do you want to learn more about circuits and add even more lights? Squishy Circuits Project 3: Make a 3D Play Dough Sculpture. Please ensure you have JavaScript enabled in your browser.
If you leave JavaScript disabled, you will only access a portion of the content we are providing. <a href="/science-fair-projects/javascript_help.php">Here's how. </a> Abstract. Electro Dough Birthday Cake. Project: Conductive Playdough Pumpkin for Halloween. We had lots of fun making a Halloween pumpkin with light-up eyes using our own homemade conductive playdough.

With some basic knowledge of electrical circuits this is a fun and accessible activity with the kids for Halloween. As with any project using electricity, we recommend close adult supervision. However the kids will have plenty of hands on fun making their creations with the playdough. You'll need conductive and insulating dough to make your project work. Read on to find out how we made our Halloween Pumpkin. DIY Electro Dough Kit ! Clog's Operation!
Football - DIY Electro Dough Kit - - Resources - Technology Will Save Us. DIY Electro Dough Penalty Shootout - Technology Will Save Us. DIY Electro Dough Penalty Shootout DIY Electro Dough Penalty Shootout Make a fun interactive game with your DIY Electro Dough kit and Tin foil!

Live that championship final moment of scoring a goal. Hear the crowd roar, see the cameras flash. The aim of the game is to flick your kitchen foil ball into the goal and see all the lights flash and the buzzer buzz! You will need: Things from your DIY Electro Dough Kit: 1 x Battery Pack,6 x LEDs,1 x Buzzer,1 x Crocodile Clip. Extra Items: Kitchen foil,Electro Dough/Play Dough (preferably 3 colours) Make the Goal Netting: Roll out some dough and cut into thin strips. These can then be laid on top of each other to make the netting.
Make the Goal Post: Make two long sausages for the inner and outer goal posts. The inner goal posts must be touching the Netting. Make sure the Blue and Green Dough is Not Touching! Attach LEDs: Bend the LEDs, placing the longer leg in Blue goal post. place the shorter leg in the Green goal post. Attach the buzzer: