
33 Shades of Green: Tutorial. . .How to Sew a Roman Shade. .This tutorial was posted last month on Remodelaholic.

I thought I would share it here on my own blog. I've lived in my house for 5 years now and never had a blind in the laundry room - I thought it was about time I got busy and sewed one up. I procrastinated for A LONG time because I thought it was going to be a hard project. It really wasn't - I wish I hadn't waited so long! Supplies: - fabric (I used an upholstery weight) - drapery lining (there will be several to choose from - light all the way to blackout; if your shade is going in a bedroom, you will most likely want to use blackout lining) - 5/16" d. wood dowels (number will depend on the height of your shade; I use four) - wood board for bottom of shade (1" w x 1/8" thick) - header board for mounting your shade (1-1/2" x 1/2" or something similar) - nylon cord (length of cording you need will be somewhere around 5 times the length of your shade) - angle brackets for mounting- cord cleat- staple gun and other misc. tools .1. .3.
First Steps to Make Top Down Bottom Up Roman Shade. Make Your Own Roman Shades - Martha Stewart DIY Decorating. Smart, tailored panels combine the softness of curtains with the functionality of blinds, and they work almost anywhere.

Their lines are perfect for small windows, in which elaborate treatments might be too busy, and for large ones, in which they can complement a room without overpowering it. When lowered, the shades fit snugly in a window frame, almost flush against the glass; when raised, their fabric hangs in neat symmetrical folds. There are three basic styles: classic, casual, and formal. The choice of fabric will influence the final effect (toile, for instance, tends to look more formal than gingham, regardless of the shade's shape). We installed the panels inside window frames; they can also be mounted to the front casing. You can dress up your shade with stripes or trim, but its beauty lies in its simplicity: a single length of finished cloth fit with a system of cords. From Bland...To Blinding (How to Make Roman Shades)
Cool Copper Projects Warm metallic hues are easy to love but often pricey.

Search Results roman shadesPattern-Making. Tutorial: Cordless Classic Roman Shade. A few months ago, I painted our kitchen the same warm grey that is in the living and dining room.

Having the same color in all three adjoining rooms has made it a lot easier to decorate cohesively. Ove the holidays, I had a few sage green towels in the kitchen and loved the way it looked with the new walls. I also considered the current rug in the living room and knew it would be a good choice to use as an accent color throughout the rooms.
So, I started looking for fabric that had featured green as well as other neutrals–brown, tan, grey. I soon found this and purchased it with a 50% off coupon (the online photo doesn’t do it justice): The warm grey is perfect with our walls and the browns tie in so well to the kitchen cabinets and dark pieces in the living room. I found a tutorial via Martha Stewart and started collecting my supplies. As one of the commenters mentioned, the tutorial is very simplified. So, here we go! { 1 (below) – Lay fabric right side down. . { 2 – Unfold. . { 3. Phew! Making roller blinds instructions. The most practical treatment for windows throughout the home and ideal for the kitchen and bathroom.
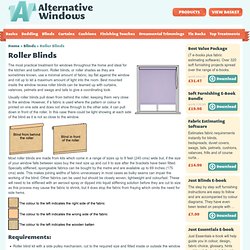
Roller blinds, or roller shades as they are sometimes known, use a minimal amount of fabric, lay flat against the window and roll up to let a maximum amount of light into the room. Best mounted inside the window recess roller blinds can be teamed up with curtains, valances, pelmets and swags and tails to give a coordinating look. Usually roller blinds pull down from behind the roller, keeping them very close to the window. However, if a fabric is used where the pattern or colour is printed on one side and does not show through to the other side, it can pull down in front of the roller. In this case there could be light showing at each side of the blind as it is not so close to the window. Requirements: Roller blind kit with a side pulley mechanism, cut to the required size and fitted inside or outside the window recess. Measuring and Estimating Fabric Quantities: Best Value Package.