
Nail Polish Prints. Finally I took the time to paint my nails- to try the rubbing alcohol prints!

Have you been seeing the newsprint nail polish lately? The trick: Paint your nails a light color for a base. Then simply dip your finger in rubbing alcohol and press a small piece of newsprint on top. You want to hold it on there for about 30 seconds, I thought you could just press and go...but you need the ink to be dark. I realized that after a couple of fingers. I read you could use other prints as well. There I learned- the simple patterns are best.
Once you have your pattern, paint a clear layer over the top (or else it will just wipe off) then wash your hands so the extra ink come off! DIY Glow Jars Tutorial. Posted on October 19, 2011 by Christina Aren’t these glow jars sublime?

They take about two minutes to make and cost only 20 cents a piece. How’s that for an enticing DIY wedding project? These would look amazing at an evening outdoor wedding. Line walkways with them, or place them on tables. If you like this project, check out my DIY ‘glitterarium‘. DIY Glow Jars Tutorial For each glow jar you will need: a jartwo Glow Sticksscissorsrubber glovessafety glasses Disclaimer: This is a project meant to be done by an adult – not a child! T-shirt headband (2) I should just rename my blog “Things Kitty Can do with a Tshirt” Anyway, I was walking through target the other day (wanting to buy every single dress I saw!)

And glimpsed this headband. Obviously the first thing I thought was “Oh shoot…I can do that” (you know you're a crafter when you refuse to purchase anything you think you can make...even if you cant) Ready for a great no-sew tutorial….AND my very first Vlog? (that’s video blog for those who thing I misspelled that) A big tshirt is best (one without any seams on the sides of the tshirt) Cut 6 strips (by cutting the bottm hem off the shirt, and cutting strips off the shirt working form the bottom), Cut them about an inch wide, and stretch them all the way out. Loosely knot the 6 together, leaving about 3 inches extra at the top. Spread out your strands, and get ready to watch my first Vlog! A few things I've learned from this video 1. 2.
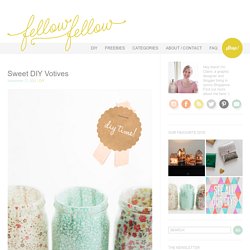
Anyway, so you've gotten that woven. You've got a woven rope right? Sweet DIY Votives. Here’s what you’ll need: 1.

Measure the height and circumference of your jar, and cut strips of fabric to roughly fit (approx. 1cm wide – doesn’t have to be perfect). 2. In your small cup, pour in some glue and dilute it with a bit of water (about 1:2), mix well. It should be the consistency of slightly thicker water.. yes, I know I’m being vague but it shouldn’t make much difference to the end result. 3. Note: – I find that it’s ok to have fabric going above the top of your jar because it can be easily cut off after it’s dried. – I don’t mind the look of the overlapping lines of fabric once the candle is lit, but if you do try not to overlap the strips in the gluing process. ** Please only use only battery operated tea-lights (not real candles).
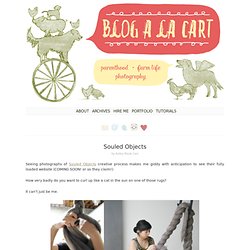
Thank you, your sign-up request was successful! Given email address is already subscribed, thank you! Please provide a valid email address. Oops. Souled Objects. Seeing photographs of Souled Objects creative process makes me giddy with anticipation to see their fully loaded website (COMING SOON!

Or so they claim!) How very badly do you want to curl up like a cat in the sun on one of those rugs? It can’t just be me.