background preloader

Sweet DIY Votives

Sweet DIY Votives
Here’s what you’ll need: 1. Measure the height and circumference of your jar, and cut strips of fabric to roughly fit (approx. 1cm wide – doesn’t have to be perfect). 2. In your small cup, pour in some glue and dilute it with a bit of water (about 1:2), mix well. It should be the consistency of slightly thicker water.. yes, I know I’m being vague but it shouldn’t make much difference to the end result. 3. Note: – I find that it’s ok to have fabric going above the top of your jar because it can be easily cut off after it’s dried. – I don’t mind the look of the overlapping lines of fabric once the candle is lit, but if you do try not to overlap the strips in the gluing process. ** Please only use only battery operated tea-lights (not real candles). Thank you, your sign-up request was successful! Given email address is already subscribed, thank you! Please provide a valid email address. Oops. Other posts you may like: Related:  DiY

DIY; Double Bow Necklace I used to be so obsessed with decoden - for those of you who don't know, it's a trend from Japan, see here. Heck, I used to be so obsessed with lolita fashion. But now that I've mellowed out, I've only been enjoying only partially-embellished stuff - and since I've been inspired by a video I seen yesterday I wanted to create some decoden-inspired gear. So I made this double bow necklace out of polymer cay. Polymer clay Cutter Jump rings Jewelry pliers Clasp Chain Oven Pencil Pin It's so easy. You might want to lay out wax paper so the clay won't stick on your surface first. Pinch the sides like pictured above, and then pinch both sides together. Next take a small bit of clay, roll it out and flatten it like in the first picture. To make holes, it helps to put a pencil or any barrel shaped object inside - it's used to hold the shape. Bake your clay according to the directions on the package. I hope you liked it.

Stenciled Pillows {tutorial} -- New Martha Stewart Decorative Paint Line <div class="greet_block wpgb_cornered wpgb_shadowed"><div class="greet_text"><div class="greet_image"><img class="enable-pib-img-under" src=" alt="WP Greet Box icon" data-recalc-dims="1"/></div>Thanks for coming by! I try to feature a new creative tutorial every day -- and I'd love to have you follow along: <a href=" rel="nofollow"><strong>subscribe to my email updates</strong></a> or <a href=" rel="nofollow">come follow along on Facebook</a>.<div style="clear:both"></div></div></div> Last week I came home to a big box of craftiness!! For one thing, the colors of this line are beautiful — 160 colors to choose from, in all sorts of finishes: Glitter, Pearl, Satin and High Gloss!! I love this idea — there are special applicator tops that convert paint bottles into tools!! {What??? I can’t tell you how excited I am about this. xoxo

Teacher Tote *Project by Jessica @ Running With Scissors* This tote was inspired by my 6th grade teacher. I remember her always carrying her purse, and this large navy blue tote that was kind of ugly and worn out. So here is a fun, colorful tote for the teacher that always has binders, graded papers, and other items to carry to and from their classroom. I designed the tote to have a basic shape, where it’s a rectangular bag. What makes this tote different is the scrunch handle. Made with white canvas for strength, and fully lined in turquoise, this tote could actually be reversible. The back needed a little detail, so one blue tree stands alone. The sewing is pretty basic and painting the tree design gives you lots of opportunity to make it unique for that great teacher who deserves a cute tote to lug all their supplies!

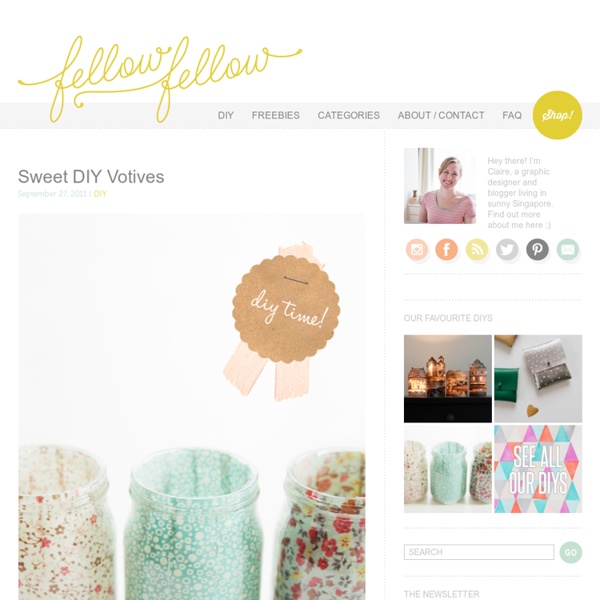
Reduce, Reuse, Recycle: Repeat - Mason Jars Yes, they are everywhere. Yes, I have posted on them before. And yes, I am still smitten! I should note...I'm a little obsessed with how the matte black came out and have more outside drying as I type this. Then, in my Pinterest crazed obsession, I found this little DIY image. This led me to trying my own version with a milk jar, fabric marker and glue gun.... She's not perfect, but I love that about her. For all you DIYers with questions on how to or the materials used for this project...I did a follow up post that can be found here.

Projects You Should Totally Do: Tiny Succulent Cork Planters {Image Source} UPDATE: We finally tried this project and it's as easy as it looks! Check out the simple tutorial. I must admit when a friend mentioned this idea to me a few weeks ago I crinkled my nose, all I could think about is moldy cork with a plant growing out of it. While I'm still adhering to my doctors orders for more bedrest, I thought I'd try to convince you that you should totally take on this project partly because it's awesome and partly so I can live vicariously through your creative endeavors! After a little time with google I found a handy tutorial online supplied by StyleBaggage. Choose a pretty corkHollow it outSlap a magnet on the backFill with a pinch or two of dirt and a succulent of your choosing Of course for more detailed instructions check out Nellene's helpful hints to the process on her blog. {Image Source} Or make cork disco balls: {Image Source} And seriously don't you just swoon for these massive planters used in an Anthropologie display? {Image Source}

DIY Animal Favor Boxes A great way to incorporate your color scheme is to paint some details of your party to match. A huge trend lately are little plastic animals. Painted and usually attached to various things, these cheap toys are modern and fun. Use them at your next shower or birthday party as favor box toppers. Fill the boxes with cookies, crayons or trinkets and let these adorable little boxes bring some fun to the party. You will need: blank boxes plastic animals primer craft paint or spray paint paint brush super glue Choose animals that sit flat on the box. Once dry, pour out a small spot of paint on a dish and start painting the animals on the bottom. Add a small drop of glue to the bottoms of each of the feet. Fill the boxes with treats and set out for your next party.

Hemp pendant lamps Inspired by West Elm’s gorgeous Abaca pendant lamps Super talented Heika DeHart strikes again. These pendant lamps she made of hemp string are genius. Plus, don’t you love how they look with her wallpaper? Heika writes: “I fell in love with West Elm’s Abaca pendent lamp a few years ago but, as usual, my taste was more expensive than my wallet could support. How to make hemp string pendant lamps Supplies and tools bouncy balls of various sizesclear drying craft glue (about 1 bottle per ball) such as Aleene’s Clear Gel Tacky Gluehemp string 20lb. weight estimated amounts needed: 16 inch diameter ball—400 yards 14 inch diameter ball—300 yards 9 inch diameter ball—100 yardsplastic gloves (optional)trash bag or small drop clothpermanent markerball inflating needle (available at sporting goods stores or bike shops)light fixture and hardware (Lowe’s doesn’t carry the fixture that Heika used anymore. 1. 2. 3. 4. 5. 6. 7. 8. 9.

Leather Fold Over Clutch I’ve been eying leather fold over clutches in bright colors like these beauties below for some time now and thought they would make a really great DIY project. It’s a really simple project and a great way to add a punch of color to your spring outfit. Cause it is all. about. color this season. You’re done!

Related: