
Arduino playground - InterfacingWithHardware. Control two stepper motors' speed and direction with two analog inputs (joystick). By Eduardo Rivas, David Escobar and Ángel Moreno for Universidad Don Bosco de El Salvador, 2013. Trastejant.
Menú. Programar Arduino con Eclipse (1 de 2) En la entrada de instalación ID de Arduino introducción a Arduino comentamos que es posible emplear otros entornos de programación para realizar nuestros proyectos Arduino.
Esto nos permite saltarnos muchas limitaciones que nos impone el IDE estándar, y emplear toda la potencia de C++ en nuestros proyectos. En esta entrada vamos a aprender a configurar y programar Arduino con Eclipse, uno de los entornos de programación más populares del momento. Eclipse es Open Source, y está disponible de forma gratuita para Linux y Windows. El desarrollo de este tutorial se va a realizar en Linux Ubuntu / Linux Mint, pero su configuración otros sistemas operativos es muy similar.
El nivel de dificultad de este tutorial es algo más avanzado que el del resto de entradas de Arduino que hemos hecho hasta el momento pero, con un poco de habilidad y siguiendo los pasos en orden, conseguiréis configurar correctamente el IDE fácilmente. En primer lugar vamos a instalar el IDE Eclipse. AccelStepper: AccelStepper Class Reference. Support for stepper motors with acceleration etc.
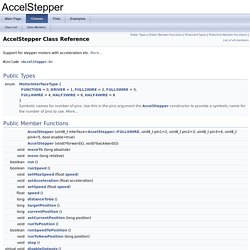
This defines a single 2 or 4 pin stepper motor, or stepper moter with fdriver chip, with optional acceleration, deceleration, absolute positioning commands etc. Multiple simultaneous steppers are supported, all moving at different speeds and accelerations. Operation This module operates by computing a step time in microseconds. The step time is recomputed after each step and after speed and acceleration parameters are changed by the caller. Positioning Positions are specified by a signed long integer. Caveats This is an open loop controller: If the motor stalls or is oversped, AccelStepper will not have a correct idea of where the motor really is (since there is no feedback of the motor's real position. Performance The fastest motor speed that can be reliably supported is about 4000 steps per second at a clock frequency of 16 MHz on Arduino such as Uno etc.
Examples: Parameters References DIRECTION_CCW, and setAcceleration(). Returns. Universal Arduino libraries for graphic LCDs,TFT LCDs and OLEDs. Display module always plays an important part in appliance of Arduino.
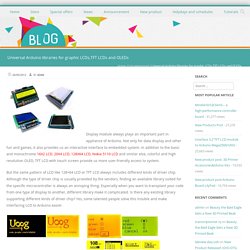
Not only for data display and other fun and games, it also provides us an interactive interface to embedded system. In addition to the basic and monochrome 16X2 LCD, 20X4 LCD, 128X64 LCD, Nokia 5110 LCD and similar else, colorful and high resolution OLED, TFT LCD with touch screen provide us more user-friendly access to system. But the same pattern of LCD like 128×64 LCD or TFT LCD always includes different kinds of driver chip. Although the type of driver chip is usually provided by the vendors, finding an available library suited for the specific microcontroller is always an annoying thing.
Especially when you want to transplant your code from one type of display to another, different library make it complicated. U8glib is a graphics library supporting many different displays including monochrome LCD and OLED for both Arduino and AVR. List of supported device for U8glib. List of supported device for UTFT. Allegro A4988 and Arduino (3) In the last part of my tutorial about the A4988 driver, I’m going to explain how to build a controller to adjust speed and rotation direction of a stepper motor.
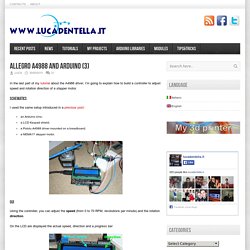
Schematics I used the same setup introduced in a previous post: an Arduino Uno;a LCD Keypad shield;a Pololu A4988 driver mounted on a breadboard;a NEMA17 stepper motor. Using the controller, you can adjust the speed (from 0 to 70 RPM, revolutions per minute) and the rotation direction. On the LCD are displayed the actual speed, direction and a progress bar: The 5 available buttons are used to control the motor: UP and DOWN adjust the speed;LEFT and RIGHT adjust the direction;SELECT activates the emergency stop (speed = 0). Continuous rotation To achieve a continuous rotation, your sketch must send the step commands to the Pololu driver at constant frequency. Let’s see an example: for a speed of 60RPM and for a motor with 200 steps / revolution, Arduino must send to the driver (60*200)/60 = 200 commands / sec or a command every 5ms. Problema con accelstepper y potenciometro.