
DIY Picture Tiles - You Will Never Buy a Photo Frame Again. Lately I’ve been having this huge urge to decorate the house.

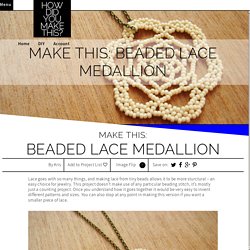
This is big news. I do not decorate. Beaded Lace Medallion. Lace goes with so many things, and making lace from tiny beads allows it to be more sturctural – an easy choice for jewelry.

This project doesn’t make use of any particular beading stitch, it’s mostly just a counting project. Once you understand how it goes together it would be very easy to invent different patterns and sizes. You can also stop at any point in making this version if you want a smaller piece of lace. Supplies: – seed beads – these are size 15 but size 11 would work just as well – beading needle – I use size 10 – OO Nymo or similar beading thread – sharp scissors Row 1 Thread the needle with the longest doubled strand of thread that you’re comfortable working with. Stitch through those beads again to make a loop. Row 2 Pick up a bead and stitch through the next bead in row 1. Continue adding a bead between each of the beads in row 1 until you read the end of the row. It will look like this when all 6 beads are in place. Best Gag Gifts, Best Gift for a Teacher, Best Gift for a Doctor.
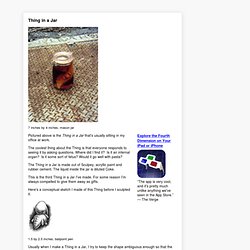
Thing in a Jar. Thing in a Jar 7 inches by 4 inches, mason jar Pictured above is the Thing in a Jar that's usually sitting in my office at work.

The coolest thing about the Thing is that everyone responds to seeing it by asking questions. Where did I find it? Is it an internal organ? The Thing in a Jar is made out of Sculpey, acryllic paint and rubber cement. This is the third Thing in a Jar I've made. Here's a conceptual sketch I made of this Thing before I sculpted it. 1.5 by 2.5 inches, ballpoint pen Usually when I make a Thing in a Jar, I try to keep the shape ambiguous enough so that the viewer cannot really pin down exactly what they're looking at. The glass jar acts as a physical barrier, preventing the viewer from directly accessing its contents. I think this is much cooler than, for example, a painting, which basically has this big implicit sign hanging off of it that says, "I am just a painting of an object, not the object itself.
Viewers of The Thing in a Jar do not have this preconception. DIY paper boat clutch (Moschino-like) It’s official.

I have a new favourite DIY. And it’s THIS ONE ! Argh, I just couldn’t resist it – I saw the paper boat clutch by Moschino on The Cherry Blossom Girl’s blog and my fingers went all fizzy and my brain went wild ! It just so happens I had everything I needed right here at home (thanks to left over white leather from THIS DIY), so I sat myself down with a pot of tea and made it right away ! Because you gotta catch inspiration while it’s on the run ;-) You will need the above supplies. First of all cut out two pieces of leather in the shape shown in image 1. Stitch the two pieces of leather together with both right sides facing the same way (image 3). Stitch the zip to one side of LAYER B.
Fold In Half Wallet Cut + Sew. I walked you through how to pattern this fold in half leather wallet.

In this post I will show you how to assemble this leather wallet so you can apply the technique to any leather wallet you might design. If making a pattern from scratch isn’t your thing yet, you can download the pattern to make this wallet for $1USD. Supplies: Leather (or plastic vinyl) 10″ x 22″ or 17″ x 13″ | 25cm x 56cm or 43cm x 33cm Woven Fabric (optional: fusible interfacing) 5″ x 8.5″ | 13cm x 22cm Zipper 4″ or 5″ long | 10cm or 13cm long Heavy Duty Thread (ideally thread designed for using with leather/fur) Paper Pattern (Make your own pattern or buy this pattern for $1USD) Tools: Rulers Straight Edge Blade (I used a rotary cutter and a box cutter for this project) Awl Cork Boards Scissors Leather Needles Marker or Pen Layout the pattern pieces in a way that efficiently uses the leather.
Cut out each piece using a ruler and straight edge blade for best results. Transfer your stitching marks to each piece. How to make a brush organizer - Irina's Photography and beyond. Couple days ago, one of my team mates Lana from BelleCoccinelle shared an idea how to make a brush organizer of sushi mat.

I found this idea brilliant! I was thinking to make some organizer because I have quite a few of cosmetics brushes that has to be organized So Lana's idea was given in a very right time :) Here we go... To make the organizer, sushi mat and an elastic are needed. Wrap the elastic around first couple sticks.