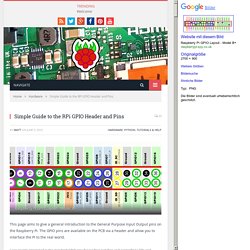
Character LCD with Raspberry Pi or BeagleBone Black. Follow the steps below to wire a character LCD to your development board.
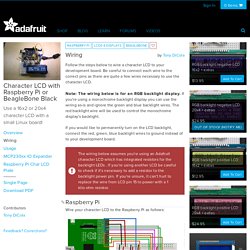
Be careful to connect each wire to the correct pins as there are quite a few wires necessary to use the character LCD. Note: The wiring below is for an RGB backlight display. If you're using a monochrome backlight display you can use the wiring as-is and ignore the green and blue backlight wires. The red backlight wire will be used to control the monochrome display's backlight. If you would like to permanently turn on the LCD backlight, connect the red, green, blue backlight wires to ground instead of to your development board. The wiring below assumes you're using an Adafruit character LCD which has integrated resistors for the backlight LEDs . Maker Quest: Raspberry Pi Irrigation Controller. Gardening improves health and quality of life, connecting us to our local environment.
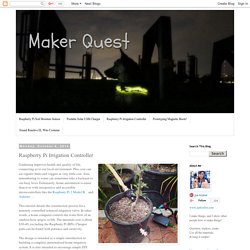
Plus, you can eat organic fruits and veggies at very little cost. How to automatically water your plants with the Raspberry Pi. Having to dig out the ol' watering can and potter about the garden might be some people's idea of bliss, but it's not very 21st century.
Besides think of the time you can recoup for another hacking project. In this Raspberry Pi project we're going to automate the whole watering of plants with a Raspberry Pi linked to a weather forecast service and an add-on board that is connected to a pump. Check out our collection of fantastic Raspberry Pi projects You will need Any Raspberry Pi A+ B+ or Pi 2The latest Raspbian OSPiface Relay PlusA 12v Peristatic pumpA 12v 1A power supplyBarrel jack to screw terminalAquarium airlineSoldering skillsWi-Fi dongleAn open weathermap.org accountAll of the code can be downloaded here To kick off, we start by soldering connections to the terminals of our pump. On the Piface Relay Plus, locate relay 3 and insert the GND (-) of your power into the COM terminal and also one of the pump connections.
. $ sudo pip-3.2 install pyowm. Google. Setting up a Home VPN Server Using Your Raspberry Pi. It’s IoT Week at SitePoint!
All week we’re publishing articles focused on the intersection of the internet and the physical world, so keep checking the IoT tag for the latest updates. One part of working with the Internet of Things is the difficulty of connecting to devices in your home when you aren’t in your home network. How to Build a Raspberry Pi Retro Game Console for $35 Raspberry Pi - Sistema de sonido para toda la casa - Tundra IT - Blog Bujarra.com. Para dar la bienvenida al 2016 vamos a poner un post de los que me gustan… en este documento veremos como montar un sistema de audio para nuestras casas!
Con unas Raspberrys repartidas por la casa podremos tener un hilo musical o un sistema multiroom de lo más barato! Podremos escuchar cualquier canción de nuestro servidor multimedia o música desde nuestro móvil, así como Spotify o lo que nos interese! Podremos mandar el audio de forma indistinta, a una Raspberry o a múltiples, según nos interese! Os comento un poco los pasos, las ideas y lo que se puede montar, luego cada uno que llegue hasta donde quiera. Configure CCTV System on RaspberryPi 2 with MotionEyeOS – nokitel.
Turn a Raspberry Pi into a CCTV Security System. Drive a 16x2 LCD with the Raspberry Pi. RASPBERRY PI ENGLISCH DRUCKDATEN V2016. Instalando OpenVPN server en una Raspberry Pi - Tundra IT - Blog Bujarra.com. Algo super util en una Raspberry para poder conectarnos desde donde sea será el montar un servidor VPN, en un documento anterior ya vimos cómo montarlo, pero era con PPTP, algo no muy seguro digamos, en este documento veremos cómo instalar OpenVPN en una Raspberry, os dejo unos apuntes para que podáis montar una VPN segura y os podáis conectar desde cualquier lugar!
OpenVPN nos ofrece una combinación de seguridad a nivel empresarial, seguridad, facilidad de uso y riqueza de características. La seguridad es lograda mediante cifrado del tráfico usando mecanismos SSL/TLS, por lo que en este documento nos desplegaremos además de OpenVPN en sí, nuestra propia CA, generaremos los certificados para los usuarios y daremos sus claves para que se conecten! Si no tenemos una IP pública fija, sería ideal combinarlo con el cliente NO-IP en nuestra Raspberry!!!
Comenzamos con la instalación de OpenSSL: . VPN mit dem Raspberry Pi - so geht's. Node.js. Running Minecraft on a Raspberry Pi. Raspberry Pi as low-cost HD surveillance camera. Introduction This article describes how to build a surveillance cam based on a Raspberry Pi micro-computer which records HD video when something moves in the monitored area.
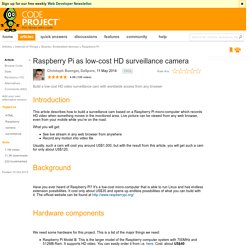
Live picture can be viewed from any web browser, even from your mobile while you're on the road. What you will get: See live stream in any web browser from anywhere Record any motion into video file Usually, such a cam will cost you around US$1,000, but with the result from this article, you will get such a cam for only about US$120. Background. Cloud Cam: Internet-Connected Security Camera. To setup the Pi camera carefully follow the steps below: Once the Pi camera is connected power on the Pi and connect to it in a command line terminal.
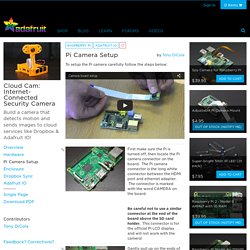
You will now need to enable the camera by using the raspi-config tool. After logging in to the Pi run the following command: Adafruit's Raspberry Pi Lesson 7. Remote Control with VNC. Again, there are many VNC clients, of which “VNCViewer” ( is available for most platforms and I have found it to work well with TightVNC.
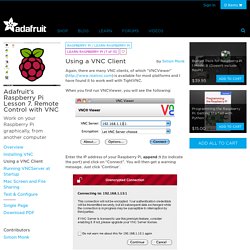
When you first run VNCViewer, you will see the following: Enter the IP address of your Raspberry Pi, append :1 (to indicate the port) and click on “Connect”. Amazon. Ergebnis für. Bilder Website mit diesem Bild.