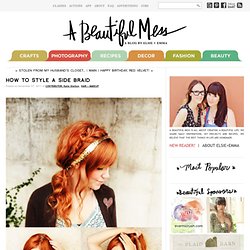

How To Style a Side Braid - A Beautiful Mess - StumbleUpon. Here's a brand new, extra magical hair how-to by Katie of Skunkboy. 1.Start with a dramatic side part. 2.

Separate a small section of hair on the side. This will be the beginning of your braid. 3.Taking that section, separate it into two smaller sections. 4. YOU ASKED FOR IT… Photos + post by Kristin Ess So many emails have come in asking how I did the braid on Lauren’s hair for her last Chelsea Lately appearance.

I recently recreated that braid and took a couple photos so you could see it up close. Here’s the very simple secret to this braid: In a regular braid there are 3 strands. How-To: The Cascade/Waterfall Braid - StumbleUpon. The waterfall braid also known as the cascade braid recently exploded as the new "trend braid" of the season.

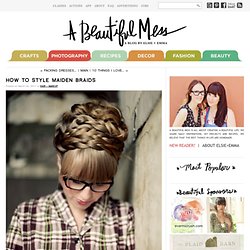
The waterfall effect looks cool and complex, but it's easier to style than you think. Give this beautiful braid a try when Beautylish takes you through the how-to! Section Off The waterfall braid works best on straight or loose waves. Brush out all the knots with a wide tooth comb. Braid As Usual Braid your strands regularly three times, beginning from the right strand. Drop the Strand This is where it gets tricky. Step and Repeat Repeat this process—French braid the left strand, drop the right strand, and pick up an adjacent new piece. Pin and Secure Once you've reached a comfortable point to stop your braid, secure it to your scalp with bobby pins. How To Style Maiden Braids. Last month I did a makeover story with Kelsie and had many requests for a maiden braid tutorial.

Yesterday she came in and we photographed these simple step by steps. Kelsie has extremely long and thick hair, but anyone with shoulder length or longer can do these braids (see my photo below for an example). Steps 1-2: Braid two strands on each side of a center part. Steps 3-5: Wrap braids around the crown of your head and pin in place with one pin each. Step 6: Arrange braids so that they cover the front of your head like a headband. Steps 7-8: Pull the rest of the hair into a ponytail and pin it into a cute messy bun. Step 9: Add final pins and spray. Summer Hair Braid Trends. Braids, pleats, or plaits—whatever you call them, we're absolutely loving all things twisted in hair this season.

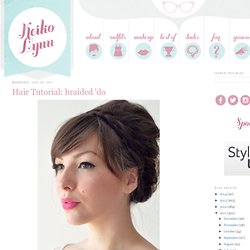
Beautylish brings you the three hottest braid trends this season and three easy braid DIY tutorials to replicate the look yourself. Who needs a headband when you can make one from your hair! We're loving this European, Heidi-inspired front braid that you can style into an updo or wear with your hair down. See how easy it is to give yourself a plait with Imogen's tutorial. It's easy to give your braids a little extra something with ribbons, flowers, bows, and any other accessories you can think of. The fishtail braid (or Herringbone braid) became a popular trend among celebrities and fashion mavens this year, and we too adore the sea-inspired style. Hair Tutorial: braided 'do. I know I said I would post this hair tutorial yesterday, but obviously I'm a no good liar because today is not yesterday, it's today.

This hairstyle is basically the same thing as milkmaid braids, only modified to up the volume and lessen the big part in the back. Pigtails or regular milkmaid braids make me look like I'm balding, as I have a wicked scar in the back of my head. I would recommend doing this in a mirror and checking the back to make sure it's all neat and tidy as you go, because I did not and it's a little (or a lot) messy in the back. I redid it before heading out and it looked much better, so make sure you use a mirror! For full instructions, keep reading after the jump. What you need: dry shampoo or volumizing product (like the Sachajuan volume powder I often use) bobby pins brush. GUEST POST - thebeautydepartment.com. Photos by: Kathleen Bly post designed by kristin ess Mad love for our first guest post winner, Taylor Nick!!!

I am fully obsessed with this bohemian-inspired-braided-goodness! Even though Taylor had some SERIOUS competition, there’s no doubt that this little lady took the cake in our hair tutorial contest. She created a beautiful, textured, easy hairstyle that will work with almost any hair type. Congratulations Taylor, and thanks to ALL of you who entered this post contest. Braid Hairstyle.