
Wedding Blog for Vintage and Creative Brides. More Design Please - MoreDesignPlease. Not martha - to make: marble magnets. I finally gave in and made marble magnets.

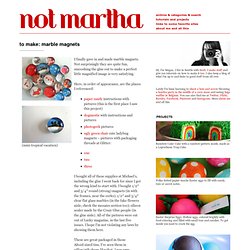
Not surprisingly they are quite fun, smooshing the glue out to make a perfect little magnified image is very satisfying. Here, in order of appearance, are the places I referenced: paper candy instructions with pictures (this is the first place I saw this project) dogmestic with instructions and pictures photogeek pictures ugly green chair cute ladybug magnets – pictures with packaging threads at Glitter:onetwothree I bought all of these supplies at Michael’s, including the glue I went back for since I got the wrong kind to start with. I bought 1/2″ and 3/4″ round (strong) magnets (in with the frames, near the corks); 1/2″ and 3/4″ clear flat glass marbles (in the fake flowers aisle, check the mosaics section too); silicon sealer made by the Crazy Glue people (in the glue aisle).
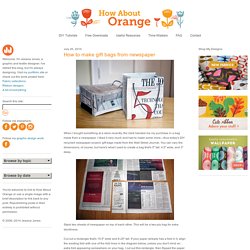
These are great packaged in those Altoid-sized tins, I’ve seen them in office/gift shops like that. How to make gift bags from newspaper. When I bought something at a store recently, the clerk handed me my purchase in a bag made from a newspaper.

I liked it very much and had to make some more—thus today's DIY recycled newspaper project: gift bags made from the Wall Street Journal. You can vary the dimensions, of course, but here's what I used to create a bag that's 5" tall, 4.5" wide, and 3" deep. Stack two sheets of newspaper on top of each other. This will be a two-ply bag for extra sturdiness. Cut out a rectangle that's 15.5" wide and 8.25" tall. Fold a flap 1.25" down from the top. Cut two pieces of cardstock or chipboard to 4.25" x 1", then glue them on the widest two panels just under the top fold. Put glue on the outside of the 0.5" tab and bring the left-most panel over to form the body of the bag, aligning the cut edge of the panel with the folded edge of the flap. Upend the bag so the 2" flap is now up. Put glue on both flaps and fold them inward to form the bottom of the bag.
Mason Jar Key Hook. Hey guys! Hope you all had a great Wednesday I have a fun project to share today! I started with a 1×8 board from Lowe’s that I cut to about 2′ long. I used a different paint method on this board and I love how it turned out so I am going to share it with you in my next post. So for now… Here is my board after it is painted and ready to go. I also purchased 3 hooks and a pipe clamp from Lowe’s.
My next step was attaching them to my board. Then it was time to attach the clamp. Most favorited all-time. Seven Flowers. Awesome Pop Up. Crystal Enamel Drinking Glasses. My kids are old enough that we can all use glass to drink out of now.

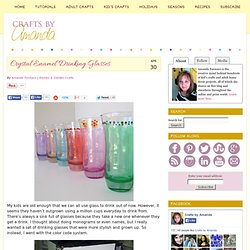
However, it seems they haven’t outgrown using a million cups everyday to drink from. There’s always a sink full of glasses because they take a new one whenever they get a drink. I thought about doing monograms or even names, but I really wanted a set of drinking glasses that were more stylish and grown up. So instead, I went with the color code system. It all started with this box of drinking glasses I bought at the thrift store for $3.54.
The set includes 6 tall glasses and 6 short glasses. In case you’re wondering how I got this pretty effect, I used DecoArt’s new Crystal Gloss Enamels. They dry clear and were perfect for this project! Then I added decorations by dipping the handle end of my paintbrush into the enamels and dotted them onto the glasses. I created flowers using this method as well. They need to dry for 48 hours. Then after 48 hours, you place them into a cold oven.