
Retro… in a modern way. I have been so tickled lately with all the questions about how I get my hair in that retro, 1940’s style.
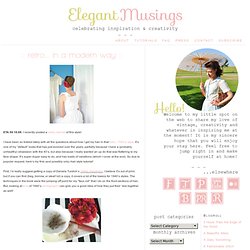
It’s one of my “default” looks that has just evolved over the years; partially because I have a (probably unhealthy) obsession with the 40’s, but also because I really wanted an up do that was flattering to my face shape. It’s super-duper easy to do, and has loads of variations (which I cover at the end). So due to popular request, here’s my first–and possibly only–hair style tutorial! First, I’d really suggest getting a copy of Daniela Turdich’s 1940s Hairstyles. I believe it’s out of print, but if you can find (beg, borrow, or steal! Here’s what you’re going to need for the exact style I’m demonstrating (other ideas at the end of this tutorial). Ready? Start by giving your hair a good brush and parting it on one side. Take one side, gathering up the front and side from approximately the middle of the top forward.
Pin in place as described above. Voila–finished roll!!! Done!! D.I.Y. Curls // How To Rag Roll Your Hair. I love the look of naturally curly hair!
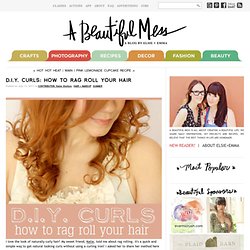
My sweet friend, Katie, told me about rag rolling. It's a quick and simple way to get natural looking curls without using a curling iron! I asked her to share her method here on A Beautiful Mess because I knew you'd be itching to learn like I was! Enjoy... You'll need some cut fabric strips, a comb and some water. How to rag roll your hair- First, dampen the bottom of your hair (the part you plan to roll) using a spray bottle. DIY Flower Halo - HonestlyWTF - StumbleUpon. You’ll start by cutting 2 circles from the piece of felt at approximately 2″ in diameter.
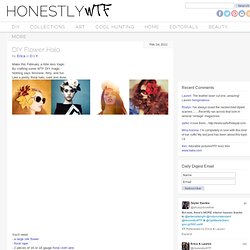
Form the wires of your halo by molding and bending each piece into a half circle. Lay the two half circles opposite of each other to create a single circle, laying it over the top of your head to check the fit. Wrap floral tape over 2 sections of overlapping wire at 11 o’clock and 3 o’clock. Trim any overlapping pieces with the wire cutters. (Click images to enlarge) Using the wire cutters, cut the stem off the flower making sure the back is flat.
The possibilities are endless with this as you can wrap flowers around half or the entire perimeter of the halo, reinforcing with glue. How to make roses from maple leaves. Christmas Lights in 8 Bedrooms. Posted by rd on Thursday, November 3, 2011 · Countdown begins before Christmas!
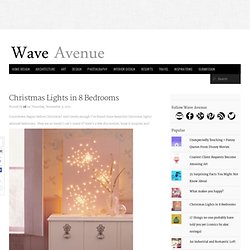
And timely enough I’ve found these beautiful Christmas lights adorned bedrooms. They are so lovely I can’t stand it! Here’s a few discoveries, hope it inspires you! [source: one, two, three, four, five, six, seven, eight] Simply Vintagegirl Blog & Blog Archive & Tutorial: How to Make... - StumbleUpon. 29 May 2010 These elegant fabric flowers are very simple to make . . . and only take a few basic supplies.
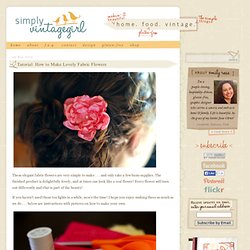
The finished product is delightfully lovely, and at times can look like a real flower! Every flower will turn out differently and that is part of the beauty! If you haven’t used those tea lights in a while, now’s the time! I hope you enjoy making these as much as we do . . . below are instructions with pictures on how to make your own. Supplies: · Synthetic Silky Fabric · Scissors · Candle (preferably a tea light) Additional supplies: · Needle and Thread, Glue Dots or Glue Gun · Buttons and/or Beads Directions: 1. Make the largest one’s diameter about half an inch larger than you want the diameter of the flower, as the petals will end up shrinking a bit. 2. You can also cut around the pattern and skip the drawing part, it just might not be as uniform . . . but with these, uniform isn’t necessary. 3.
Cut just inside the drawn lines to make a circle out of the fabric. Handmade Salt Pouches For The Shower Or Bath. I love salt scrubs, especially this time of year when I want to slough off the dead skin from winter, and I equally love bath salts for the skin softening ingredients in them – but more often than not I find myself in the shower.
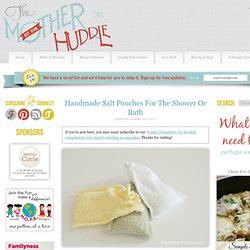
These pouches are perfect for combining both bath salt and salt scrub into an exfoliating pouch I can bring into the shower, and they are simple to make. You can go a few different routes when making these so play around with your recipes and find your favorite. I made these for my mom for Mother’s Day so I added a few things for specific reasons. I will list them to give you an idea of how you can customize these to suit your needs. In my moms pouches I included: A few different ideas for a mix: Oatmeal, lavender buds, and powdered milk with a little of your favorite essential oilJust sea salt and grapefruit or petitgrain essential oil for an invigorating scrubSalts, herbs, and essential oil Start with 6 cheap washcloths.
Folded in half, cut them into thirds.