
Microcontroller Basics - Introduction. One thing is great about microcontroller ICs, these are available almost in all parts of the globe and electronic retailers.
Fundamentally microcontroller devices are popularly used in applications involving assessments of the surrounding environment and in similar electronics. You could find these devices being used for displaying a certain parameter, in motor control applications, LED lighting, sensors of various types such tilt sensor, accelerometer, velocity meter, data loggers, temperature controllers, keyboards etc. The primary understanding regarding microcontrollers could be obtained by referring to AVR Amega32 microcontroller which is so advanced that sometimes it’s called a computer within a chip. This device is assigned to carry out series of commands to form a program.
The language of the program that you would be seeing here is C++. When it comes to MCUs, you get the facility of having the option of controlling and configuring all of its pinouts.
Index of - BASIC Commands. How to debounce a switch. How to de-bounce a switch using CMOS & TTL It has come to my attention that there is a definite lack of understanding on how this simple procedure is achieved.
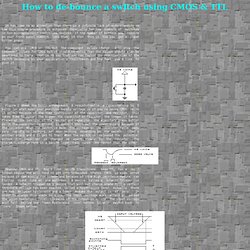
Especially for low numbers of switches in non-microprocessor controlled devices. If the number of buttons you require on your front panel numbers less than 16 then this is how you get a clean button press. You can use CMOS or TTL but the component values change. I'll show the component values for CMOS but it should be noted that the values should also be sweetened to taste. Figure 1 shows the basic arrangement. RTOS. Introduction: World of microcontrollers - Book: PIC Microcontrollers. The situation we find ourselves today in the field of microcontrollers had its beginnings in the development of technology of integrated circuits.
This development has enabled us to store hundreds of thousands of transistors into one chip. That was a precondition for the manufacture of microprocessors. The first computers were made by adding external peripherals such as memory, input/output lines, timers and others to it. Further increasing of package density resulted in creating an integrated circuit which contained both processor and peripherals.
PSoC. PIC Logix: DIY: Simple standalone logic analyzer for less than $30 ! Features Minimalistic: Just two (2) important components + several capacitors/resistors and connectors Stand-alone, does not require PC - although it looks like running on a PC :) Displays output on VGA monitor or television (PAL and NTSC) Uses standard PS/2 keyboard 8 input signals up to 900kHz (can be extended to +- 2MHz) state analyzer (for JTAG at the moment, but anything is possible to implement) Open-source (GPL) Design PIC Logix has two major components.

CJKIT-20905: JAMECO KITPRO: Education & Hobby Kits. XPLO. 33014K.pdf (application/pdf Object) Pic Micro Pascal compiler. Start with PICs. PIC info. The PIC Tutorial - Instruction Set Summary. The PIC Tutorial - The Microcontroller Fundamentals. Basically, a microcontroller is a device which integrates a number of the components of a microprocessor system onto a single microchip and optimised to interact with the outside world through on-board interfaces; i.e. it is a little gadget that houses a microprocessor, ROM (Read Only Memory), RAM (Random Access Memory), I/O (Input Output functions), and various other specialized circuits all in one package.
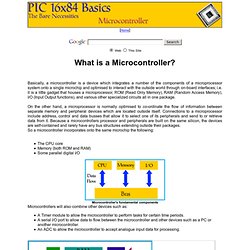
On the other hand, a microprocessor is normally optimised to co-ordinate the flow of information between separate memory and peripheral devices which are located outside itself. Connections to a microprocessor include address, control and data busses that allow it to select one of its peripherals and send to or retrieve data from it. Beyond Logic. Microchip PIC micros and C - source and sample code. Sample projects for the Microchip PIC micro series of microcontrollers, including the PIC12x, PIC16x, PIC18x, PIC24x, and dsPICx microcontrollers.
Code is targeted at the Hi-Tech C compiler, from www.htsoft.com, the C18 or C30 compiler from www.microchip.com, or CCS C. We want to publish your embedded source code for the benefit on the PIC community. Send it to support@microchipc.com and I will post it on the site, together with recognition of your name and website. MPLABX. Contiki. Contiki is an open source operating system for networked, memory-constrained systems with a particular focus on low-power wireless Internet of Things devices.
Examples of where Contiki is used include street lighting systems, sound monitoring for smart cities, radiation monitoring systems, and alarm systems.[1] Contiki was created by Adam Dunkels in 2002[2] and has been further developed by a world-wide team of developers from Atmel, Cisco, Enea, ETH Zurich, Redwire, RWTH Aachen University, Oxford University, SAP, Sensinode, SICS, ST Microelectronics, Zolertia, and many others.[3] The name Contiki comes from Thor Heyerdahl's famous Kon-Tiki raft. PIC uC Tutorial #1: Basics - Introduction to PIC microcontrollers and capabilities. Planet Open Source. Open Programmer, an open source USB programmer for PIC, ATMEL AVR, I2C-SPI-MicroWire EEPROM. An open source USB programmer for PIC micros, I2C-SPI-MicroWire-OneWire-UNIO EEPROMs, some ATMEL micros, generic I2C/SPI devices and (soon) other devices Quick facts Completely free and Open Source (including firmware) Programs PIC10-12-16-18-24, dsPIC30-33, EEPROMs type 24xxxx (I2C), 25xxx (SPI), 93xx6 (MicroWire), DS24xx (OneWire), 11xxx (UNIO), some ATMEL micros, communicates with generic I2C & SPI devices (see supported devices ) Can work as ICD debugger USB 2.0 Full Speed interface, HID class (same as keyboards, mice, etc.)
Self powered Doesn't need drivers Built from easy to find components (estimated cost ~10€) Hardware generated timings for maximum speed and reliability (writes a 18F2550 in 15s, 8s under Linux) Doesn't saturate your CPU and doesn't suffer when other programs are running Open source control programs for Linux and Windows It's not another PicKit clone Picture of a prototype: Another programmer? USB & HID firmware (v0.8.0) Control programs Download.
Aardvark I2C/SPI Host Adapter - USB to I2C and SPI interface. Usbpicprog. Welcome to microchipDIRECT. Bus Pirate. From DP Bus Pirate v3.6 available now for $30.15, including worldwide shipping Bus Pirate v3.6 is also available at Adafruit Industries (USA) EpicTinker (USA) Watterott Electronic (Germany) Evola (Europe) Anibit (USA) Hackaday (USA) The Bus Pirate is an open source hacker multi-tool that talks to electronic stuff.
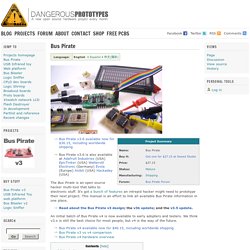
It's got a bunch of features an intrepid hacker might need to prototype their next project. This manual is an effort to link all available Bus Pirate information in one place. Read about the Bus Pirate v3 design; the v3b update; and the v3.5 update. An initial batch of Bus Pirate v4 is now available to early adopters and testers. Introduction Features Features overview (original) Hardware Tutorials. What Is ClockworkMod Recovery And How To Use It On Android [Complete Guide] ClockworkMod, abbreviated as CWM, is a popular custom recovery for Android phones and tablets developed by Koushik Dutta (Koush) – a well-known name in the Android dev community.
![What Is ClockworkMod Recovery And How To Use It On Android [Complete Guide]](http://cdn.pearltrees.com/s/pic/th/clockworkmod-recovery-complete-11333368)
ClockworkMod recovery allows you to perform several advanced recovery, restoration, installation and maintenance operations on your Android device that aren’t possible with the stock recovery, and is one of the most common ways used to gain root access, back up device data, install custom ROMs, kernels, themes & mods, and more. However, for anyone new to Android customization and hacking, some of its options might prove to be a tad confusing. In what follows, we will cover all that this recovery is capable of doing, and how to do it. Here is what we shall be covering in this guide: Now let’s take a look at each of these topics in detail. About Android Recovery. Programming an ATtiny w/ Arduino 1.0.1. This tutorial shows you how to program an ATtiny45, ATtiny85, ATtiny44 or ATtiny84 microcontroller using the Arduino software.
These are small, cheap ($2-3) microcontrollers that are convenient for running simple programs. The ATtiny45 and ATtiny85 have eight legs and are almost identical, except that the ATtiny85 has twice the memory of the ATtiny45 and can therefore hold more complex programs. The ATtiny44 and ATtiny84 have 14-legs and more inputs and outputs. Thanks to Mark Sproul for his work on making the Arduino core portable across processors. Materials and Tools.
Bodhi Linux 1.4 is a speedy, customizable OS for tablets, notebooks, desktops. Bodhi Linux is a light-weight operating system based on Ubuntu.
It’s highly customizable and ships with a fraction of the pre-loaded apps you’ll find in Ubuntu. But the key difference between Bodhi and the main branch of Ubuntu is that Bodhi Linux uses the Enlightenment desktop manager and offers a choice of environments suitable for notebook, tablet, or desktop computers. This week Bodhi Linux 1.4 was released. The key updates included a newer version of the Midori web browser, a more recent Linux kernel, and updated apps available for download, including the latest versions of the Firefox and Chromium web browsers. Like many Linux-based operating systems, you can take Bodhi for a test drive before installing it by downloading a LiveCD image and burning it to a disc. Since Bodhi doesn’t come with as much software pre-installed as Ubuntu, the LiveCD disk image is nearly half the size, at just over 417MB. Using RXTX In Eclipse - Rxtx. Coridium Corporation - Programming. Minibloq. DIY USB to Serial Cable For $3! « Jonathan Thomson's web journal.
Please take a moment to vote for my entries in the Hack It! And Make It Glow Challenges! Update Several good, inexpensive, purpose-built USB to serial modules are now available on eBay for around five to six dollars. Just search for PL2303 or CP2102. Introduction The Arduino board is a great way for beginners to start learning about developing software for microcontrollers; however it’s cost, while a steal when compared to the initial investment required in the past, can be a little too steep for a do-it-yourselfer who wants to do things cheaply.
To be fair there are arduino clones that do lower the price a good bit, but the real cheapskates that don’t mind doing a little extra work can’t help but think they could do it for less. The trick is to use a Nokia cell phone data cable based on Prolific’s PL-2303. Preparation Tools: Wire Stripper Multimeter Anti-static wrist strap Driver: Recent versions of Linux have the driver pre-installed. Using Microcontrollers (Atmel AVR and Microchip PIC) » Jumper One. Many people using Arduino or some other development board in their projects, instead of making their own board with microcontroller because they simply don’t know how to design PCB with microcontrollers. What microcontrollers need in order to operate? This time I will be focusing on two most popular 8 bit micro architectures: Atmel AVR and Microchip PIC.
In reality what many people are afraid of is really simple to do. You just need a couple of passive components and you’re good to go. There’s two scenarios you might want to stick with: Do not put ISP (In System Programming interface) on the board. Bus Pirate v3 (assembled) [THM180C4M] - $27.15. I received Bus_pirate 3.6 dp 6037_v1. I installed FTDI driver and other things need to connect the BP. when I connect the BP with my PC, terminal just show message "Connected.. " Not HIZ_. i tried searching about this problem and upgrade firmware. but not be able to upgrade firmware, upgrade program log's ID is 0x00.