
Design*Sponge ? Blog Archive ? diy project: renske?s minimalist tote bag. A talented seamstress with a mission, Renske Solkesz decided to create her own wardrobe after finding herself frustrated with high fashion prices.
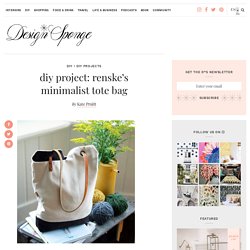
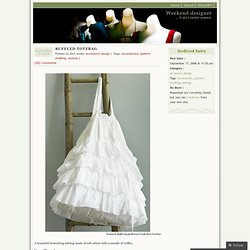
When we saw her chic and modern wardrobe creations, we asked if she’d be willing to create and share a fun accessory tutorial with us. I’m super excited about what she’s come up with: an amazing self-closing utilitarian tote! I’m a huge fan of the graphic contrast and the leather and rivet details. Like her fashion designs, this tote is made from inexpensive materials, yet looks totally luxe. I’m halfway out the door to the fabric store already! CLICK HERE for the full how-to after the jump! When I designed this bag, I wanted to integrate the grip/straps in a more functional way with the rest of the bag. RUFFLED TOTEBAG. Featured: Ruffle bag by Rianrae (India Rose Textiles) A beautiful drawstring totebag made of soft cotton with a cascade of ruffles.
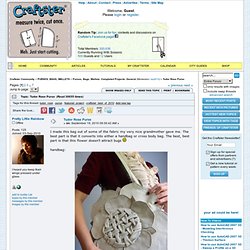
You will need: Fashion fabric, 45″ wide equal to 3.5 times your bag circumference measurement (W).Coordinating thread. Tudor Rose Purse. I made this bag out of some of the fabric my very nice grandmother gave me.
The best part is that it converts into either a handbag or cross body bag. The best, best part is that this flower doesn't attract bugs. Blog » Simple Sewing Alterations You Can Make On Any Bag Project. Lazies, Tracy Chapman, owner of Sew Thankful, had a great time creating this Miranda Day Bag for herself.
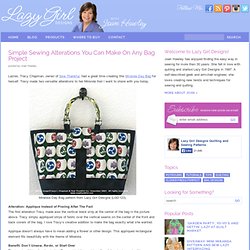
Tracy made two versatile alterations to her Miranda that I want to share with you today. Miranda Day Bag pattern from Lazy Girl Designs (LGD123). Alteration: Applique Instead of Piecing After The Fact The first alteration Tracy made was the vertical black strip at the center of the bag in the picture above. Tracy simply appliqued strips of fabric over the vertical seams on the center of the front and back covers of the bag. I love Tracy’s creative addition to make the bag exactly what she wanted. Applique doesn’t always have to mean adding a flower or other design. Benefit: Don’t Unsew, Re-do, or Start Over The beauty of this alteration is that Tracy added these strips after all the piecing and quilting was done.
Adding strips on top of the already sewn cover allowed Tracy to customize her project and move forward without losing any of the work she had already done. Amy Butler. Pleated_tote_pattern.pdf (application/pdf Object) Pleated tote (beach bag) tutorial. Before we went away, I decided that a new bag for the beach was a must – something big and roomy to hold books, magazines, sunscreen, hats, and all that other good stuff.

So I made this big pleated tote, and it worked perfectly. This is a picture of it in action: And here’s a little tutorial in case you want to make one for yourself – doesn’t have to be for the beach either, it could come in handy for schlepping all kinds of things around town. Here’s what you need: two pieces of your main fabric cut in shape A four pieces of the top shape (B) in a contrasting fabric two pieces of a lining fabric in shape C one piece of the long rectangle for the strap in the contrasting fabric two pieces of the top shapes (B) and one of the strap in a medium weight interfacing. Insulated Picnic Tote. Vanessa from Punkin Patterns is up today in our Summer Sewing series, here to help you keep your picnic foods cold or hot in any weather!

Her Insulated Picnic Tote tutorial has some fun details and is easy to make. Check out Vanessa’s introduction and then come back to learn how to make the tote for summer picnics all season long… Runaround Bag Pattern. In this pattern you’ll find:step-by-step instructions with full color photos and professional illustrations for making one Runaround Bagfull size print-at-home pattern piecestwo interior pocket optionsmagnetic snap optionincludes License to Sell!!!
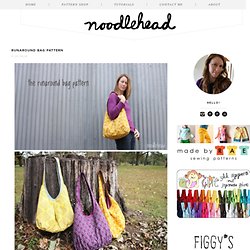
By purchasing this pattern, I also give you (the purchaser of this pattern) the rights to sell finished Runaround bags (on a home based scale). Additional information regarding the license to sell is included in the pattern. Materials needed: 3/4 yard exterior3/4 yard interior1/2" double fold bias tape (store bought or handmade)14mm magnetic snap (optional)8” zipper (optional)1 1/2 yards fusible woven interfacingthreadwater soluble pen Approx. This is an 14 page PDF pattern with full size print-at-home pattern pieces and includes detailed step-by-step instructions with professional illustrations and full color photographs.
Projects. Growing up, we had a very special Little Golden Book® that only appeared during the Christmas season.
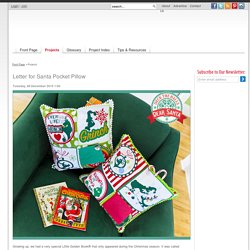
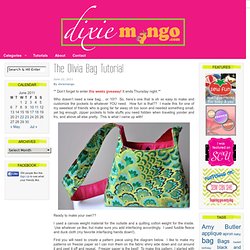
It was called Santa's Toy Shop. It had a thin plot line, but we loved it. The Olivia Bag Tutorial. ** Don’t forget to enter this weeks giveaway!
It ends Thursday night. . ** Handmade Gift Exchange gift features #2. Are you ready for the second round of highlighted gifts made for the Handmade Gift Exchange?

If you haven’t checked out the Handmade Gift Exchange Linky party, you should! And even if you have, there are tons of new gifts linked up that you don’t want to miss! AND for all you HGE participants, i will be extending the linky party until August 15. some of you haven’t received your gifts yet and wanted to join in the fun. so don’t worry, i’ll leave it open for a few more weeks than previously stated. for those of you who are new here, twice a year i host a Handmade Gift Exchange where i pair up 2 strangers who become friends and made gifts for each other. its loads of fun! The next Handmade Gift Exchange will start the first week of November, so mark your calendar! Tutorial: Reversible tote bag. Quick & Cool Holiday Gift: Two-Tone Gift Bags in 3 Sizes.
We all know good things don't always come in small packages. They can be small, medium or large... and still be quite wonderful. That's why we made our super cute gift bags in three sizes. It also allows you to sort out your holiday list into those who've been Good, Very Good, and Great. Our elegant gift bags come in three useful sizes and are a great way to use up larger fabric scraps. Fully lined zippered box pouch - pattern and tutorial - it's a Pretty Modern life. I love the look of a zippered box pouch...so incredibly cute.
I found many tutorials on the internet, but was disappointed after making pouches following these tutorials to find that they were not fully lined; looks so much nicer when you open your pouch and there are no seams. It took me a long time to figure it out and I thought and thought and thought...then I got it♥ I don't want to keep this knowledge to myself, so here it is. I'd like to thank Jane at Projects by Jane (the only other tutorial like this that I was able to find on the internet - wish I'd found it sooner). New Green Mama: Reversible Messenger Bag Tutorial. Beginner's Bias Tape Bag with Free Downloadable Pattern.
Make your own 6-pocket mini pocketbook and stay organized — insatiable need. I’m sure that many of you, like me, are on an eternal quest for organization. I know I’m not alone in finding the Container Store’s promise of a perfect, organized life utterly seductive. But here’s the thing…I don’t really like purging, I love my stuff. Therefore I also love pretty things in which to stash my stuff, so I get to enjoy my fantasy of being organized and contained. This tutorial is about helping you stay organized, in a quick, easy, and super-cute way. It is a distilled version of the Holland Cox pocketbook, and is a breeze to make. The pattern …is only four rectangles. The body is 7.25″ tall.the large pocket is 5.5″ tallthe medium pocket is 4.25″ tallthe small pocket is 3″ tall materials needed I chose a vintage cotton canvas for the body in a bright retro floral, and quilting weight cotton in a matching color for the interior.
You’ll also need a button and a bit of elastic for the closure, and a bit of ribbon for the pen. Start with the pockets 1. 2. The closure 3. 4. 6. Sew a simple backpack. Two pocket, ultra slim fabric card case — insatiable need. A few weeks ago, I went to Dallas for the wedding of a friend of mine from college, and unsurprisingly, the reception ended up doubling as a mini college reunion. Fabric Clutch. Shoulder Bags and Totes.