
3D, Maya, Blender and more tutorials from beginner to advanced. 3D World - The Magazine for 3D Artists. Ben Mathis. Download PDF Normal Map Workflow Page 2 After you have matched your low poly to the high poly, it's time to layout UV's.

When making UV layouts for use with normal maps, there are a couple things to be mindful of. The first is what your target engine is capable of. Also, keep in mind that UV chunks can be facing "forward" or "backwards". 1) Everything must have unique UV space. 2) Mirroring is allowed, but only directly down the center of the object. 3) Creative mirroring and flipping is allowed, and the engine can adjust using the winding rules and the facing direction of the UVW chunks.
Regardless of your engine type, there are some rules to making good UV layouts. If you are using 3DSMax as your baker (baking normal maps is only available in max 7 and up) you may not have any UV chunks overlapping. After your UV's are finalized be sure to reset Xforms on your low poly. Above outlined in pink is the options box. clicking it brings up the below dialog box. Don't render yet. Chaos Vue 7 by Daniel Respaud. Making Of 'Lost Trinity' by Brian Recktenwald.
EnvironmentSculpting. Mental ray Sun & Sky. Daylight system > Modify panel > Daylight Parameters rollout > Sunlight/Skylight drop-down lists > mr Sun/mr Sky The mental ray Sun & Sky solution is designed to enable physically plausible daylight simulations and accurate renderings of daylight scenarios.
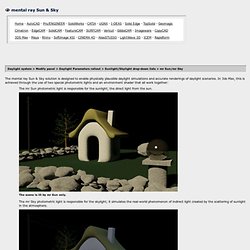
In 3ds Max, this is achieved through the use of two special photometric lights and an environment shader that all work together: While you can use these separately, their intended functionality is unleashed only when used together. mr Sun and mr Sky are meant primarily for use within the 3ds Max Daylight system. When used in combination, this solution is called Sun & Sky. Note: Sun & Sky is a true high-dynamic range photometric lighting system that requires the Logarithmic Exposure Control to be enabled. Certain parameters do the same things in mr Sun, mr Sky, and mr Physical Sky. For this reason the concept of parameter inheritance is included. Interface (common parameters) Horizon Height—The vertical position of the horizon.
Volumetric cloud tutorial using 3ds max : Autodesk 3ds Max Tutorial. Let's start. start a new file in MAX or VIZ, 1) Create a plane for your ground surface.
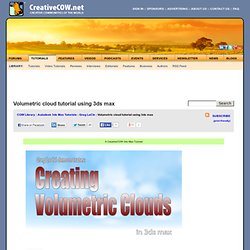
(CREATE>GEOMETRY/PLANE) 2) Create a big sphere, apply a NORMAL modifier to the sphere (MODIFIER>NORMAL) and select invert. (this is to make sure the sphere is viewable from inside) This big sphere is going to be used as the Blue sky background. 3) Position the sphere halfway, meaning centerpoint should be around the ground plane) 4) Select the Sphere and go into EDIT MESH mode (MODIFIER>EDIT MESH) and click on the VERTICES button, select the half the vertices underneath the ground plane and press delete. 5) Select Sphere and apply a spherical UVmap to it. 6) Create a gradient map and apply it to the sphere.
Click to view larger image. 7) Now we are going to create the Gizmo apparatus. Click to view larger image. 8) After creating these we're going to add Volumetric fog to the gizmos, go to RENDERING>ENVIRONMENT and under "ATMOSPHERE" click on "ADD" and add a Volume Fog effect. Maya 3D Modeling Tutorials for Level Design and Game Environments. Tanat. FUCK YEAH CONCEPT ART. Kelseybeckett: I’ll be slowly adding all my full size images from my show “Murmuration,” that opened January 20th at Corey Helford Gallery!
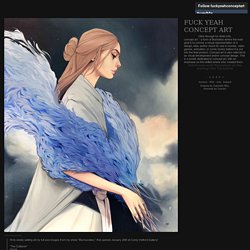
“The Collector”20x24Oil on CanvasPrints of this piece are available at !!! Poolsofchrome: Steel, muscle, sinew and not much in the way of a limbic system mischeviouslittleelf: Areit, thats all you get for now. 3DTotal.com - CG artists homepage with fresh CG industry news // 3ds Max Tutorial. By Ian Ibbotson Introduction Before attempting to create a scene it is important to understand global settings pertaining to any scene that will make modelling more efficient together with settings that pertain to individual scenes and stages in scene development.
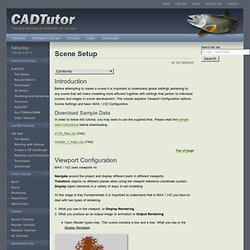
This tutorial explains Viewport Configuration options, Scene Settings and basic MAX / VIZ Configuration. Download Sample Data kf102_files.zip (1mb) module_1_maps.zip (11kb) Top of page Viewport Configuration MAX / VIZ uses viewports to: Navigate around the project and display different parts in different viewports Transform objects on different planes when using the viewport reference coordinate system Display object elements in a variety of ways to aid modelling At this stage in Key Fundamentals it is important to understand that in MAX / VIZ you have to deal with two types of rendering. 1. Open Render types.max. On the Main Toolbar press Quick Render This produces an Output Rendered image Viewport Menu Smooth + Highlight / Wireframe 1. Sascha Henrichs's videos.
Ben Cloward - Character Animator. Max Cookie - 3DS Max Tutorials and Training.