Glenn Feron - The Art of Retouching. P o r t f o l i o Retouching solutions for any image ~ any client High End digital retouching ~ Photo retouched composites ~ Creative retouching Professional photo retouching services for models, photographers, fashion, beauty retouching, glamour, Publishing, advertising, wedding, family photos, web sites, Facebook profiles, restoration.
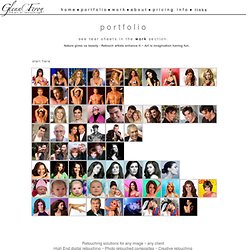
Have your image retouch ready for "Photo Canvas" for the holidays and other photo finishing services. Before & after retouched images above. A video portfolio of some past & present photos I've taken Wiil be for sale soon on my web site. Art Takes Times Square Contests & Gallery New Images to brows though For Photography 2013" "For Photography 2012" "For Photography 2012 "For Artwork" *Lose Weight fast * Belly Slimming & more* ~ 25 Lbs off in one day, Guaranteed!
Support our Troops & First responders NYPD ~NYFD ~EMS Create jobs in the USA ... Lest We Forget ~The home of the Free, Because of the Brave ~ Thank you all & God Bless. Girl Power. How to Mold Paint Splatter to a Face in Photoshop. In this tutorial, we'll learn how to take splattered paint Photoshop brushes and apply them to the contours of a model's face.

This is a relatively simple technique, which yields excellent artistic results. Let's get to it! Final Image Preview Take a look at the image we'll be creating. Want access to the full PSD files and downloadable copies of every tutorial, including this one? Video Tutorial Our video editor Gavin Steele has created this video tutorial to compliment this text + image tutorial. Preparation First thing you will need to do to create this effect is find some nice paint splatter/spray brushes. Step 1 Copy the background and paste it onto a new layer. Create a new layer labeled "Extra Skin. " For this I usually just play around with the Cloning Tool until I get close to something that looks right. Step 2 Once we have covered all the facial features, select the "Extra Skin" layer and the "Subject" layer, then press Command + Alt + E on to merge the layers into a new layer.
Effet 3D polaroïd. Bonjour, Ce tutorial va vous permettre de faire ce genre d'effet 3D ci dessus. 1.
Ouvrez un nouveau document de 300 / 376 pixel.et avec l'outil plume dessinez une forme comme ci dessous . Utilisez le blanc comme couleur de remplissage. 2. Maintenant, un clic' droit sur votre calque de forme et choisissez "option de fusion". Ne fermez pas votre fenêtre! Cliquez sur "incrustation de couleur" et entrez les paramètres : Toujours dans la même fenêtre cliquez sur "incrustation de dégradé" avec ces parametres: Cliquez sur ok!
Vous devriez avoir l'image ci dessous: 6. 7. Prenez l'outil de selection directe , selectionnez les 2 points avant et reculez les comme ci dessous : 8. 9. 10. 11. 12. 13. 14. 15. 16. 17. 18. 19. PS: J'ai testé ce petit tutoriel avant de vous le traduire et voilà ce à quoi je suis arrivée: Bon travail à vous tous!