

Page corner bookmarks. This project comes to you at the request of Twitterer @GCcapitalM.
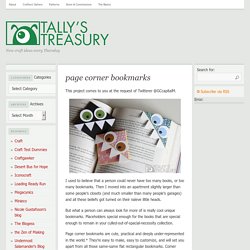
I used to believe that a person could never have too many books, or too many bookmarks. Then I moved into an apartment slightly larger than some people’s closets (and much smaller than many people’s garages) and all these beliefs got turned on their naïeve little heads. But what a person can always look for more of is really cool unique bookmarks. Placeholders special enough for the books that are special enough to remain in your culled-out-of-spacial-necessity collection. Page corner bookmarks are cute, practical and deeply under-represented in the world.* They’re easy to make, easy to customize, and will set you apart from all those same-same flat rectangular bookmarks.
If you like this tutorial, here are a couple others that might be up your alley. Instructables - Make, How To, and DIY. Start.no. Related Searches no.net Buy this domain The domain no.net may be for sale by its owner!
Popular Categories Finance Shopping Lifestyle Games Internet Travel Electronics Computers. Shop by Color. Fabric Origami Workshop. Account Suspended. Joseph Wu's Origami Page. Creator/Folder: Joseph Wu Date: July 27-29, 2005 (design) Diagrams: This model is not diagrammed.
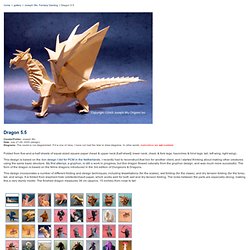
If it is one of mine, I have not had the time to draw diagrams. In other words, instructions are not available. Folded from five-and-a-half sheets of equal-sized square paper (head & upper neck [half sheet]; lower neck, chest, & fore legs; haunches & hind legs; tail; left wing; right wing). Water Balloon Luminaries.
A fun and easy project with a beautiful payoff.
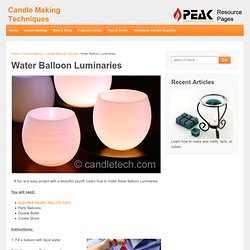
Learn how to make these Balloon Luminaries. You will need: High-Melt Paraffin Wax (IGI 1260)Party BalloonsDouble BoilerCookie Sheet Instructions: 1. 2. 3. 4. 5. Craftershock.com. Craftershock.com. Sukisuki. Handmade Plushies : un album. Say No to Crack » Blog Archive » Wow – Gummi Bear Sculptures! Imagine walking into a friend’s dining room to find this four foot tall Gummi Bear chandelier hanging from the ceiling: YaYa Chou, the artist who conceived the chandelier, has also created many other Gummi Bear sculptures, such as this Gummi Bear rug (which I recommend not using as a bath mat): I thought this red Ram was the cutest though.
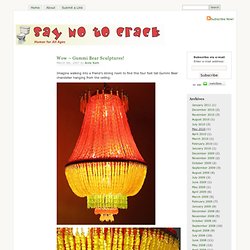
Primarily because I’d love to give them out as Christmas and Birthday presents: Who knew that Gummi Bears could be so versatile? Via YaYa Chou Related Posts: No results. Leave a Reply. Paper Flowers – Anyone Can Do That. Japanese Kusudama, this tutorial is featured on Craftuts Anyone can do that, I assure you.

The proof: I can, just take a quick look at my result below. And, believe me, I am neither meticulous nor particularly patient. You could even say I’m the opposite. Below you can see my very first attempt to create paper flowers. What you will need to make your own Kusudama paper ball? 1. 3. 4. Paper Filigree Snowflake Gallery. I've switched over to using acid free paper and glue to make my paper filigree snowflake ornaments now. I figure there's no sense in putting this much work into something that might fall apart in a few years, and with practice, they're starting to get pretty enough that I'm planning to make quite a few of them. In my search for paper that will hold up over time, I was looking for archival quality paper, but there wasn't much available that wasn't too thick, or too yellow.
I visited all sorts of art, craft, scrapbook, and office supply stores in my paper quest, but the pickings were pretty slim for archival paper in shades of silver and white, so I went with mostly acid free paper and will see how it holds up. The pictures don't show it very clearly, but the snowflake above on the right has both white and off white, and it adds an interesting antique look, or at least I thought so until my kids mentioned the old joke about not eating the yellow snow.
Do-it-Yourself DIY String Wedding Lanterns Yarn Chandeliers. Jessica of Wednesday Inc shows us how to make those gorgeous twine chandeliers from the inspiration shoot she shared with us this morning.

Using balloons, glue and twine, you can also make these lanterns for your wedding – and then bring it home and use it as your very own mid century lampshade. What you will need are: balloons, glue, yarn, tray for glue, corn starch 1/2 cup of Corn starch, 1/4 cup of Warm water, clear fast drying spray paint, hanging lamp cord or fishing line (depending on your desired final product), and a lighting kit if you’re looking for a fully functional lantern. Jessica recommends using a sharpie to mark on the inflated balloon how much room you need to leave for the lighting cord.
She also recommends coating the balloon with vaseline prior to wrapping the yarn coated with glue so it doesn’t stick on the balloon once it’s dry. You can see all the details on Jessica’s blog. My Favorite Blogs.