
Atmel Software Framework. Get Started We'll tell you all you need to know to start evaluating and working with this product.

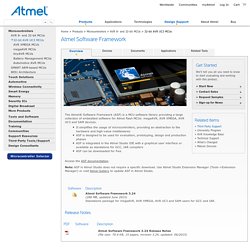
The Atmel® Software Framework (ASF) is a MCU software library providing a large collection of embedded software for Atmel flash MCUs: megaAVR, AVR XMEGA, AVR UC3 and SAM devices. It simplifies the usage of microcontrollers, providing an abstraction to the hardware and high-value middlewaresASF is designed to be used for evaluation, prototyping, design and production phasesASF is integrated in the Atmel Studio IDE with a graphical user interface or available as standalone for GCC, IAR compilersASF can be downloaded for free Access the ASF documentation. Note: ASF in Atmel Studio does not require a specific download. Tool. Four Walled Cubicle - Dean Camera - AVR Articles. Programming an AVR with Arduino - Michael Holachek. [TUT] [SOFT] Using the USART - Serial communications. For an updated version of this tutorial in PDF format, please see this page of my website.
![[TUT] [SOFT] Using the USART - Serial communications](http://cdn.pearltrees.com/s/pic/th/using-serial-communications-103520658)
Using the USART with AVR-GCC Freaks, I've had this three-quarters finished and sitting on my hard drive since mid-last year, so I decided to finish it and post here for the benefit of others. I'm the first to admit it's not very clearly written, so I may re-write it in the future. Comment away. This tutorial will focus on setting up the serial USART on the AVR platform. What is the USART? The vast majority of devices in the current AVR family lineup contain a USART hardware subsystem.
The USART transmission system differs to most other digital busses in that it does not utilize a separate pin for the serial clock. The RS-232 Specification The serial USART is frequently referred to as RS-232, which is a reference to the RS-232 specification which mandates the logic levels and control signals. First things first - Setting up the Hardware You should wire up your MAX232 to reflect the schematic here. Hacking an analog input to support a rotary encoder. Hacking an analog input to support a rotary encoder.

Push button rotary encoders are popular input devices for making simple user interfaces. Using a pushbutton rotary encoder requires 3 input pins on your microcontroller: 1 for the switch and 2 for the quadrature outputs. However, in a recent application I had only 1 pin remaining on my MSP430G2553. My only choice was to leverage that pin's analog input capabilities. I first sketched out my requirements, then designed a circuit, measured the performance of my design and wrote microcontroller software to realize it.
Usage Specification Determing the feasibility of using an analog input requires knowing how the user will use the knob. Further specifications are: Pulses will not be counted when the button is pushed (the knob becomes slightly harder to turn in this case). Interface the encoder to an analog input The push button switch is trivial; pushing the encoder shorts two contacts. Measuring Circuit Peformance Code Implementation. Carte contrôleur ATmega328P Nano V3 Compatible Arduino version améliorée - €2.97. How-To: Shrinkify Your Arduino Projects. Honey, I Shrunk the Arduino: Moving From Arduino to ATtiny and Writing Your Code in Pure AVR-C: 5 Steps.
Software The "Hello World" of microcontroller programming is the blinking LED.

So this is just what we'll try to achieve with our first program! Please note: You can get the full code of these programs in my github-repository. It's also much better to view the source code there because github has proper syntax highlighting. We don't want to do all the steps of compiling, linking, etc. by hand so the first thing we need is a Makefile. . # # Makefile template for ATtiny45 # Derived from AVR Crosspack template # DEVICE = attiny45 # See avr-help for all possible devices CLOCK = 1000000 # 1Mhz PROGRAMMER = -c usbtiny -P usb # For using Adafruit USBtiny OBJECTS = main.o # Add more objects for each .c file here FUSES = -U lfuse:w:0x62:m -U hfuse:w:0xdf:m -U efuse:w:0xff:m # settings as taken from.
Standalone Arduino kit. Google Code Archive - Long-term storage for Google Code Project Hosting.