
Paper Flower Key Holder. Difficulty Rating: Beginner Tags If you need a quick 'just because' gift for someone, this is it!
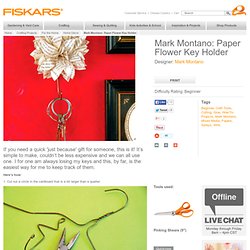
It’s simple to make, couldn’t be less expensive and we can all use one. I for one am always losing my keys and this, by far, is the easiest way for me to keep track of them. Here’s how: 1. 2. 3. Make It Pretty Wednesdays. Planting A Pineapple. Did y’all know that you can take this and turn it into… This?

And that this will eventually produce… This? Yes, I’m talking about turning your average, ordinary grocery store pineapple into a tropical showpiece within your home. A plant that is not only impressive but will WOW! Planting a Pineapple. My Little Chickadee Creations. Doormat, Come In, Go Away. Crafty Nest. Wipe Off Menu Board. I am a meal planner.
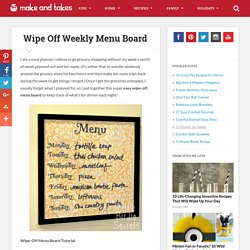
I refuse to go grocery shopping without my week’s worth of meals planned out and list made. (It’s either that or wander aimlessly around the grocery store for two hours and then make ten more trips back during the week to get things I forgot.) Once I get the groceries unloaded, I usually forget what I planned for, so I put together this super easy wipe-off menu board to keep track of what’s for dinner each night! Wipe-Off Menu Board Tutorial Supplies: Picture frame with glass front (I love these 12×12 frames I found at Ben Franklin for only $7!) 1. 2. 3. 4. Now everyone in the family knows what’s for dinner each week! I decided my frame would look better black in my kitchen, so I spray painted it black.
Little Birdie Secrets are regular contributors to Make and Takes and was born from the crafting obsession of three friends living in the Pacific Northwest. How To Make A Stylish Photo. Here is a simple yet stylish photo frame that can accomodate quite many photos at once. The idea is very simple. Fasten twines on the empty frame and hang photos using clothes pins on them. You can use a frame you bought or a frame you made by yourself. To make it you just need to find some wood strips, sand them, paint or stain them and fasten together with the staples and nails. Yes, everything is as simple as it sounds. Photo lampshades. PINTEREST UPDATE: This is a post from 2010.

I do not take custom orders, only the tutorial is available. The lamps have held up wonderfully. As many of you requested, Marie is sharing a little tutorial here on how she made her lampshades. When she made them she was not planning on doing a tutorial for this blog, so be sure to thank her for taking the time to write all this out. Also, for those wondering…Kara will be sharing some tutorials for her book art on her blog soon. Marie is happy to do custom orders for those that prefer buying over making! * LAMPSHADE – Hobby Lobby carries self-adhesive shades & nightlights, Target has some smaller lamps for $19 that would be perfect for this project, I’ve found some lamps & shades on Craigslist. . * GLUE – I used a hot glue gun for the first lamp.
. * VELLUM – I buy this in packs of 20 (I think) in the scrapbooking section of Hobby Lobby. . * PRINTER – I have a color inkjet printer. If you are using photos – there are several options. That’s it!