
428 Gift Patterns For Sewing Addicts : I posted this list of sewing links a few weeks ago.
Today, I’m reposting it, for anyone who might have missed it the first time around! It’s time to start creating handcrafted gifts for the holidays. With that in mind, here are 428 Gift Patterns from Craft Stew. Included here are all your favorite sewing patterns from past posts….. anything that is appropriate for gift giving. I skipped most of previous posts on clothes patterns, as they would require multiple fittings. 428 Gift Patterns Free Tote Bag Patterns – Favorite? Home Sewing Projects – Favorite?
Free Hat Patterns – Favorite? Free Fleece Hat Patterns – Favorite? Sew for big folks. Alina's Adventures sew for big folks All of the links below are to free sewing tutorials and patterns offered by kind creatives all the over the web.
Organized in alphabetical order by category- scroll down to see the plethora of categories and links. P indicates a printable or PDF tutorial or pattern. DIY Woven Chain Bracelet. Chain link bracelets, with colorful threads woven through them, have been popping up here and there.
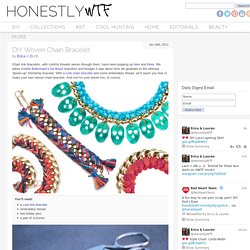
We adore Aurèlie Bidermann‘s Do Brazil bracelets and thought it was about time we graduate to the ultimate “grown-up” friendship bracelet. With a curb chain bracelet and some embroidery thread, we’ll teach you how to make your own woven chain bracelet. And one for your bestie too, of course. 5 Ways to Turn Zippers into Awesome Arm Candy. UPDATE: By popular demand, Zipper Bracelet Kits ($15) and readymade Zipper Bracelets ($20) are now available in the Brit + Co. shop!

You know we love turning unconventional materials into wearable accessories. Today, we’re tackling zippers! We figured out 5 simple, beautiful ways to create bracelets, cuffs, and bangles out of metal, plastic, and repurposed zippers. Materials: - zippers - E-6000 quick hold contact adhesive - velcro or snap buttons - leather crimps + clasps - Tools: needle nose pliers, sharp scissors First thing to do is get your zippers!
1. These bangles are sweet, and have a definite friendship bracelet vibe. Use colored zippers for these, in whatever colors you like. Attach cord ends so that you can add a clasp and loop. 2. For this one, you’ll want a zipper with some contrast. We chose a black zipper with gold teeth. 3. CWTS reveal - the book clutch + how-to. Tutorials for Recycling T-Shirts. So way way back, in June, I wrote this Studio Organization post, about starting the process of organizing my studio by cleaning out the closet full of junk.

Well, it's September and...let's just say the closet is a work in progress. Some of the things that are taking up space in the closet are shirts that I never wear anymore. DIY Wrap Bracelet. You should all know by now that we are all about stacking bracelets on our wrists.

The more, the better. In fact . . . the most, the best! With that being said, we’ll show you how to master a version of the ever so popular wrap bracelet. It’s so simple and addicting, you’ll soon be churning out these wristlets with your eyes closed. The Craft Junkie: Soda Pop Art. My DIY Wedding My husband (and business partner) Danny and I are both very artistic and crafty people by nature.

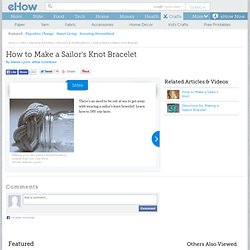
So naturally, a lot of elements at our own wedding were handmade. How to Make a Sailor's Knot Bracelet. In order to create your Sailor's Knot bracelet, you'll need: cotton twine (at least 3 yds), a round object to put the bracelet around – Mason jar, can, bottle, anything circular with a similar circumference to your wrist, scissors, and Fray Check or clear nail polish.
Snake Knot Tutorial. V and Co how to: jersey knit bracelet. I don't know what it is about this time of year that makes me just want to have my bare feet in the sand, be watching the sun setting into the ocean, and breathing in the warm salty air of the beach...as i get older, more and more i find myself missing that place i used to go to almost every.single.day. as a teen.
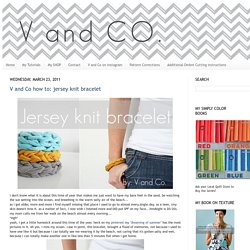
(my skin doesn't miss it. as a matter of fact, i now wish i listened more and DID put SPF on my face...hindsight is 20/20). my mom calls me from her walk on the beach almost every morning... *sigh*yeah, i get a little homesick around this time of the year. heck on my pinterest my "dreaming of summer" has the most pictures in it. ah yes. i miss my ocean. case in point. this bracelet, brought a flood of memories, not because i used to have one like it but because i can totally see me wearing it by the beach, not caring that it's gotten salty and wet, because i can totally make another one in like less than 5 minutes flat when i get home. *sigh* Knots.
Upcycled / Recycled T-Shirt Bangles (Tutorial) and Weekend Stuff….. I’ve got a LOT of scraps.

So I’m always trying to come up with a way to use them. How to Make a Ruffled Top from a Men's Shirt. Memorable Ways to Repurpose Old T-Shirts – Crafting a Green World. Sewing Published on June 18th, 2010 | by Wenona Napolitano We all have them- those t-shirts we just can’t let go of. Even if they are worn out, faded or no longer fit, we can’t seem to let go because of the fond memories they hold.
It could be a concert t-shirt from your favorite band, or a college shirt that remind you of the good ol’ days, or maybe it’s one of your child’s tiny tees that they’ve grown out of. How to turn jeans into a skirt - Portland sewing. If you want a fun sewing project involving old blue jeans, you must try your hand at turning an old pair of jeans into a skirt. Recycling jeans by turning them into skirts is a great way to get a new life out of old jeans that might not fit the way you like anymore. And for young girls, you can turn jeans that are too short for them now and turn them into nice skirts that they can wear to school!
CLICK HERE for full instructions including nice step-by-step photos on how you can turn a pair of jeans into a jean skirt! Sanford Shopping Tip: If you need some old jeans to turn into skirts, you can shop at the Family Thrift Store in the lower level of the Mid Town Mall in downtown Sanford. Guía Para Tejer Bien. El Punto Derecho es el punto más común. Si tejes en punto derecho todas las hileras lo que obtienes es un tejido en punto Musgo (también conocido como punto Sta. Clara o punto Bobo). Una prenda tejida toda en punto derecho luce de la misma manera por fuera y por dentro, lo que significa que es un punto reversible. Un tejido con punto Musgo queda plano, gordito y no se enrosca en los bordes. Estas cualidades lo hacen ideal para bordes, cuellos, bufandas y prendas tejidas por completo en este punto. Con el punto derecho el hilo del ovillo queda siempre por detrás del tejido, y se realiza en cuatro pasos.
Cómo Tejer Punto Derecho con el estilo Inglés (el hilo en la mano derecha): El estilo Inglés, también conocido como estilo Americano, es el método de tejido más popular en Inglaterra, partes de Europa y América del Sur entre otros lugares. Este estilo es considerado el más sencillo de aprender, por lo que es la opción más popular en principiantes. 1. 2. Tejidos - Aprende a tejer de modo fácil y sencillo - Paula.
How to: turtleneck sweater turns cardigan in 5 easy steps : julie kundhi. Patrones de Tejido Gratis. Tejidos y puntos para aprender a tejer.